
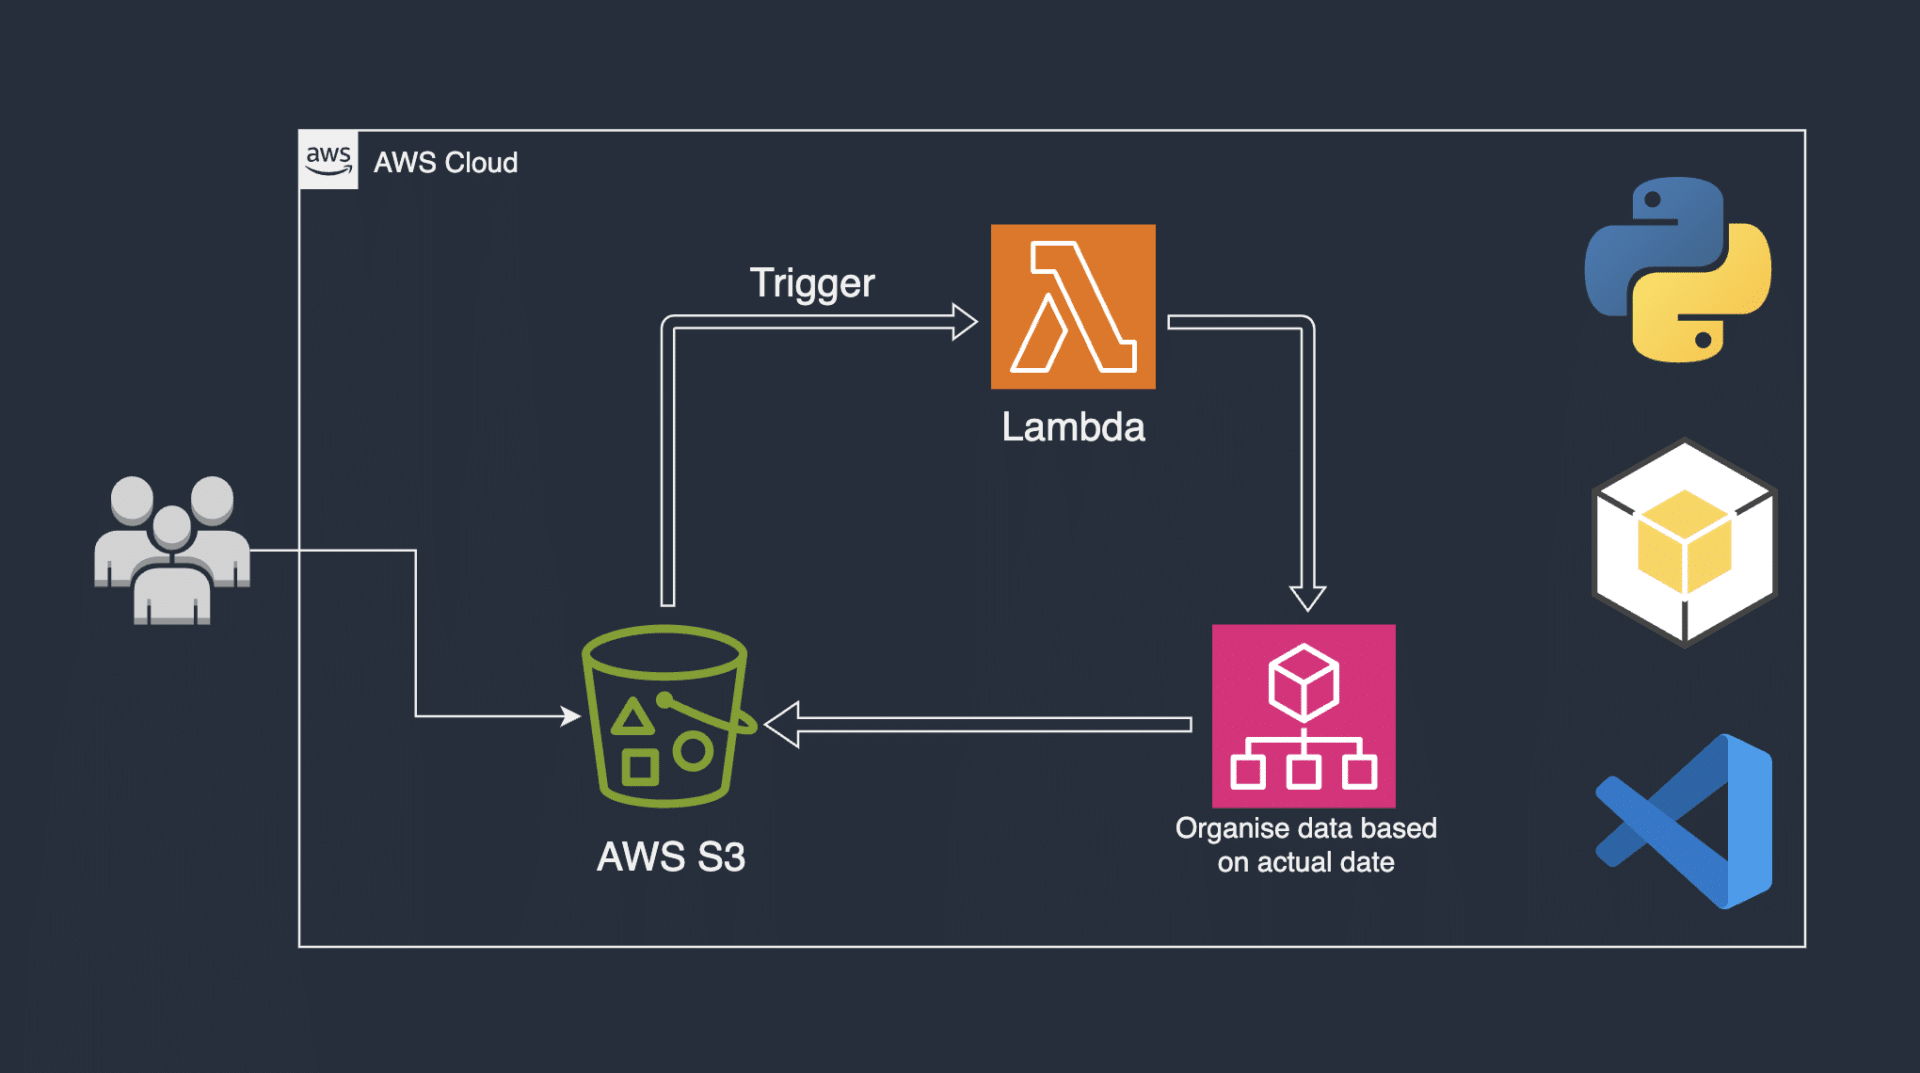
Automating File Organization in AWS S3 with Lambda
We must create an IAM user with programmatic access before using Python to create resources in your AWS account. Then Python will use these credentials to authenticate with your AWS account to create resources.
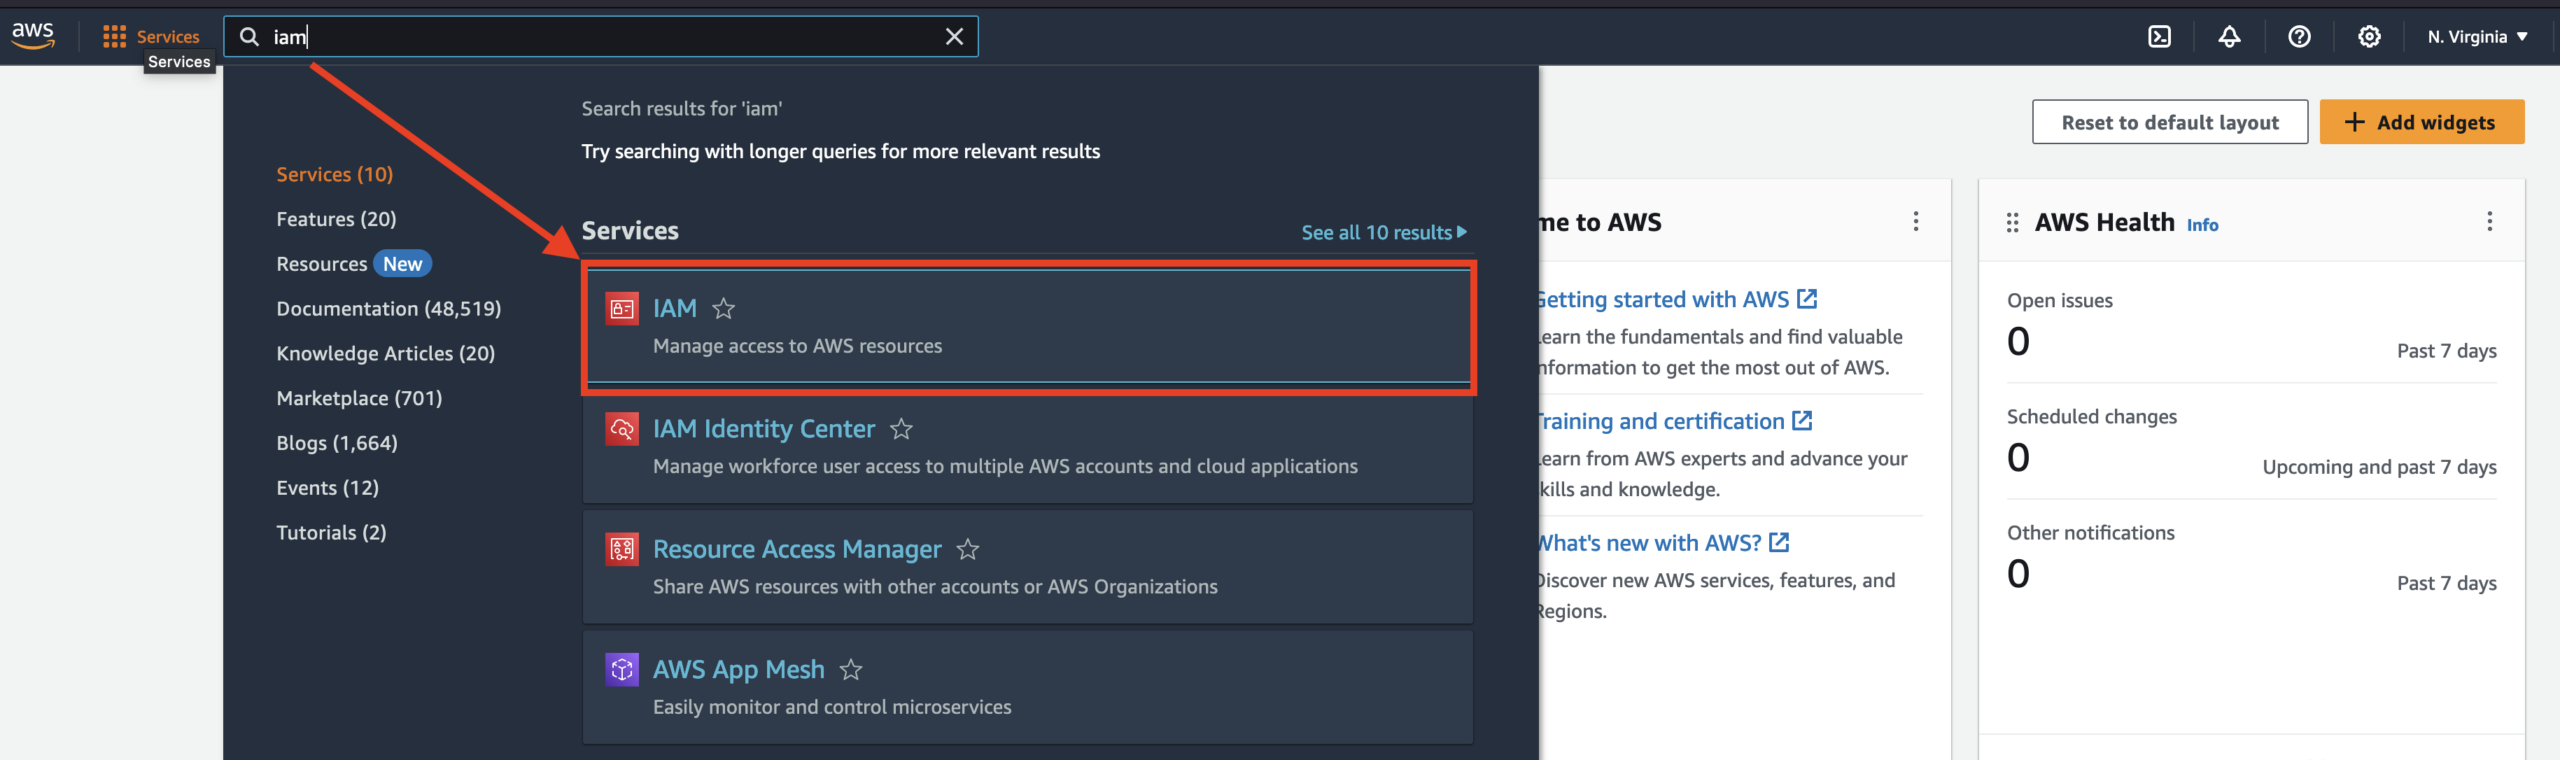
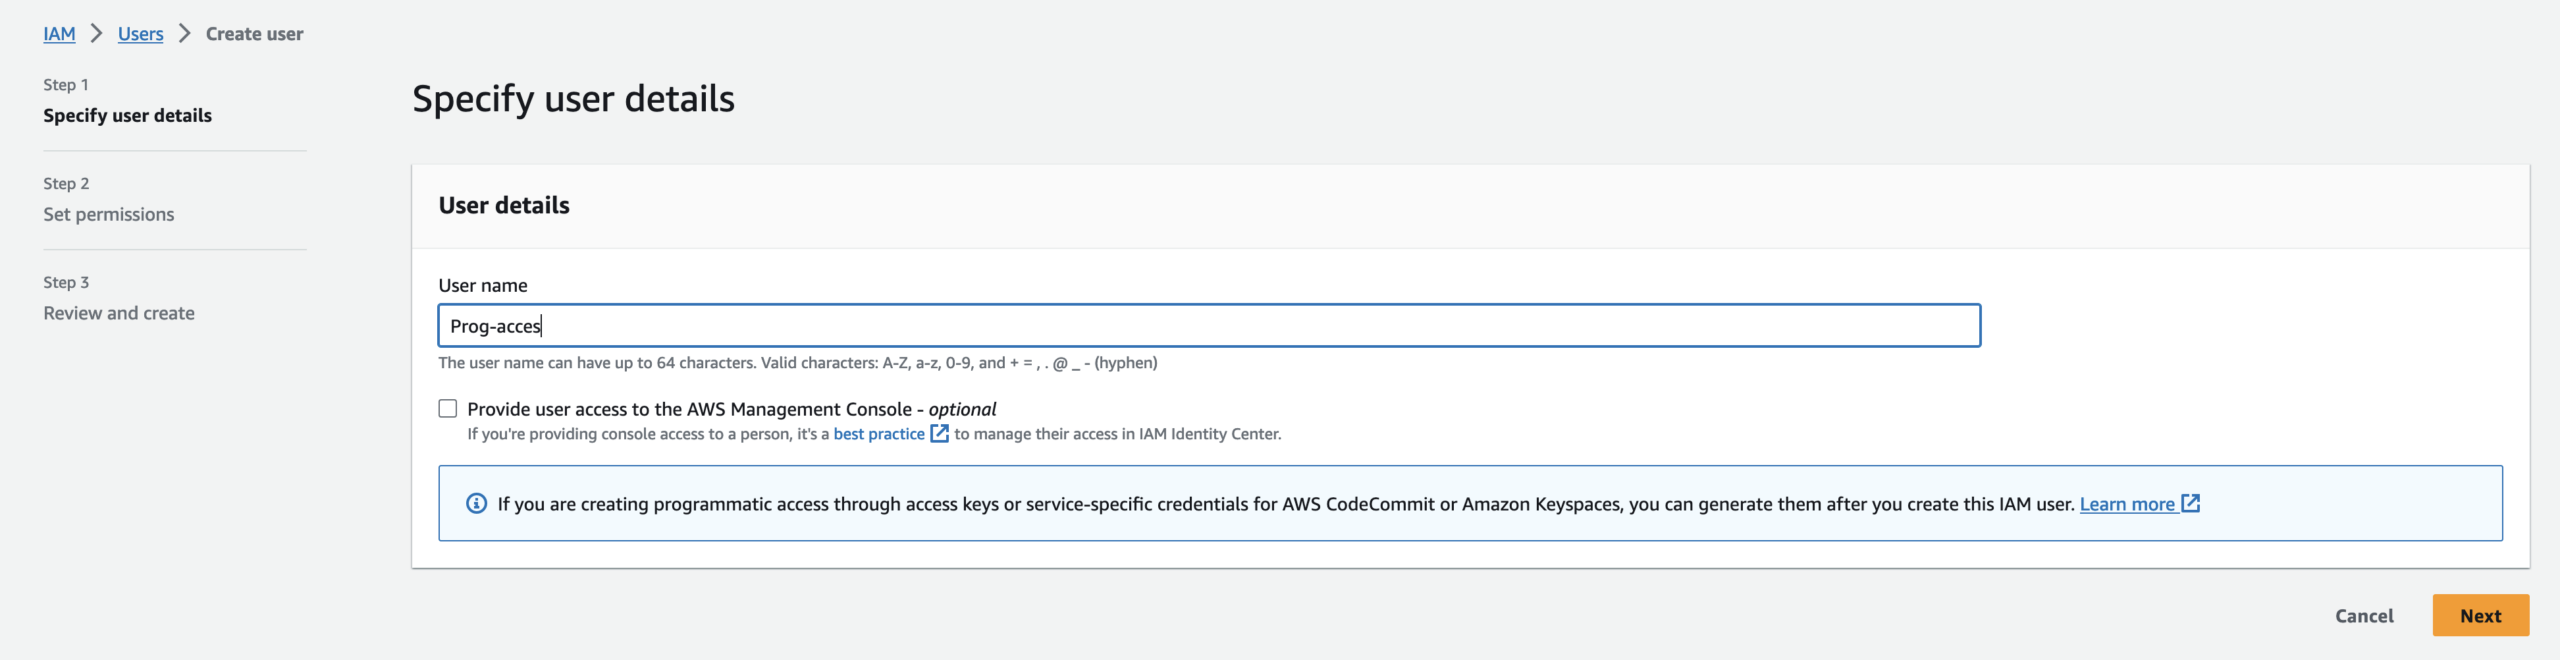
On the IAM dashboard, go to users, then create user.
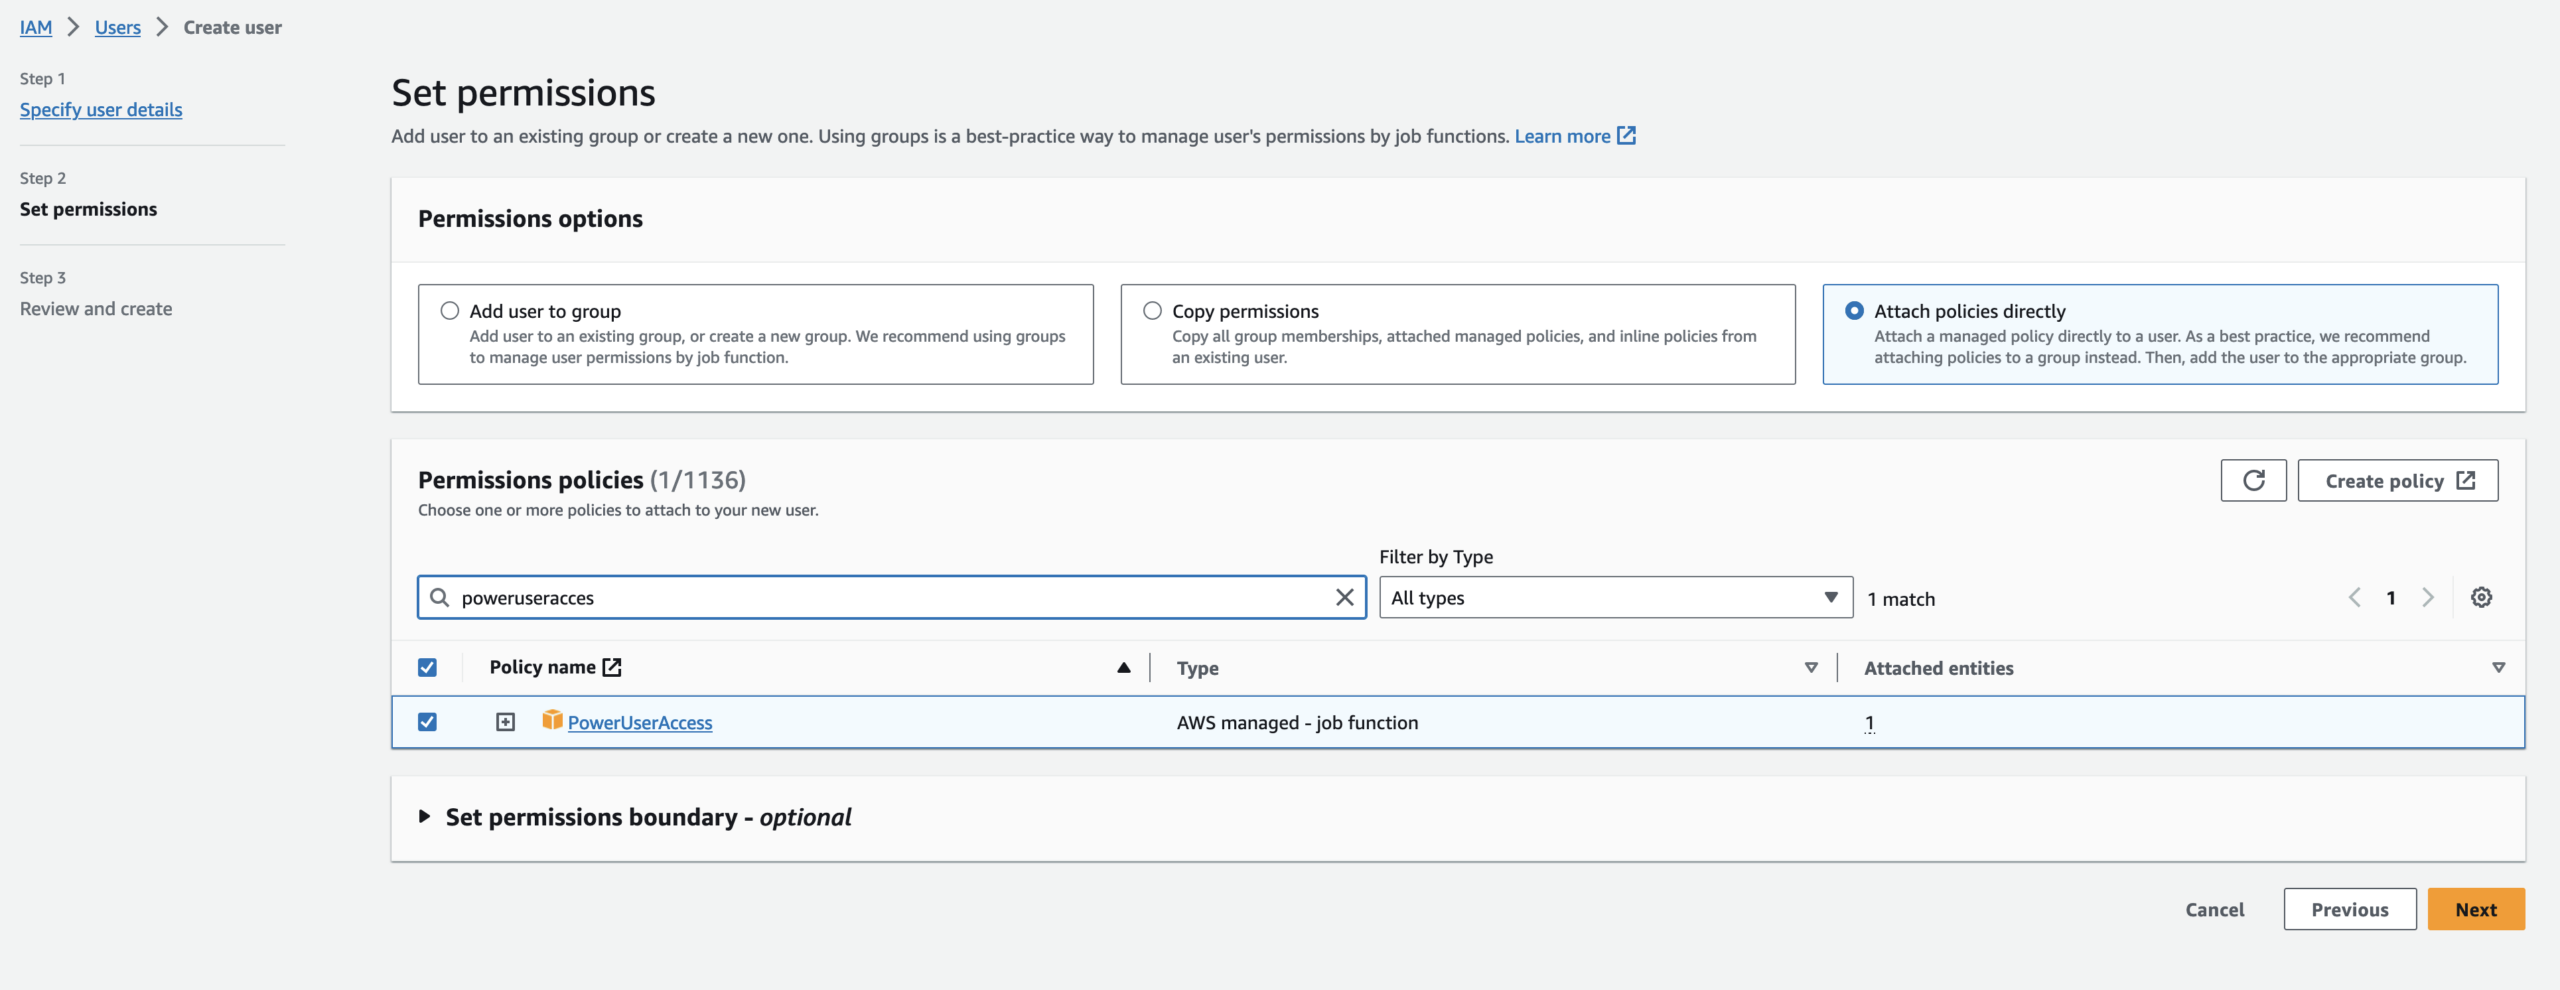
Select Attach policies directly. Search and select power user access in permissions policies and hit next. You can review the Summary before Creating a user.
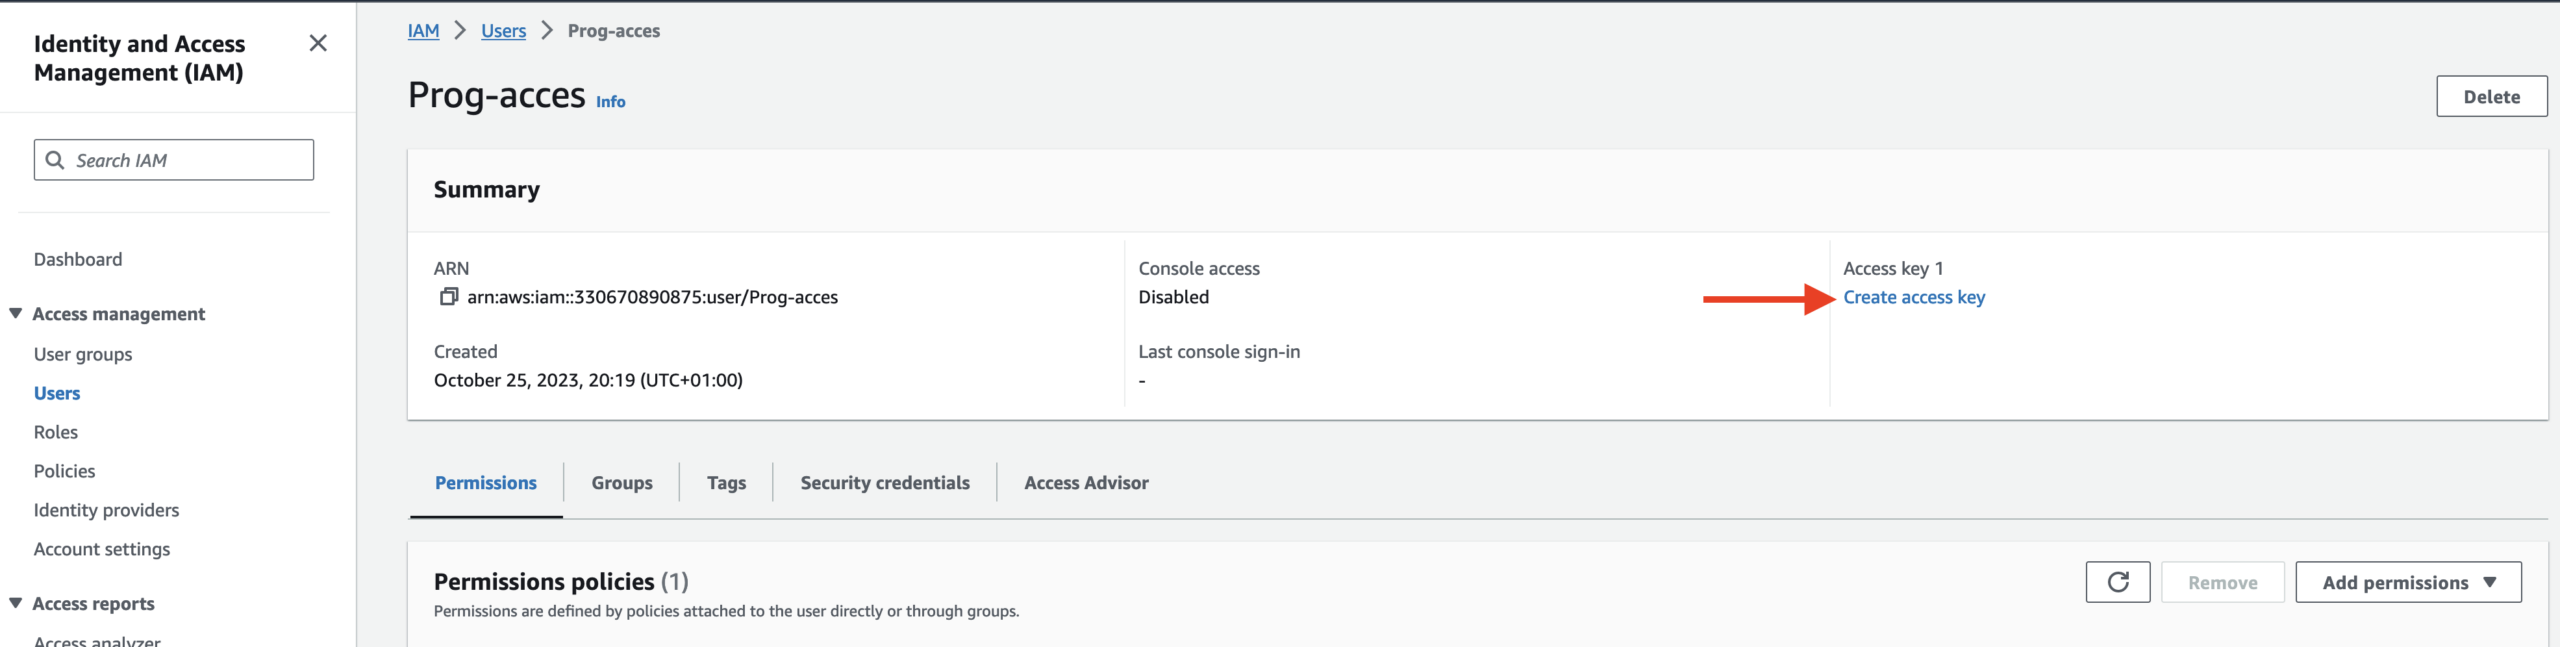
After you create your user, open it and click Create Access Key or open the Security credentials tab scroll to Access keys and click Create access key.
On this page choose Command Line Interface and confirm I understand the above recommendation and want to proceed to create an access key.

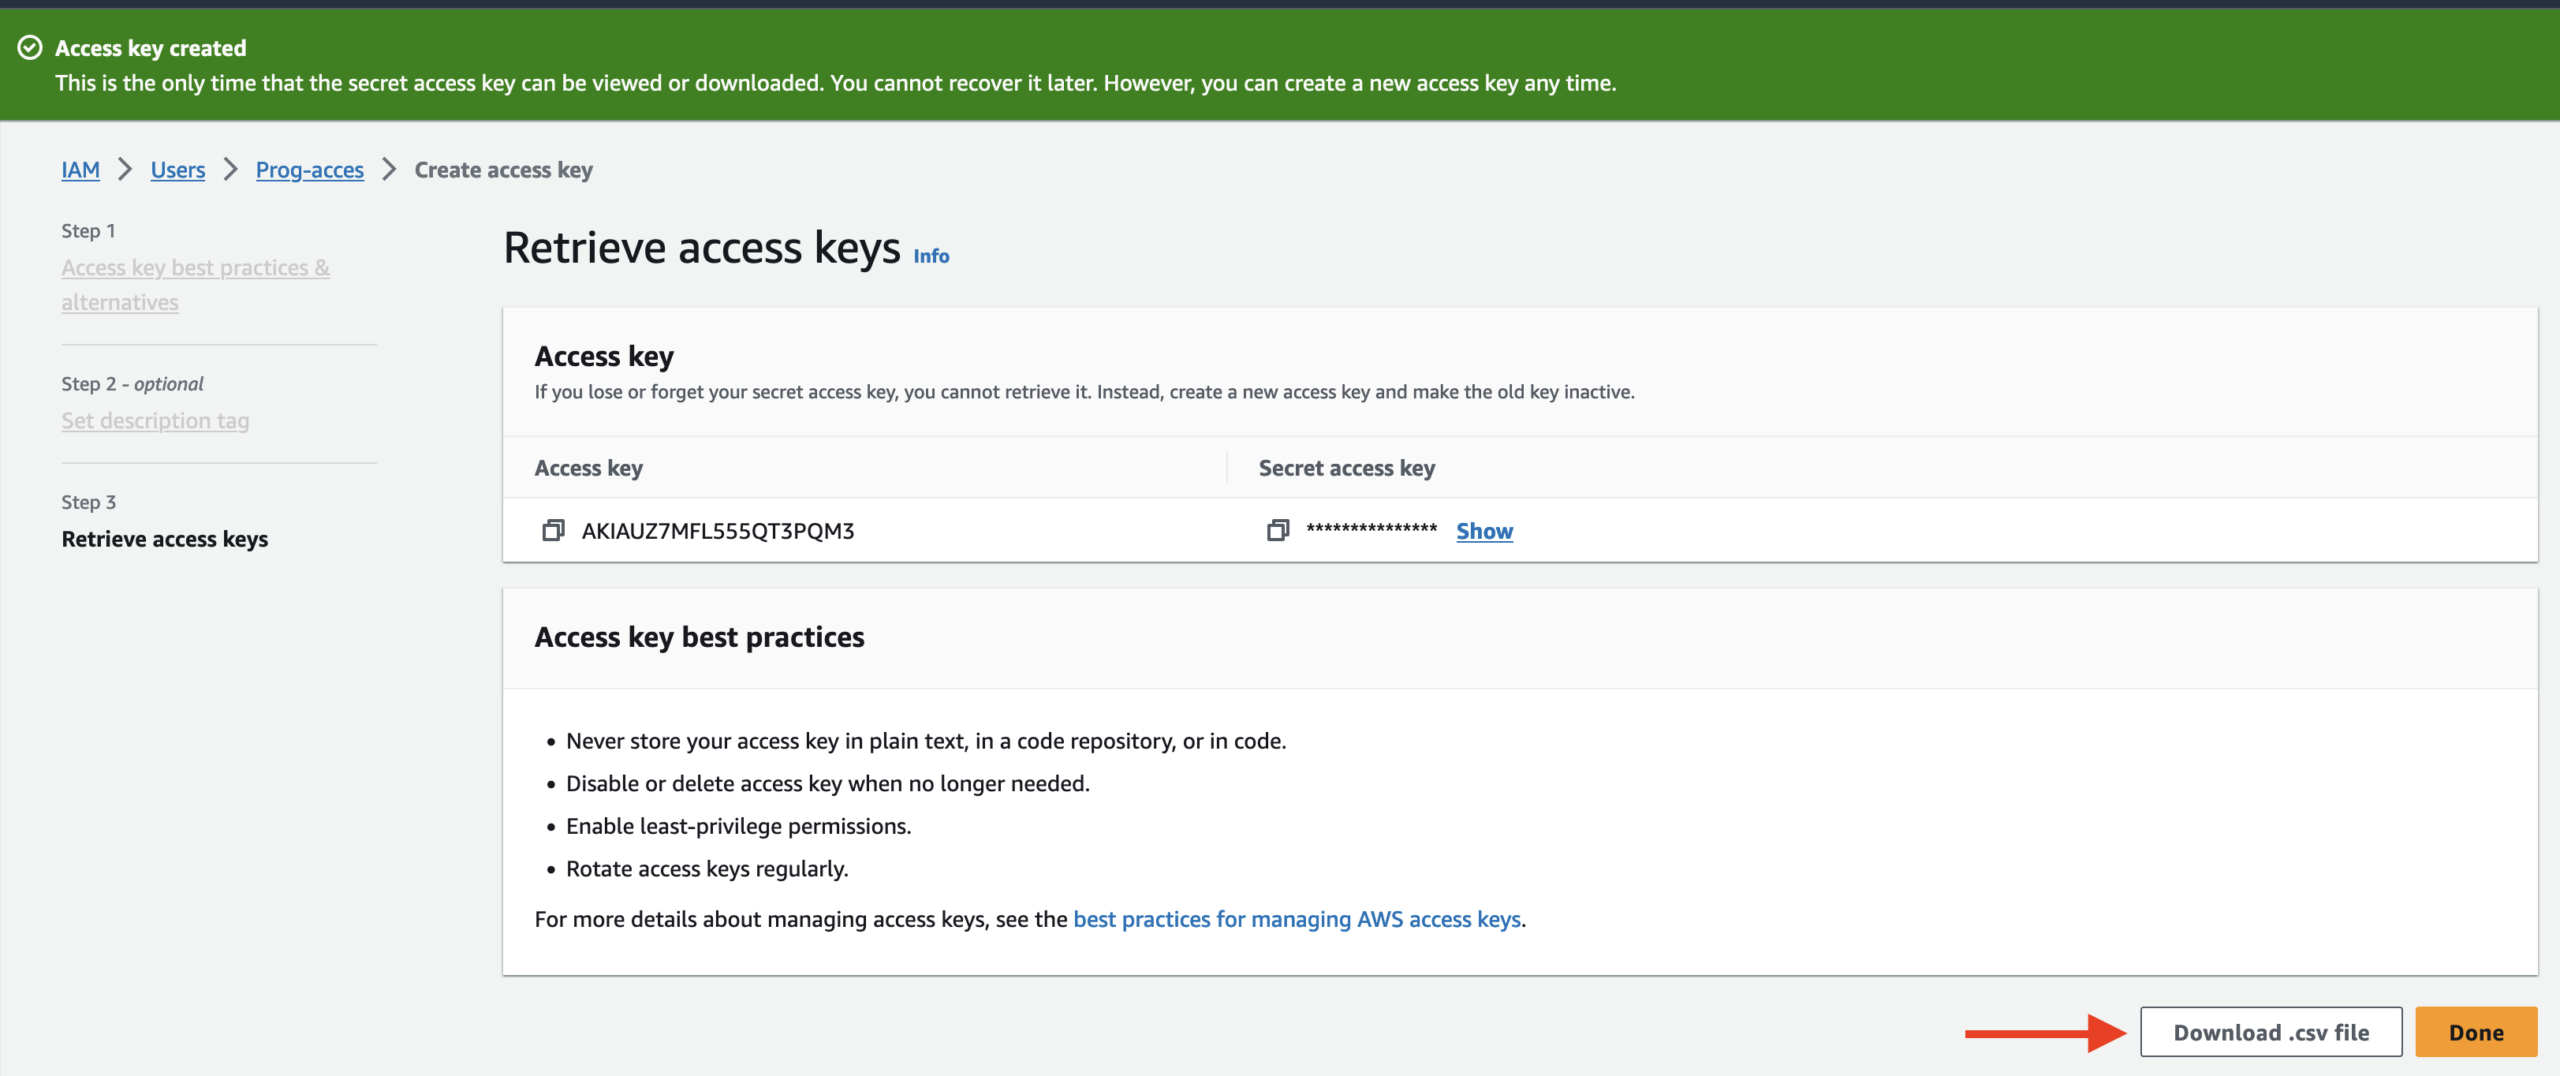
At the Retrieve access keys tab download the csv file. This is the only time that your credentials can be viewed or downloaded. You cannot recover it later. Please keep them private and in a safe place.
Install the AWS Command Line (CLI)
For more details on installing the AWS command line on your computer, please check the official documentation because it depends on which system operation is used.
Run the AWS configure command.
Once you’ve installed the AWS CLI on your computer, we need to run the AWS configure command to configure your IAM user’s credentials in a file on your computer.
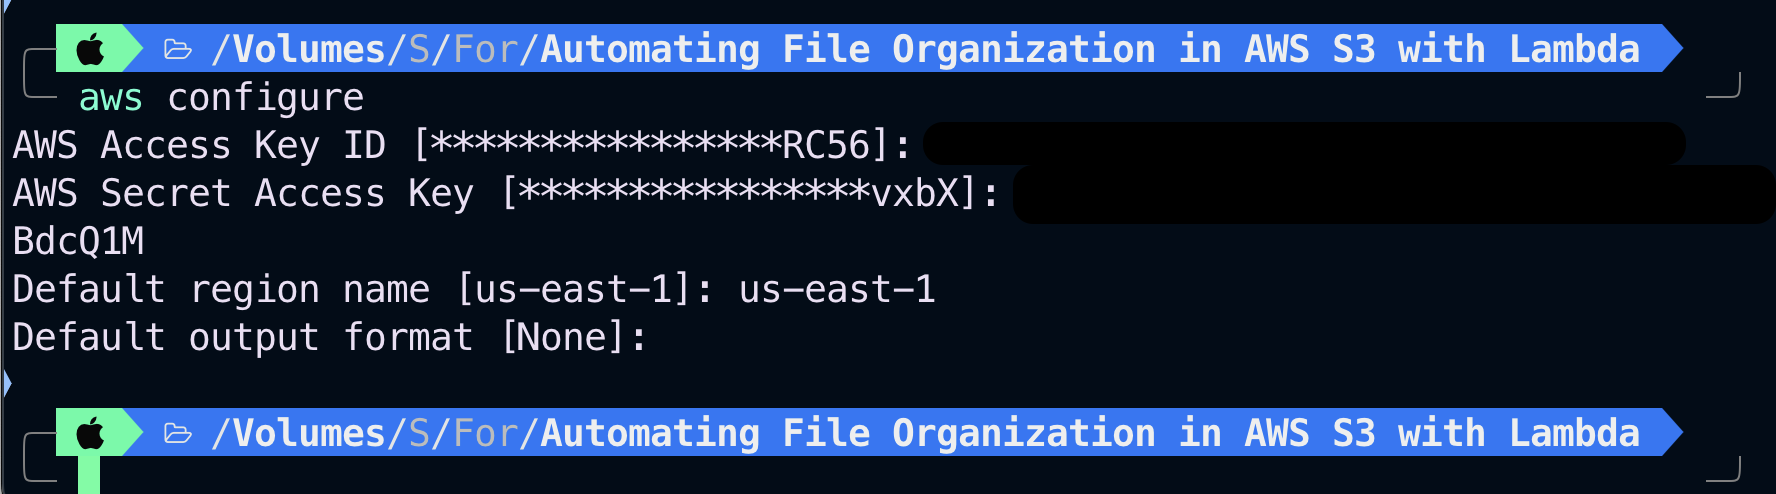
AWS is creating a file on your computer and storing those credentials in that file whenever you run
aws configureand entering your AWS access key ID and secret access key.
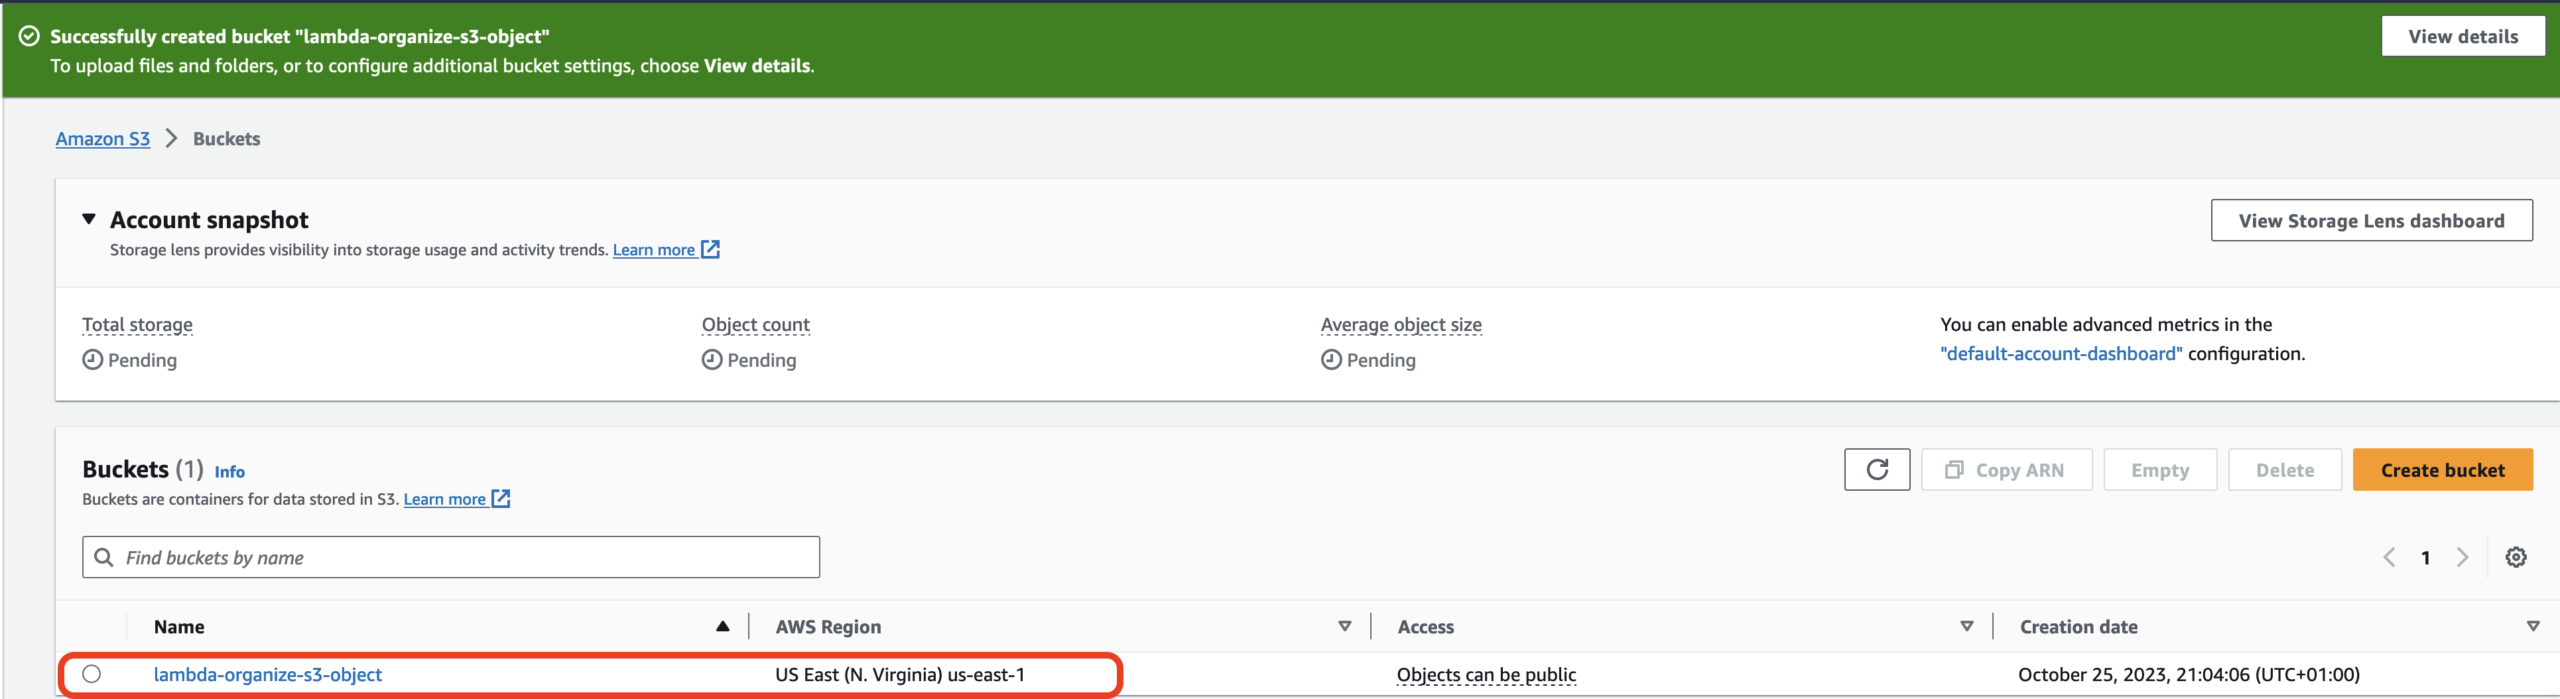
Before writing our Python script, we must create the S3 bucket into which the customer would upload the file.
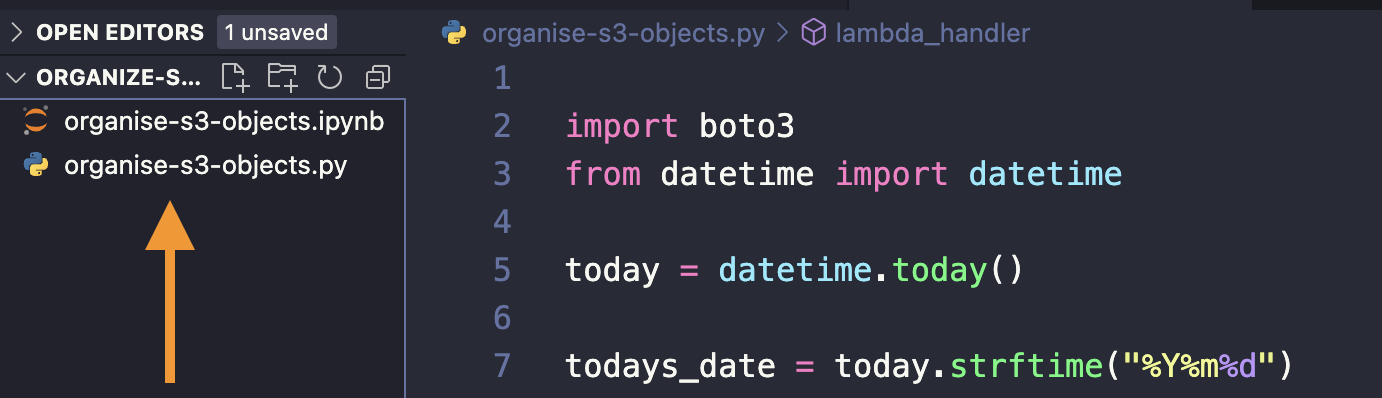
In this project, I will use Visual Studio Code with the extension Jupyter notebook because it allows you to run each line of code to ensure that it is successful before you proceed to the next line of code.
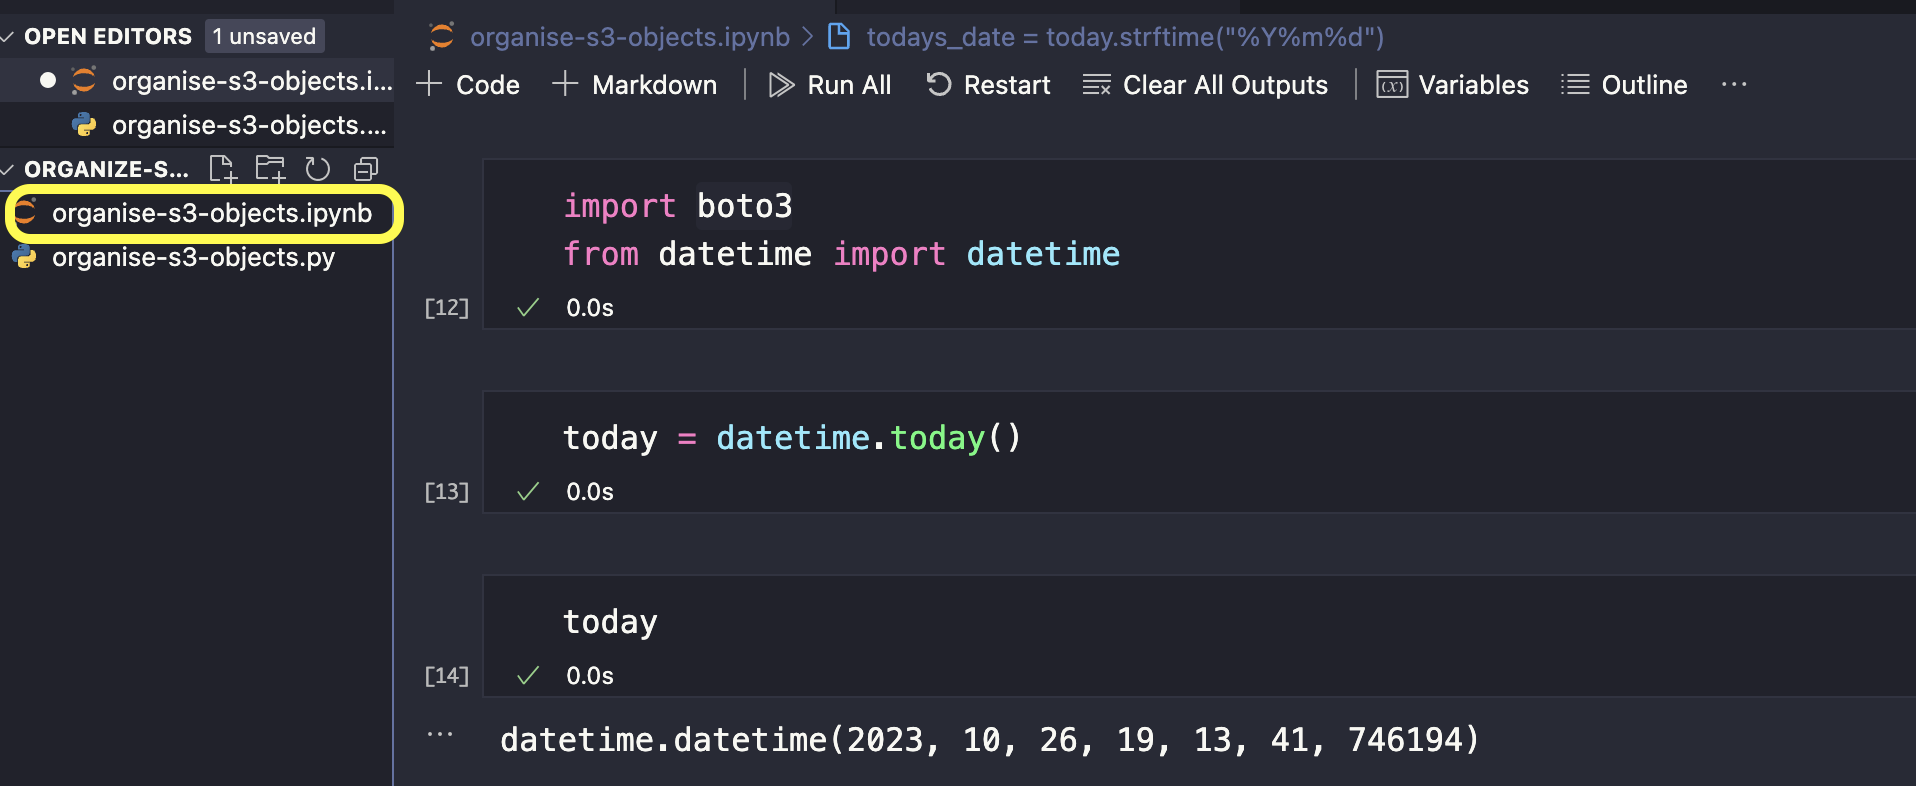
First, import the modules we need into our Python project.
We only need 2 modules for this project. The first module is Boto3. Whenever you’re using Python to create resources in AWS, you always have to import the Boto3 module. The second module that we will import is datetime — According to the company problem, we have to create a folder in our S3 bucket and we will name that folder based on the day the file was uploaded into our S3 bucket. Therefore, in order to be able to name our folder based on the day, we have to import the module datetime.
Here’s how our syntax should look like for our: organise-s3-objects.ipynb file. In this cell, we will create a Python variable and we will use it to call to this date.
Let’s format this date according to the instructions from our problem — YYYMMDD. Add another cell. We’ll create another variable and enter the syntax like this, then run the code.
todays_date = today.strftime("%Y%m%d")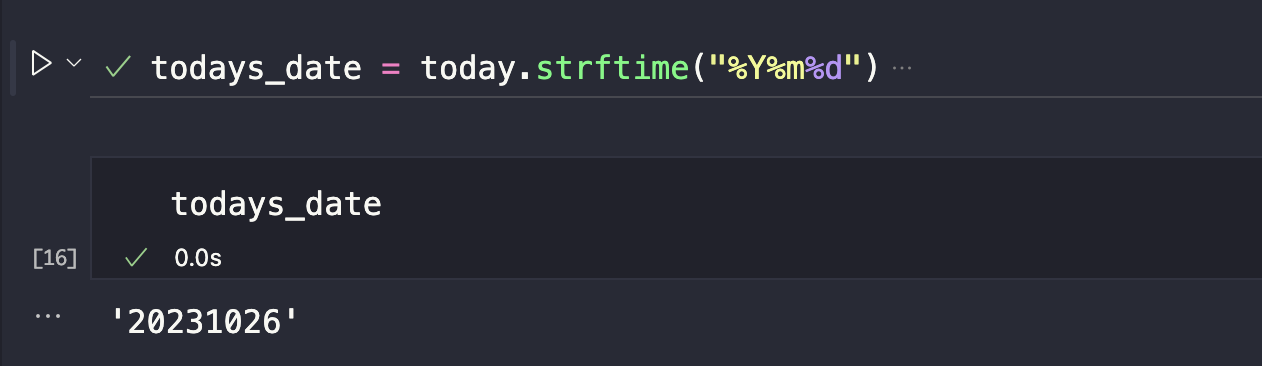
We’ve created a variable which is printing to this date in the format we want, the next step is connect with our S3 bucket in our AWS account.
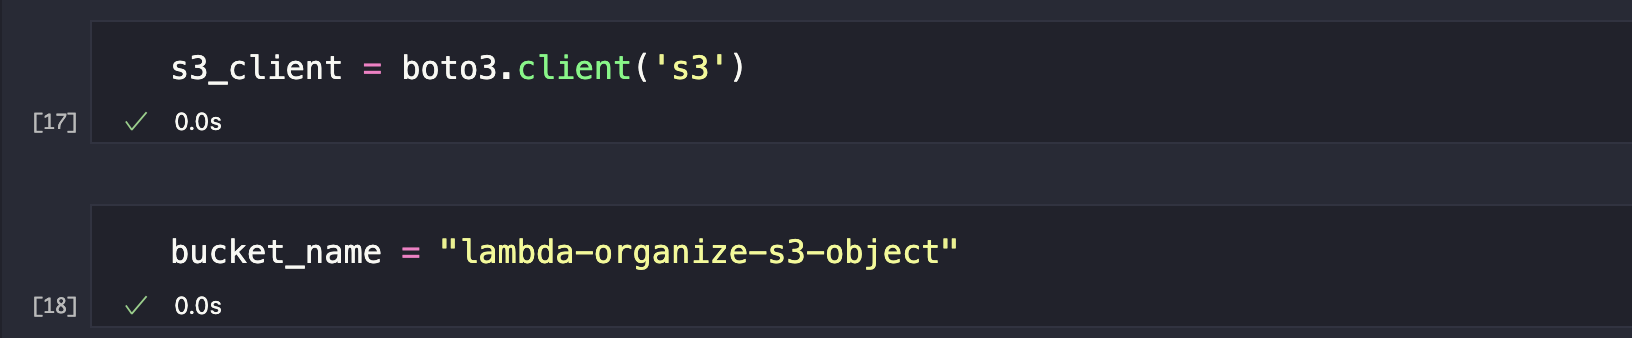
We are going to use the Boto3 client for S3. Visit Boto3 AWS S3 documentation to know more about getting these information. We’ve imported Boto3 earlier so we need to use this syntax to connect with the S3 client.
client = boto3.client('s3')Let’s write a syntax to list all the objects we have in our S3 bucket. Visit Boto3 AWS S3 documentation to get the code that will allow us to do this.
S3.Client.list_objects_v2This is how the Request Syntax would look like.
response = client.list_objects_v2(
    Bucket='string',
    Delimiter='string',
    EncodingType='url',
    MaxKeys=123,
    Prefix='string',
    ContinuationToken='string',
    FetchOwner=True|False,
    StartAfter='string',
    RequestPayer='requester',
    ExpectedBucketOwner='string',
    OptionalObjectAttributes=[
        'RestoreStatus',
    ]
)
This is how the Response Syntax would look like.
{
    'IsTruncated': True|False,
    'Contents': [
        {
            'Key': 'string',
            'LastModified': datetime(2015, 1, 1),
            'ETag': 'string',
            'ChecksumAlgorithm': [
                'CRC32'|'CRC32C'|'SHA1'|'SHA256',
            ],
            'Size': 123,
            'StorageClass': 'STANDARD'|'REDUCED_REDUNDANCY'|'GLACIER'|'STANDARD_IA'|'ONEZONE_IA'|'INTELLIGENT_TIERING'|'DEEP_ARCHIVE'|'OUTPOSTS'|'GLACIER_IR'|'SNOW',
            'Owner': {
                'DisplayName': 'string',
                'ID': 'string'
            },
            'RestoreStatus': {
                'IsRestoreInProgress': True|False,
                'RestoreExpiryDate': datetime(2015, 1, 1)
            }
        },
    ],
    'Name': 'string',
    'Prefix': 'string',
    'Delimiter': 'string',
    'MaxKeys': 123,
    'CommonPrefixes': [
        {
            'Prefix': 'string'
        },
    ],
    'EncodingType': 'url',
    'KeyCount': 123,
    'ContinuationToken': 'string',
    'NextContinuationToken': 'string',
    'StartAfter': 'string',
    'RequestCharged': 'requester'
}
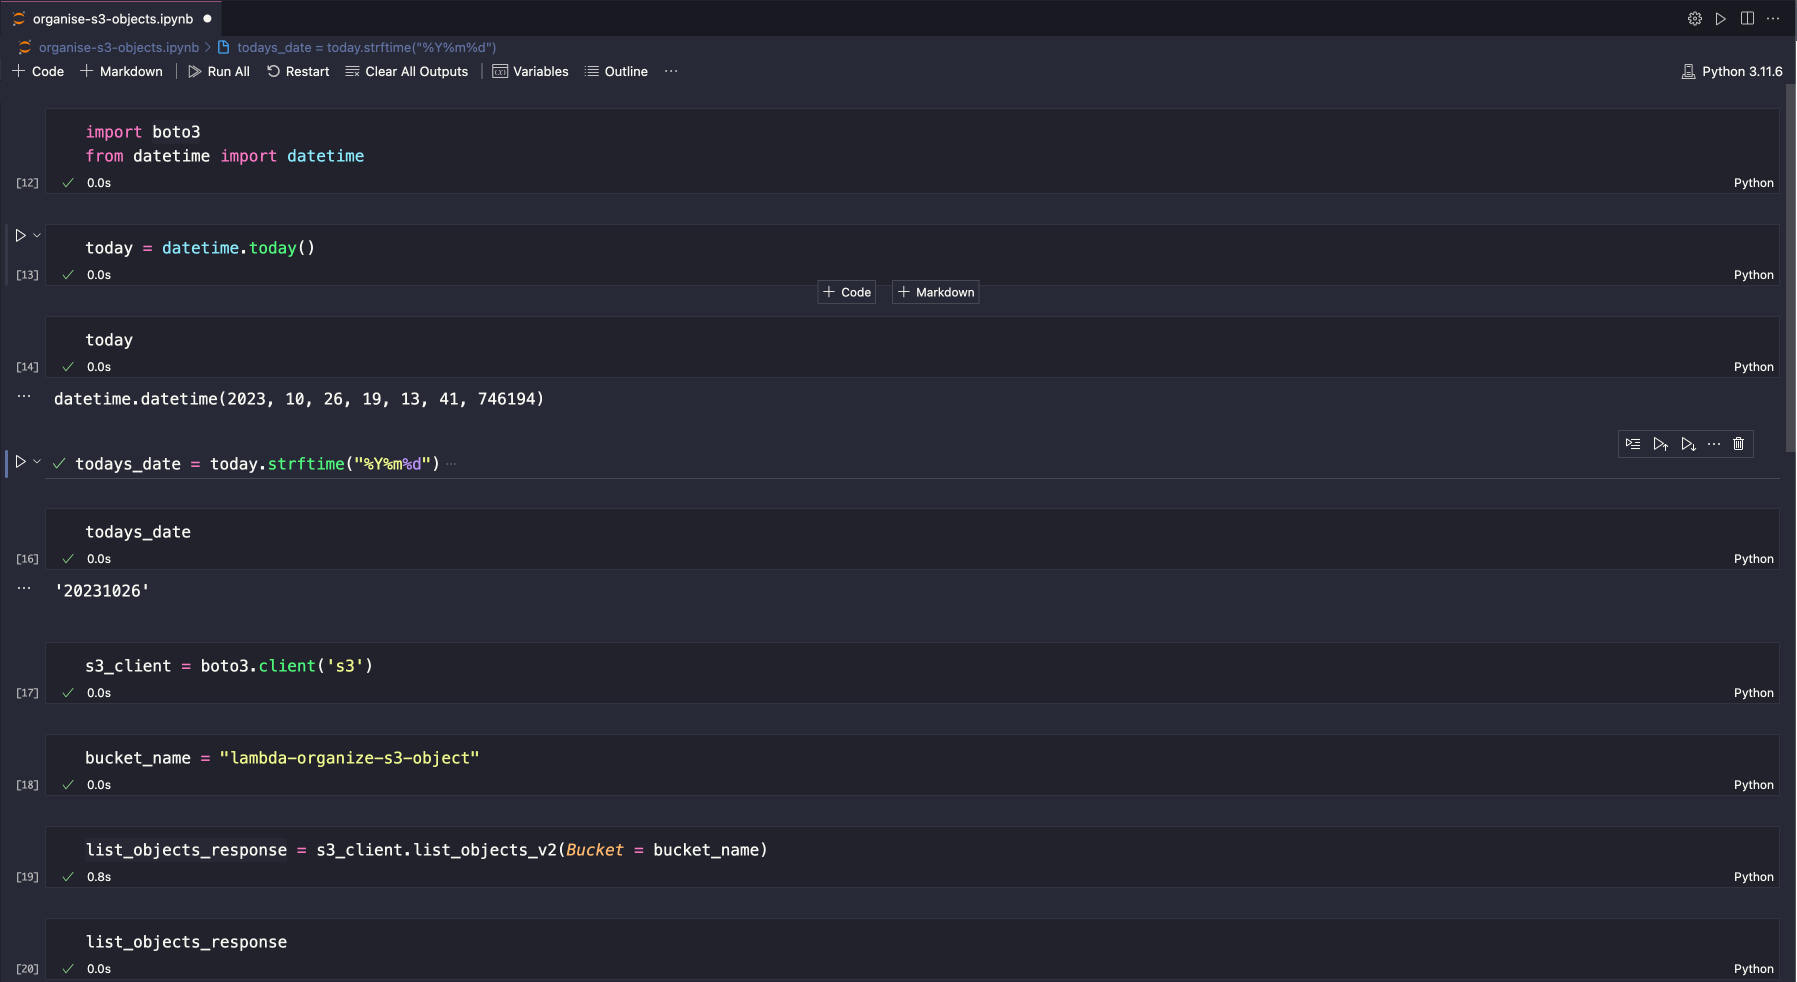
Let’s create another variable — list_objects_response . This is where we want to store our response in. We will call our s3_client. Enter the method that we want according to the official documentation client.list_objects_v2 then enter the perimeter value (Bucket= and lastly, we will reference our bucket_name) variable.

Click Run All at the top to run all our codes simultaneously.
We’ve successfully run each cell, and our output should look like this.
We’ve successfully listed all the objects in the lambda-organize-s3-object S3 bucket. AWS sent its response, and we only need the key content which lists all the objects in our S3 bucket.
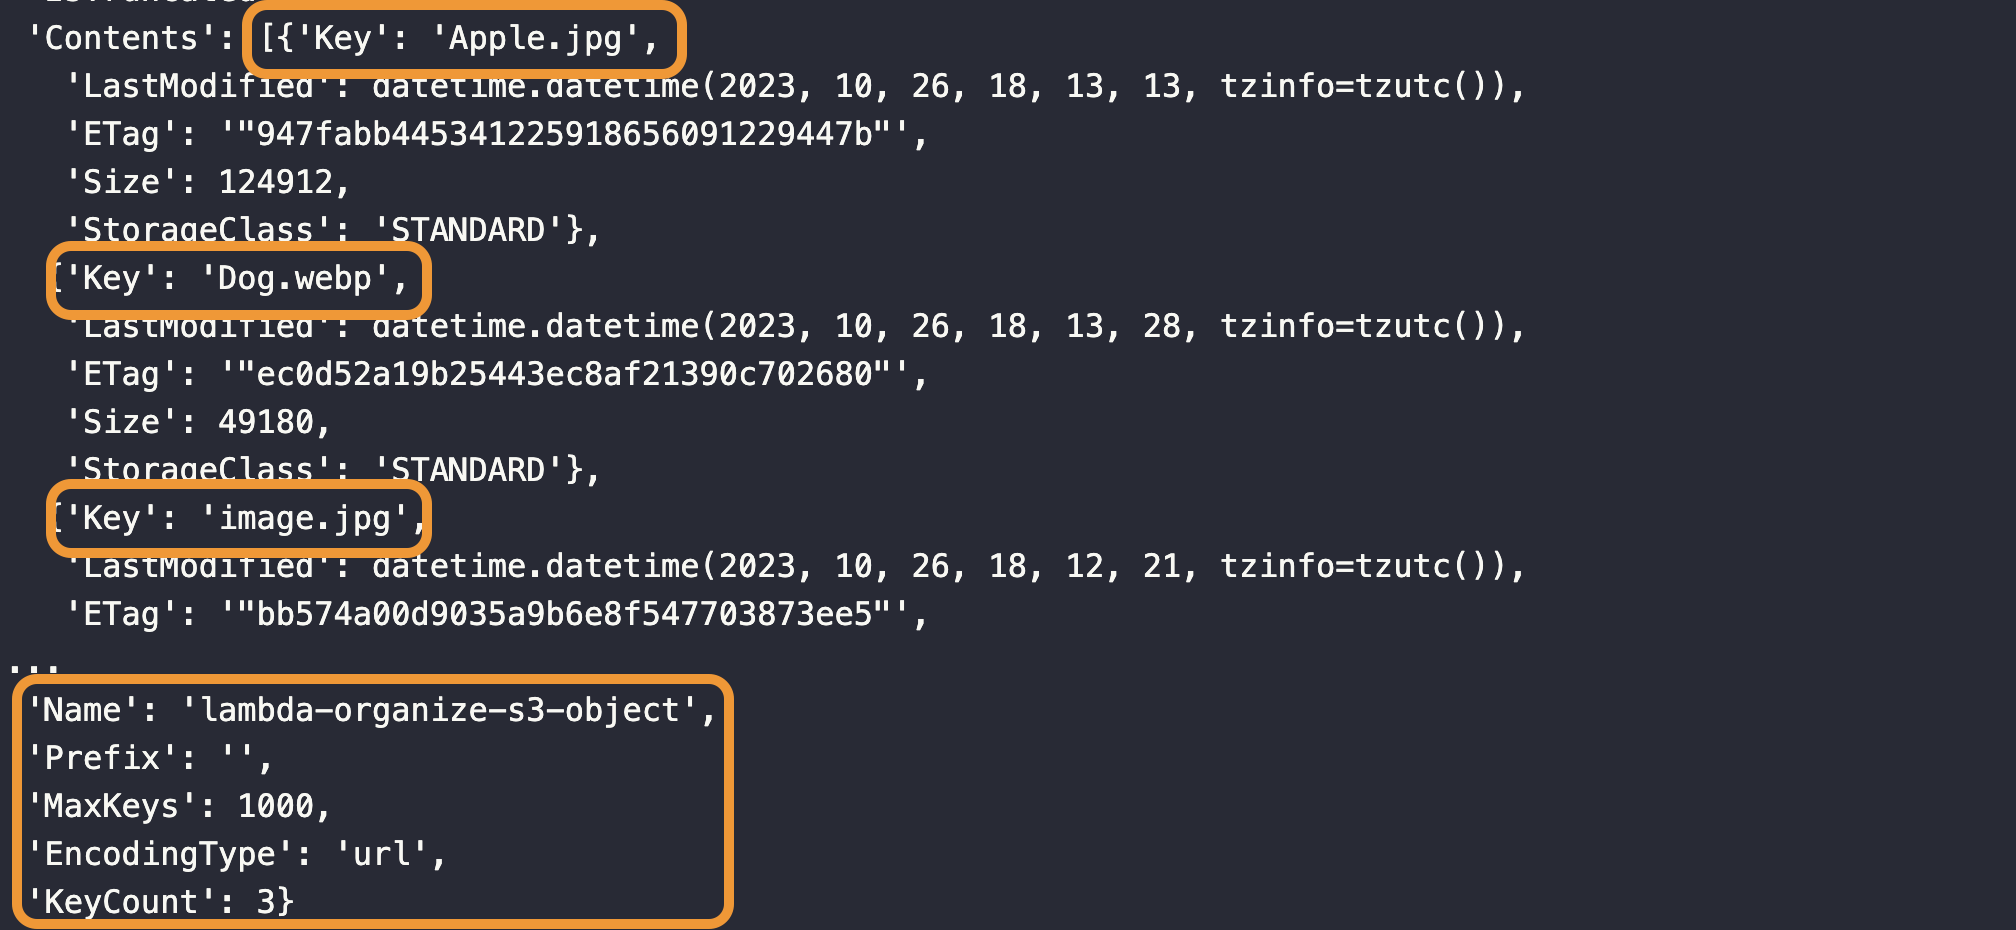
[]means list{}means dictionary in Python.
Let’s go to our Jupyter notebook to write our code to get only the value of content from this dictionary. Add another cell.
We are going to store the value of Content in another variable.
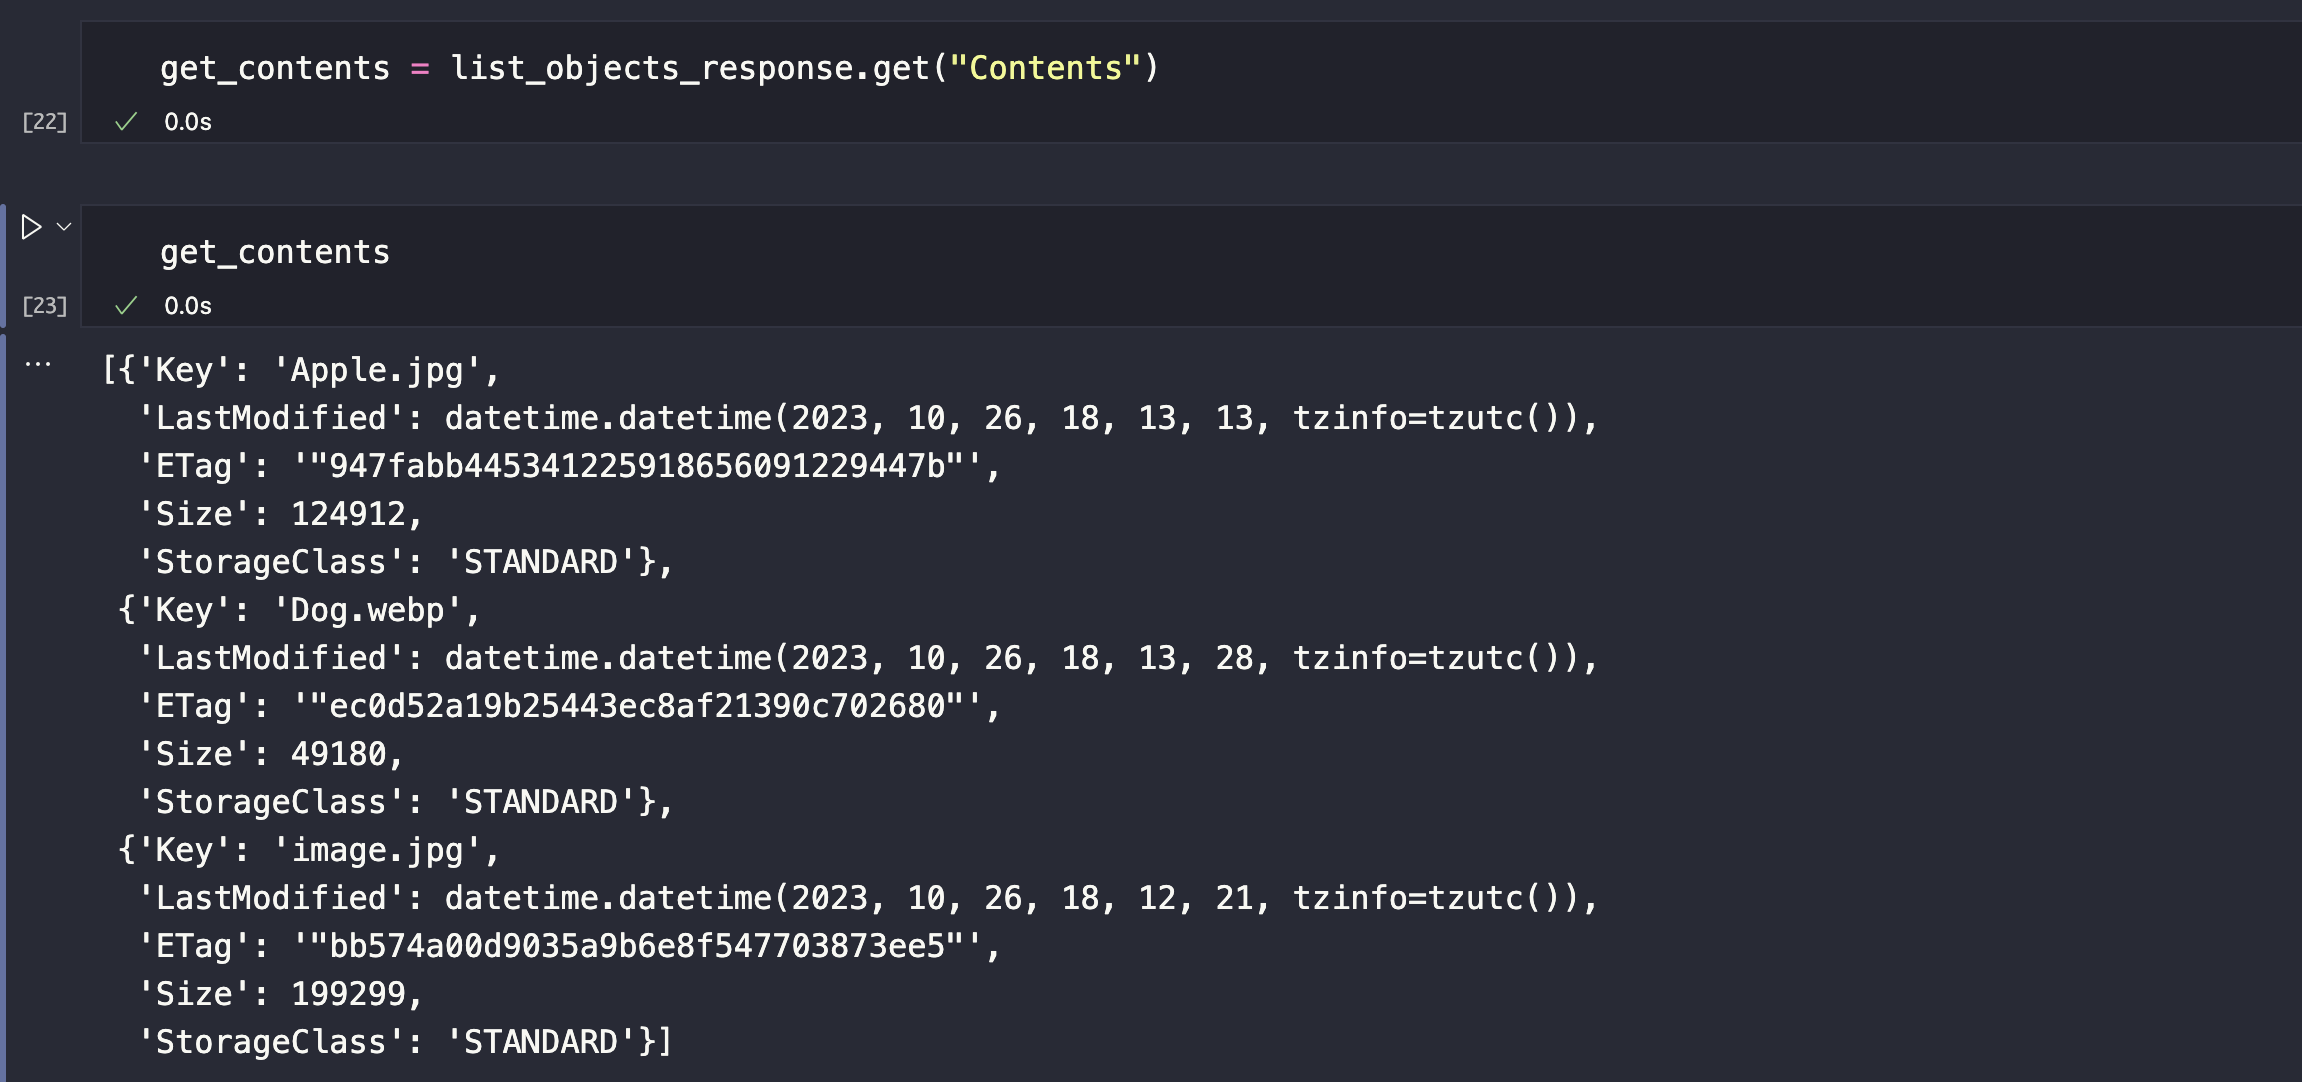
[]means list{}means dictionary in Python. For each dictionary, we can see that it is containing the information for every object we have in our S3 bucket.
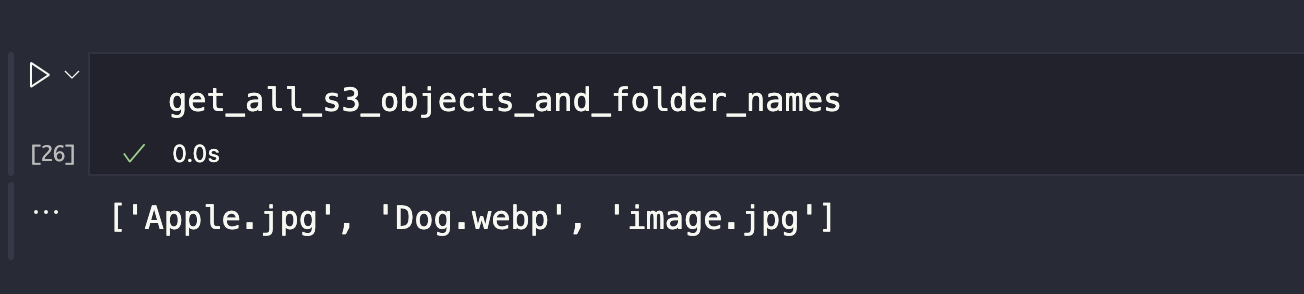
Next, we will get all the names of the objects in our S3 bucket and store them in a variable. Add another code below.
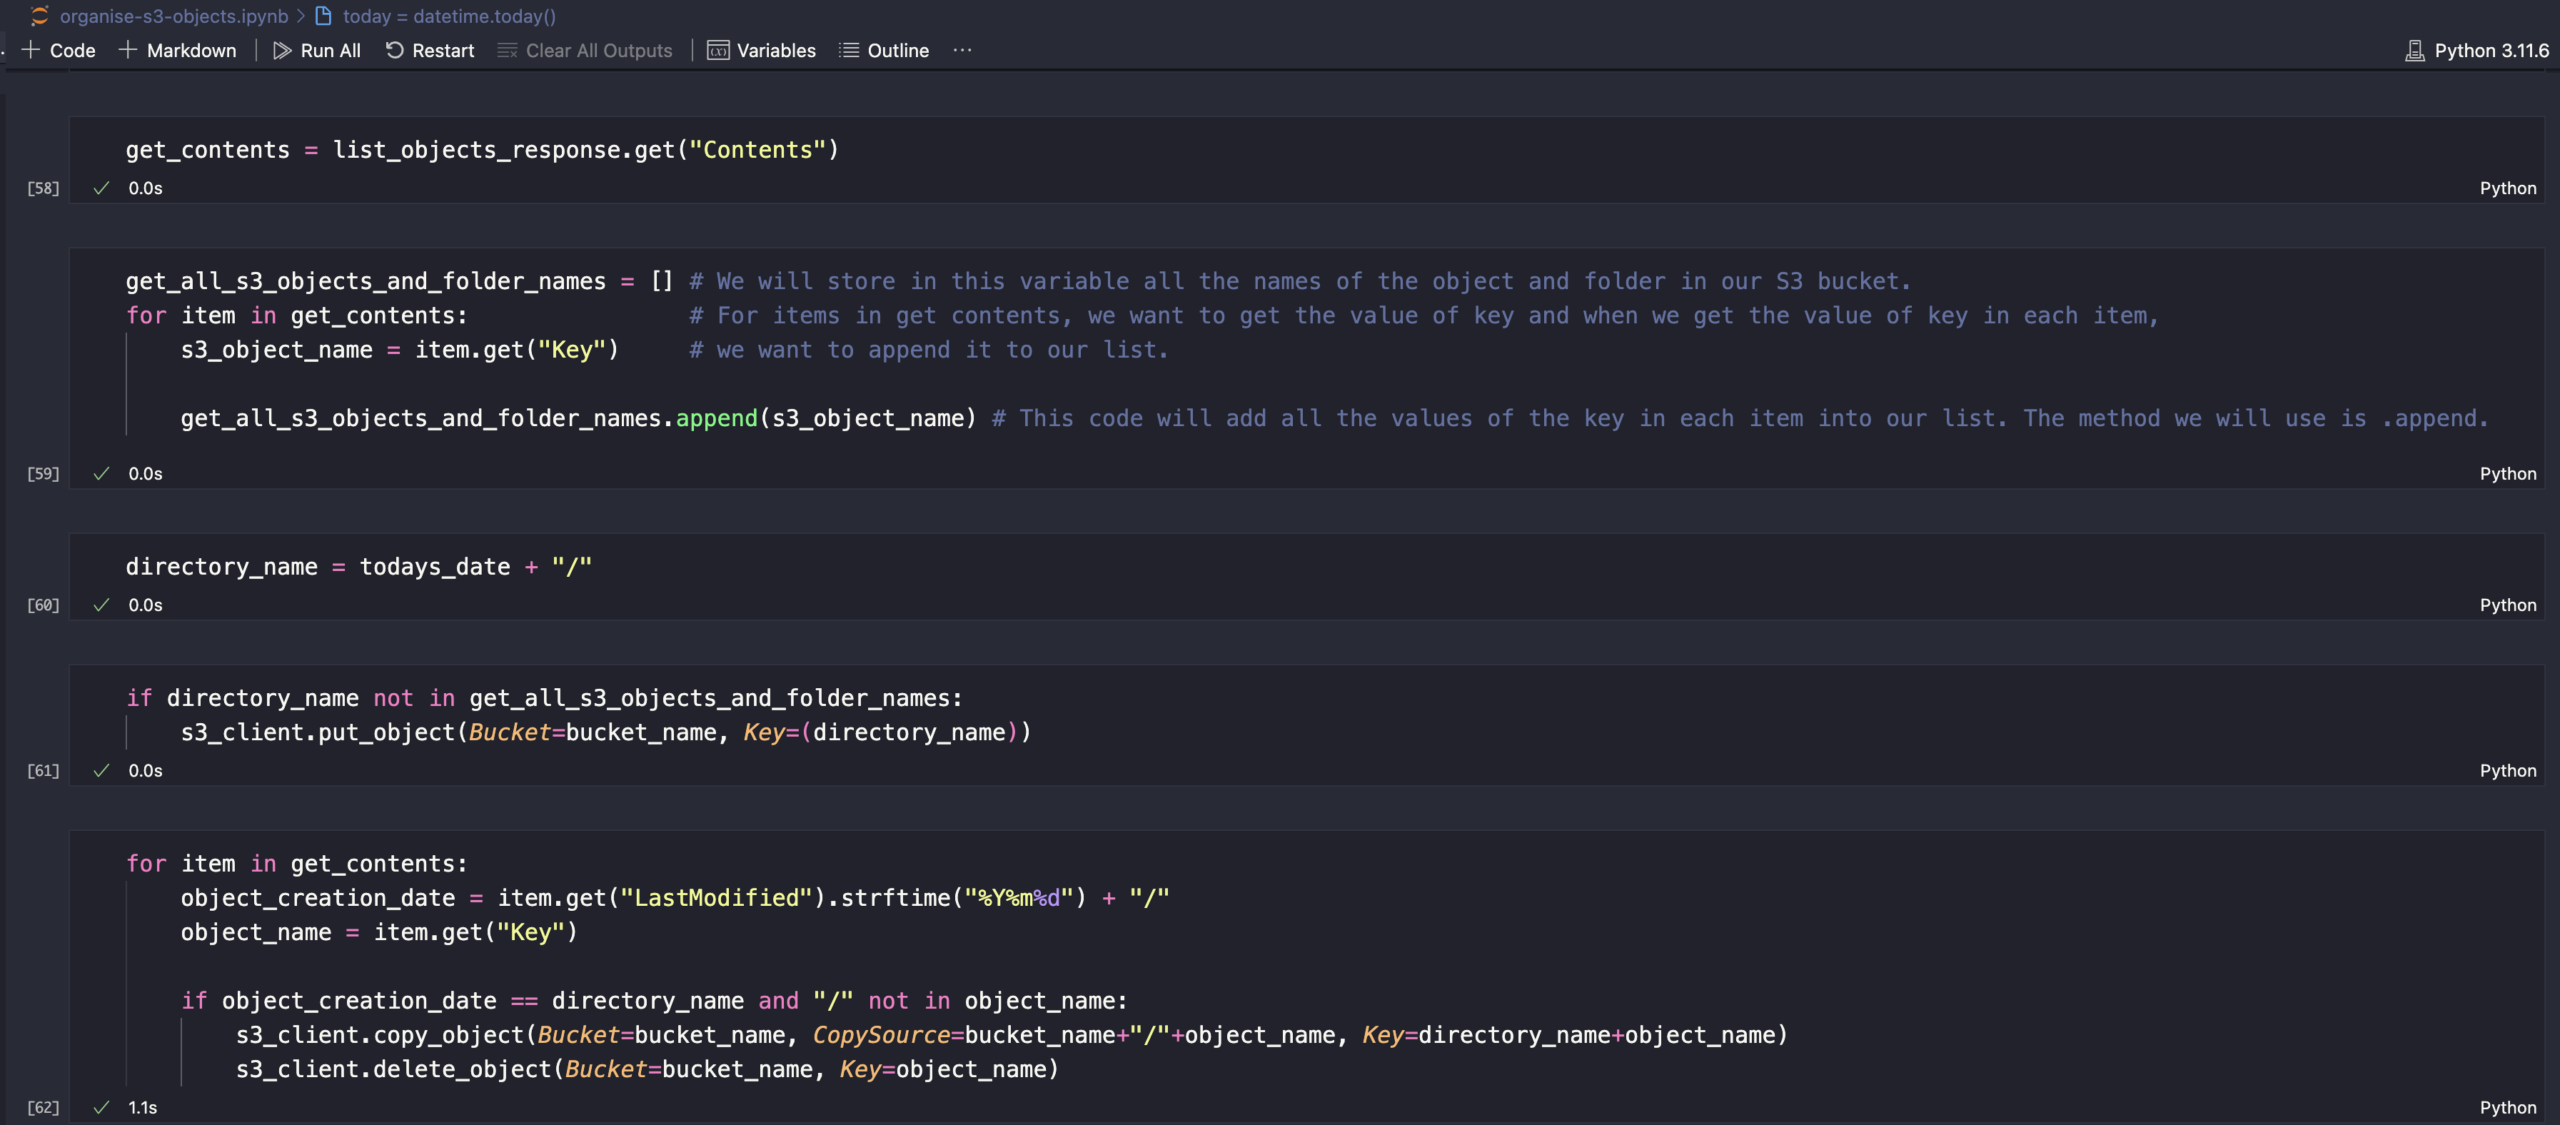
This is how your codes should look like.

This is all we need to do to get the name of all the objects in our S3 bucket and store them in the list.
We need to create a folder for today’s date in the S3 bucket if one doesn’t exist. Remember that the folder has to be named according to today’s date. In AWS, to create a folder in your S3 bucket you must enter the folder’s name with: /
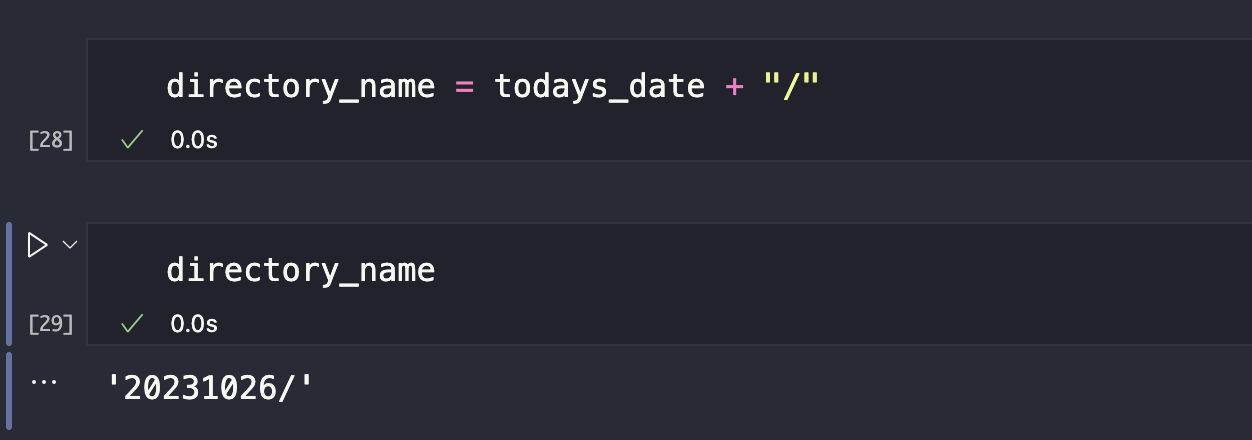
We already have the format for our folder name, and the next step is to check whether the folder for today exists in our S3 bucket; otherwise, we need to create it.

Here’s what our code should look like. Visit the AWS Boto3 Documentation to learn more about getting these commands. Save your file and run it.

We are using the IF statement to check whether the folder exists in the S3 bucket. We are using S3/Client/put_object command.
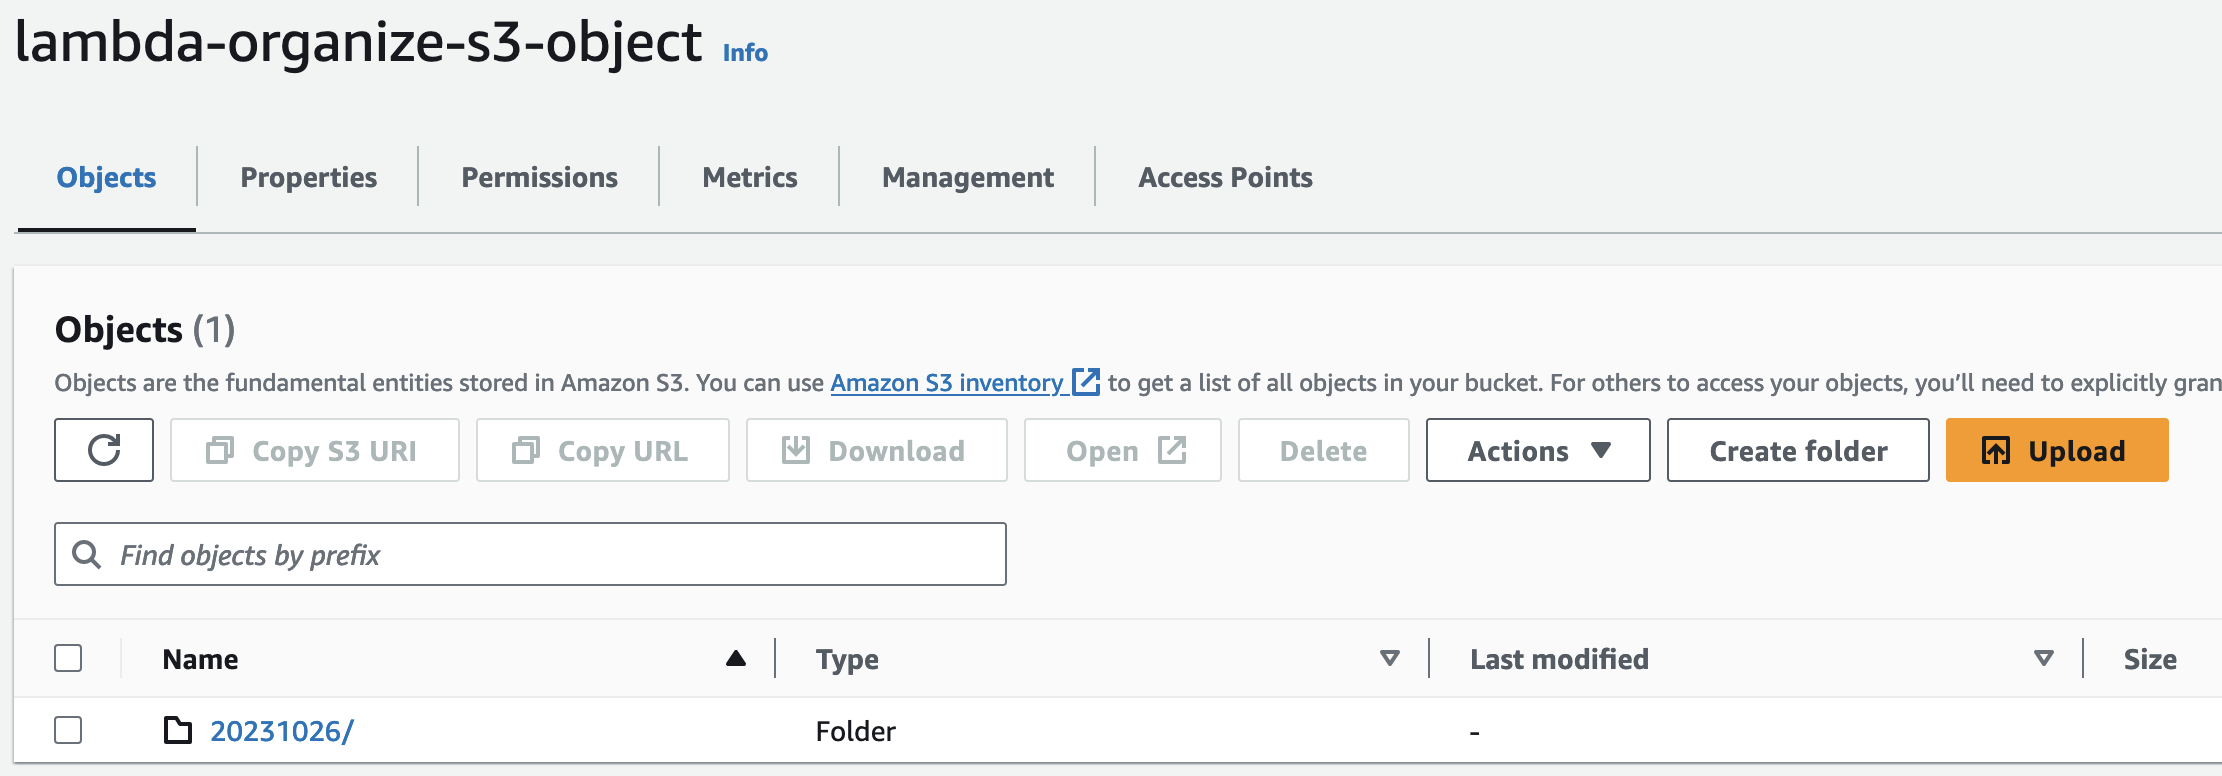
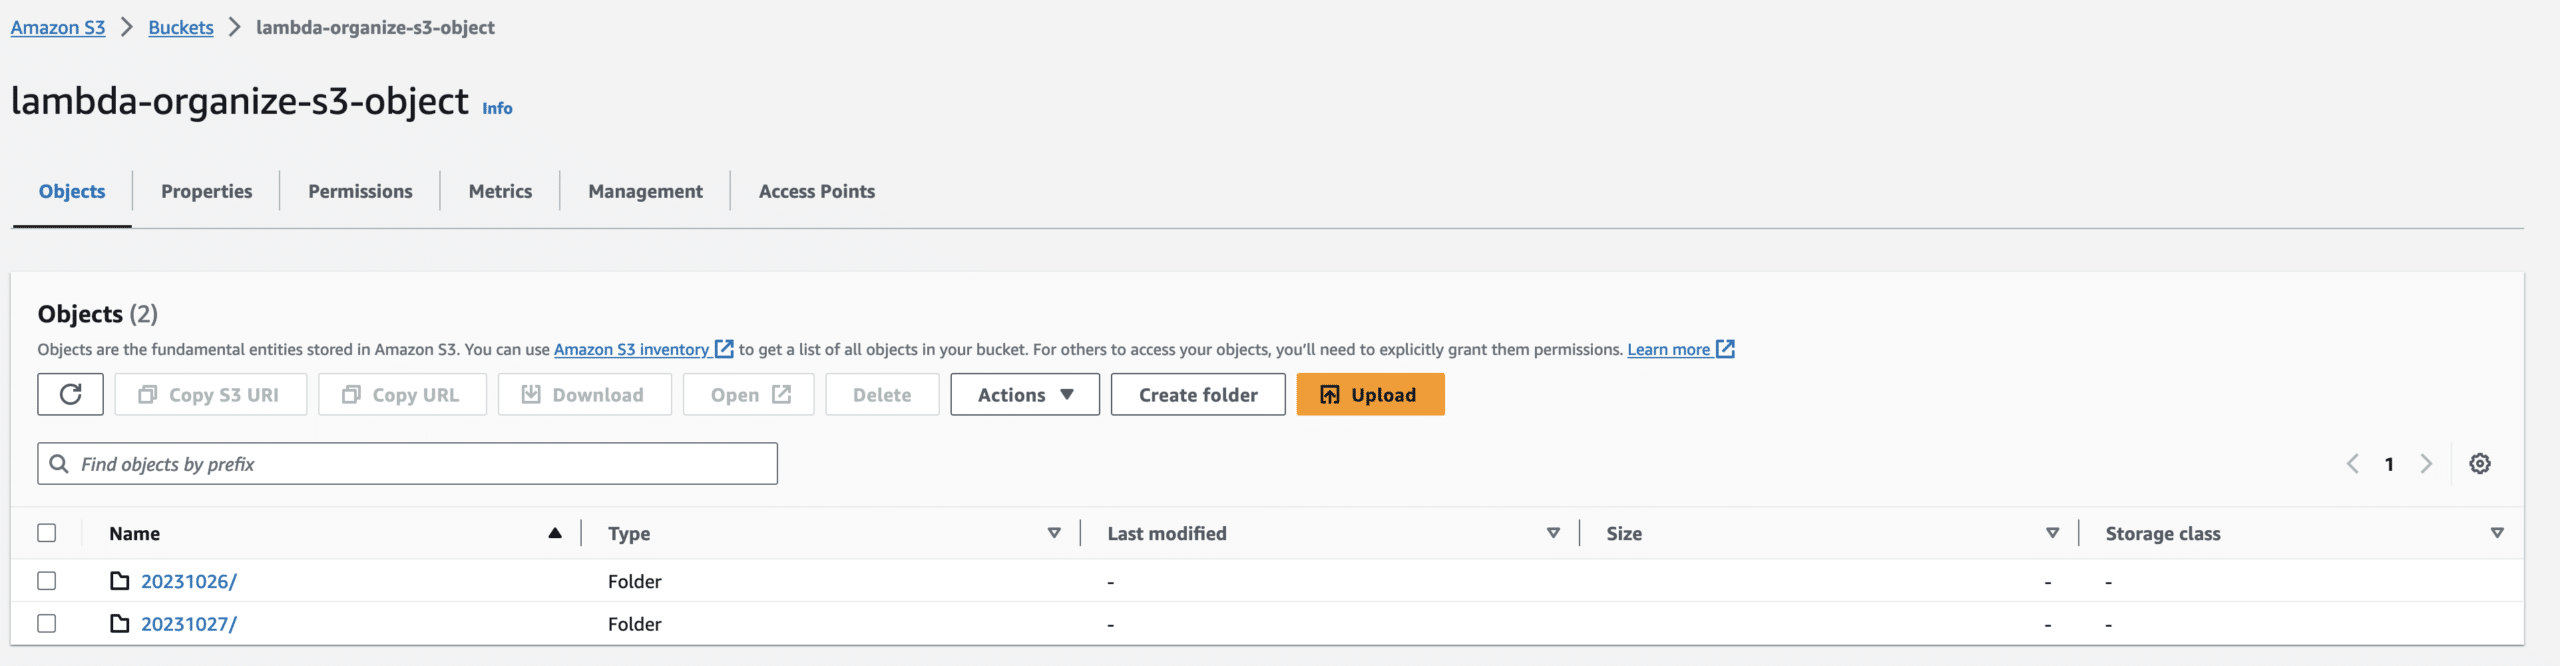
After you run succefuly the code refers the bucket page to see the folder with today’s date name.

Up next, add any object that was uploaded into our S3 bucket today into this folder. Visit the AWS Boto3 Documentation to know more about getting these commands. We will use the copy_object command. We will write our code to add these objects into the folder if these 2 conditions are met:
1st condition: if the last modified dates for the objects match our folder name.
2nd condition: we’ll make sure that the objects we are trying to move into a folder doesn’t have a / at the end.
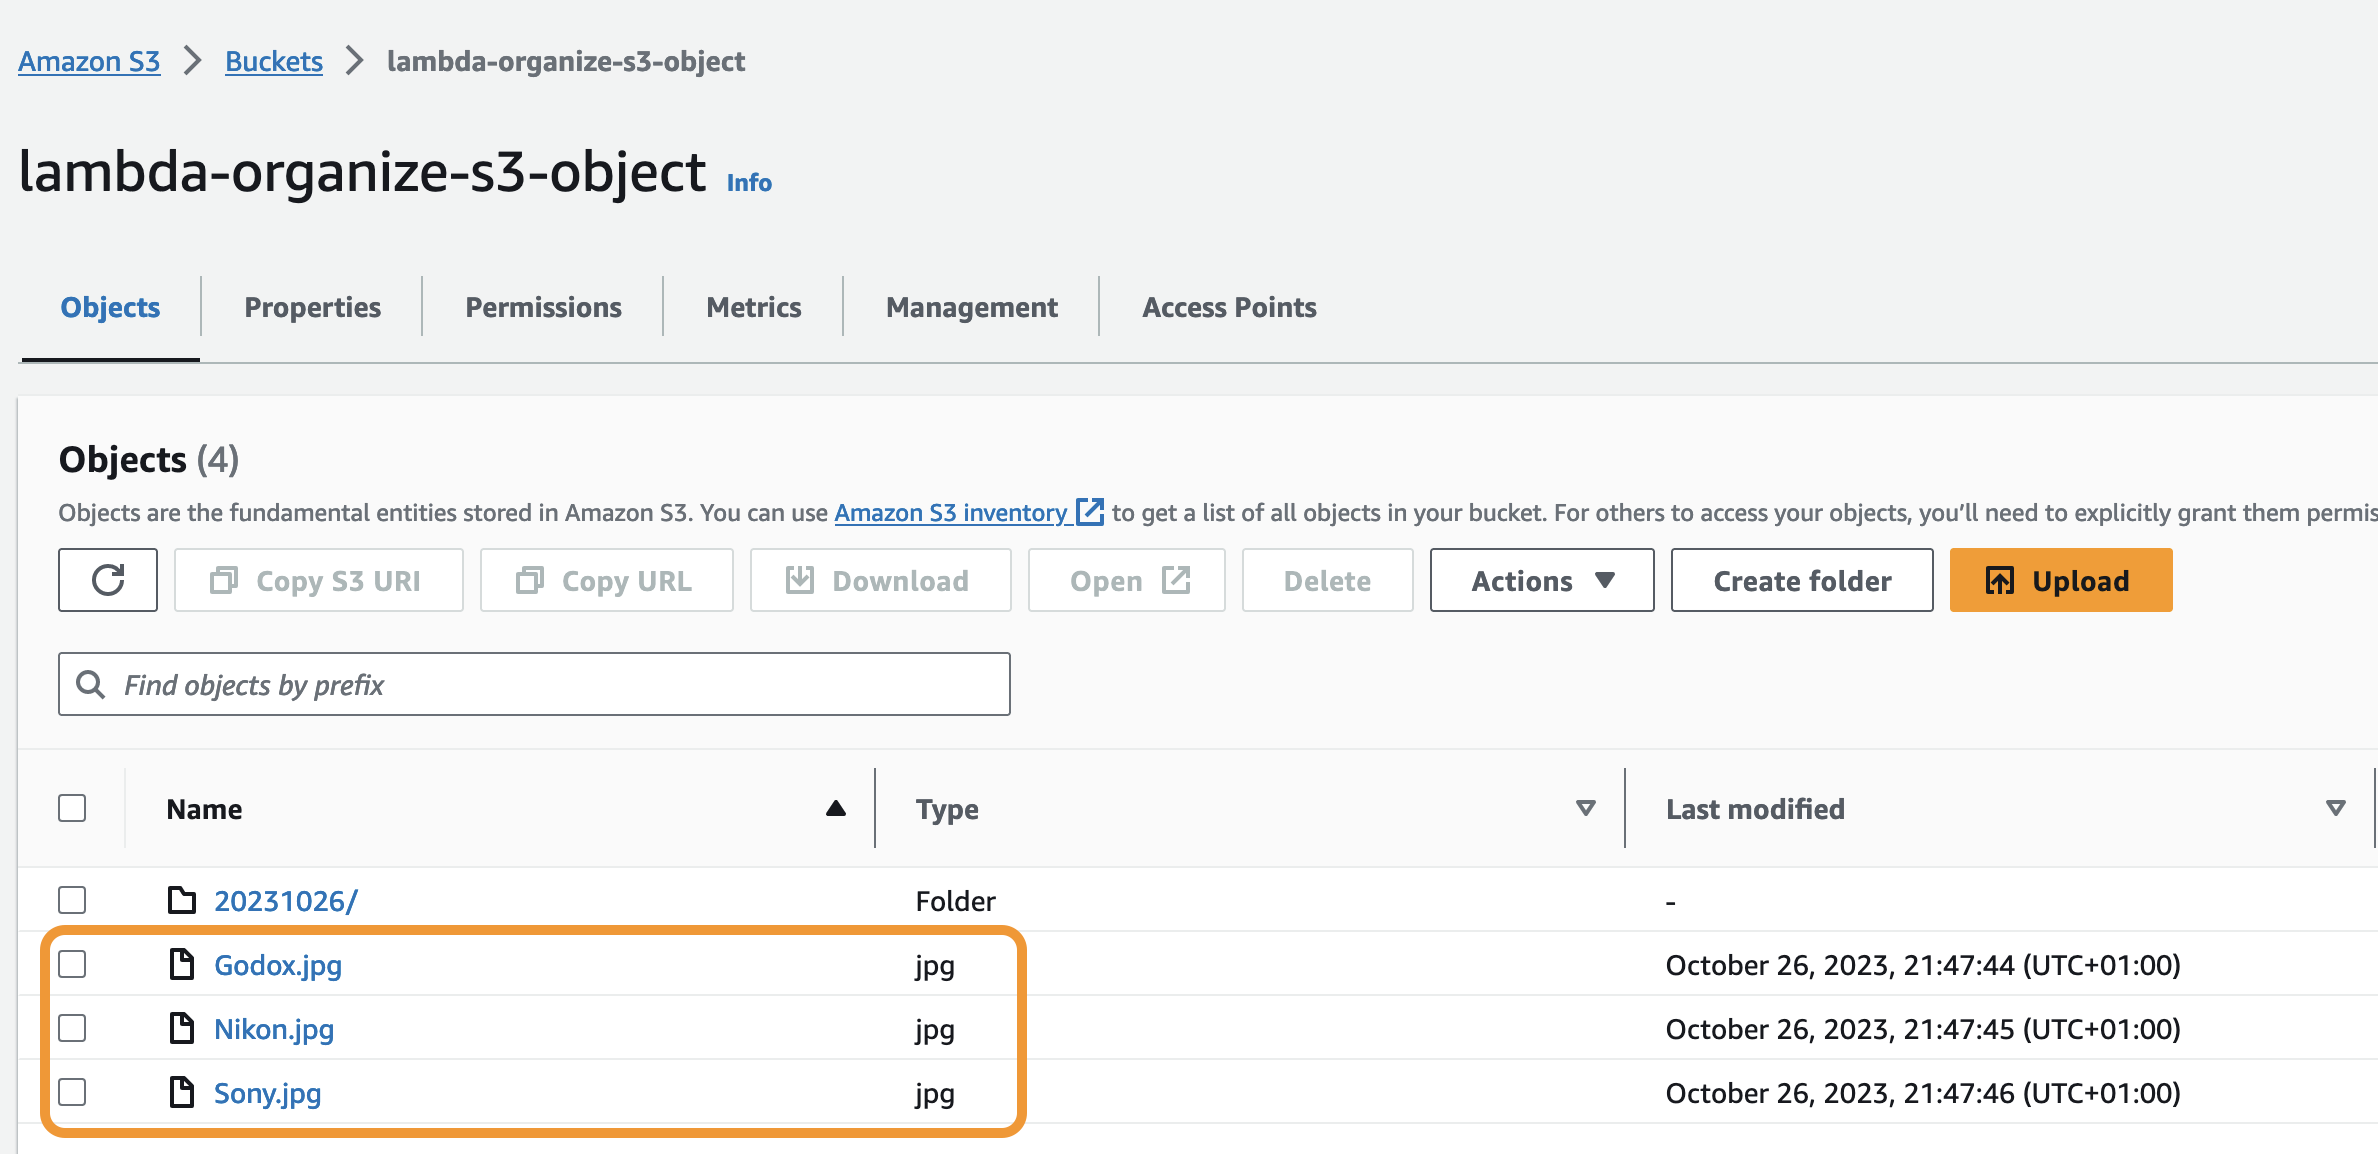
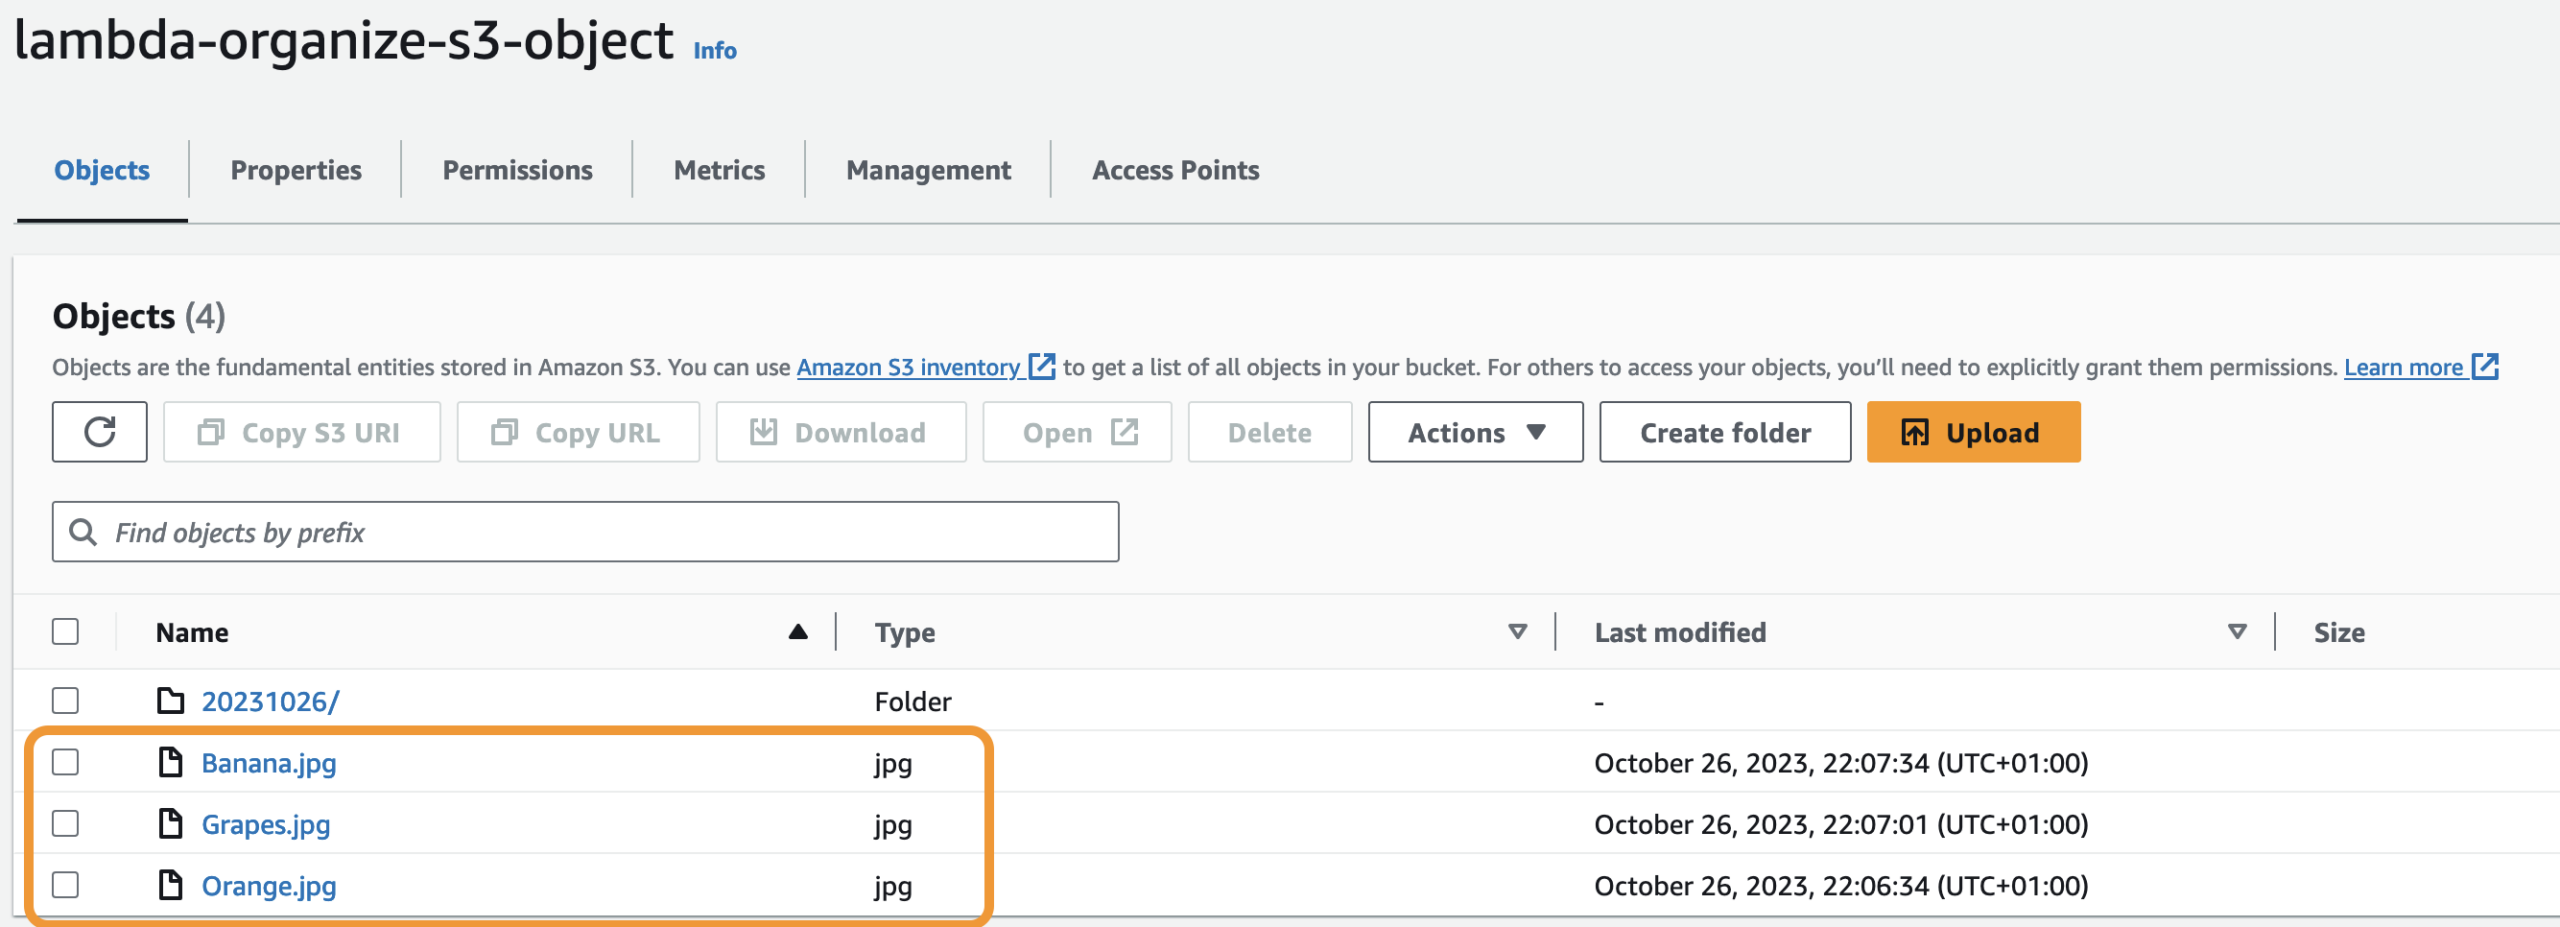
I uploaded new objects to match today’s date folder because the first 3 objects were uploaded yesterday.
This is how our code should look like.
for item in get_contents:
    object_creation_date = item.get("LastModified").strftime("%Y%m%d") + "/"
    object_name = item.get("Key")

    if object_creation_date == directory_name and "/" not in object_name:
        s3_client.copy_object(Bucket=bucket_name, CopySource=bucket_name+"/"+object_name, Key=directory_name+object_name)
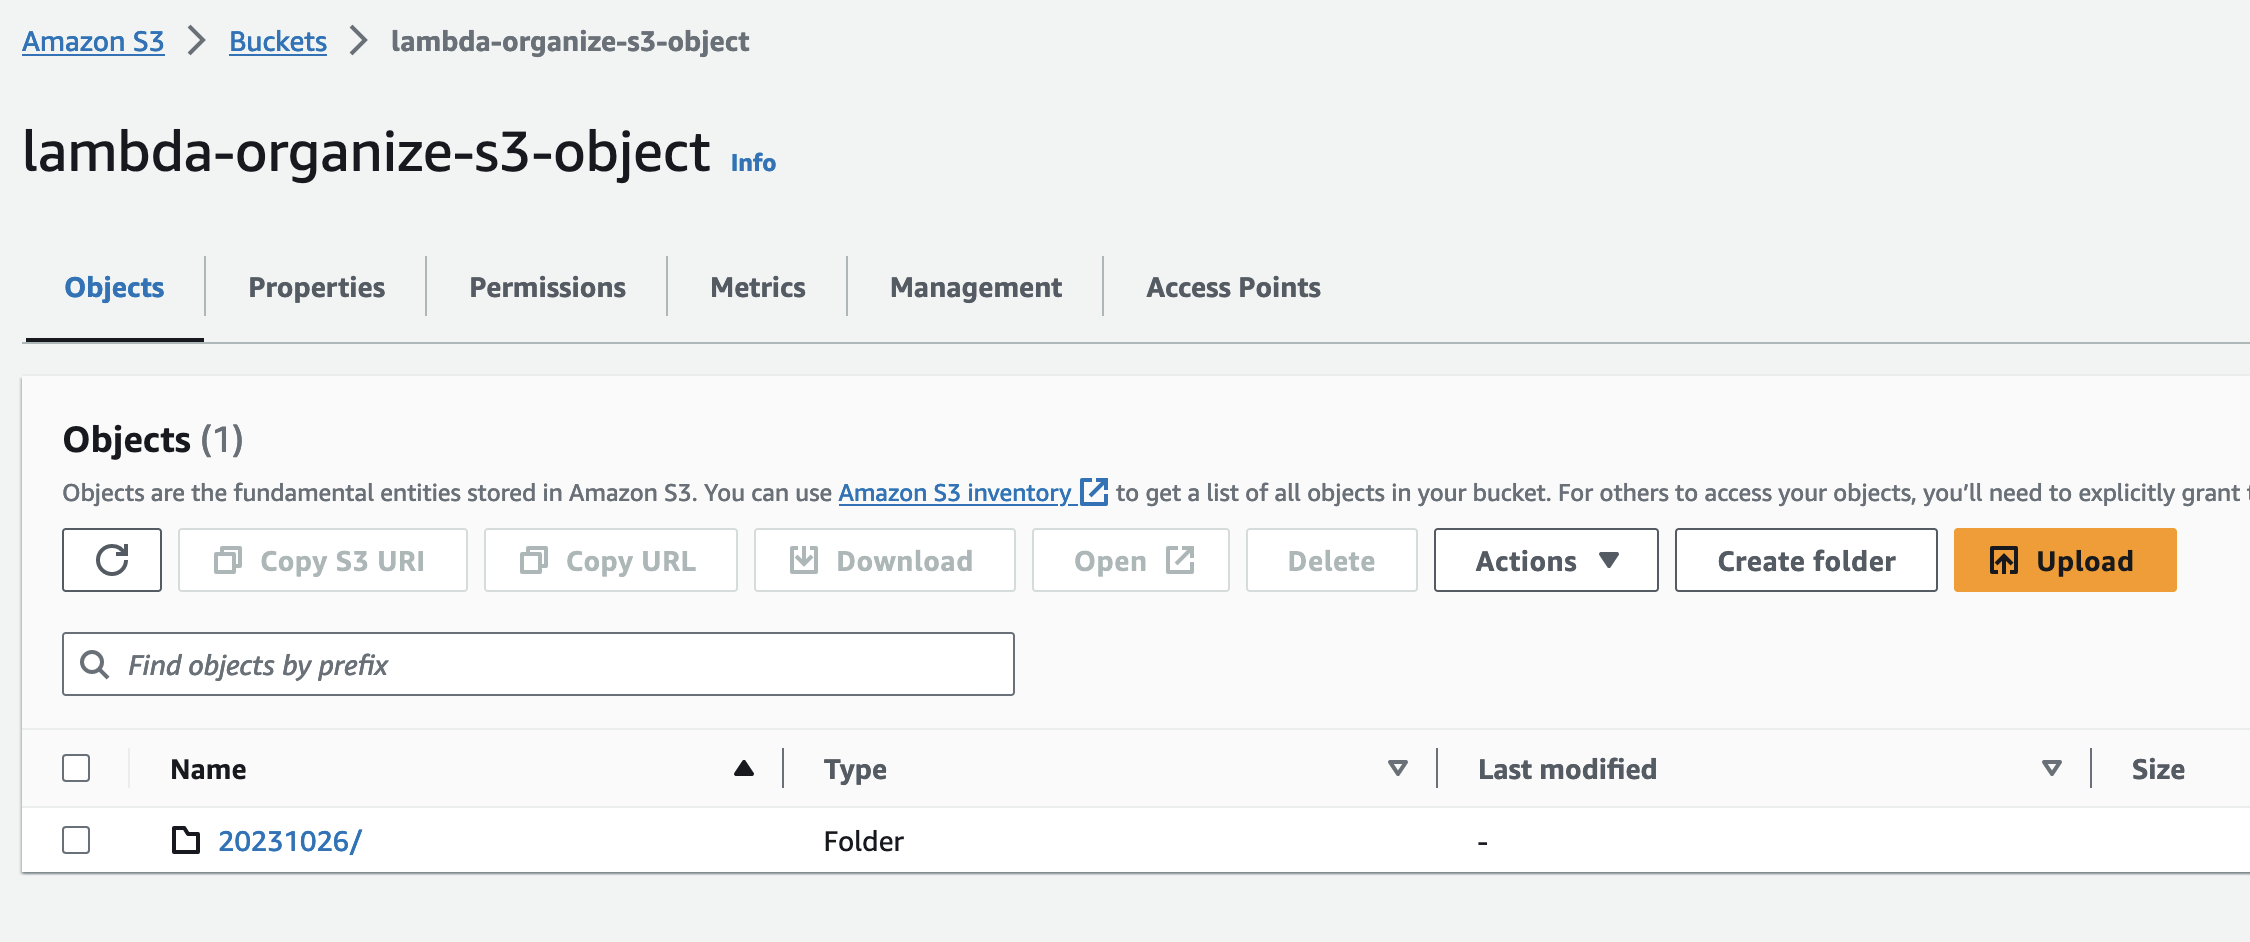
This is my folder for today’s name and its empty at the moment.

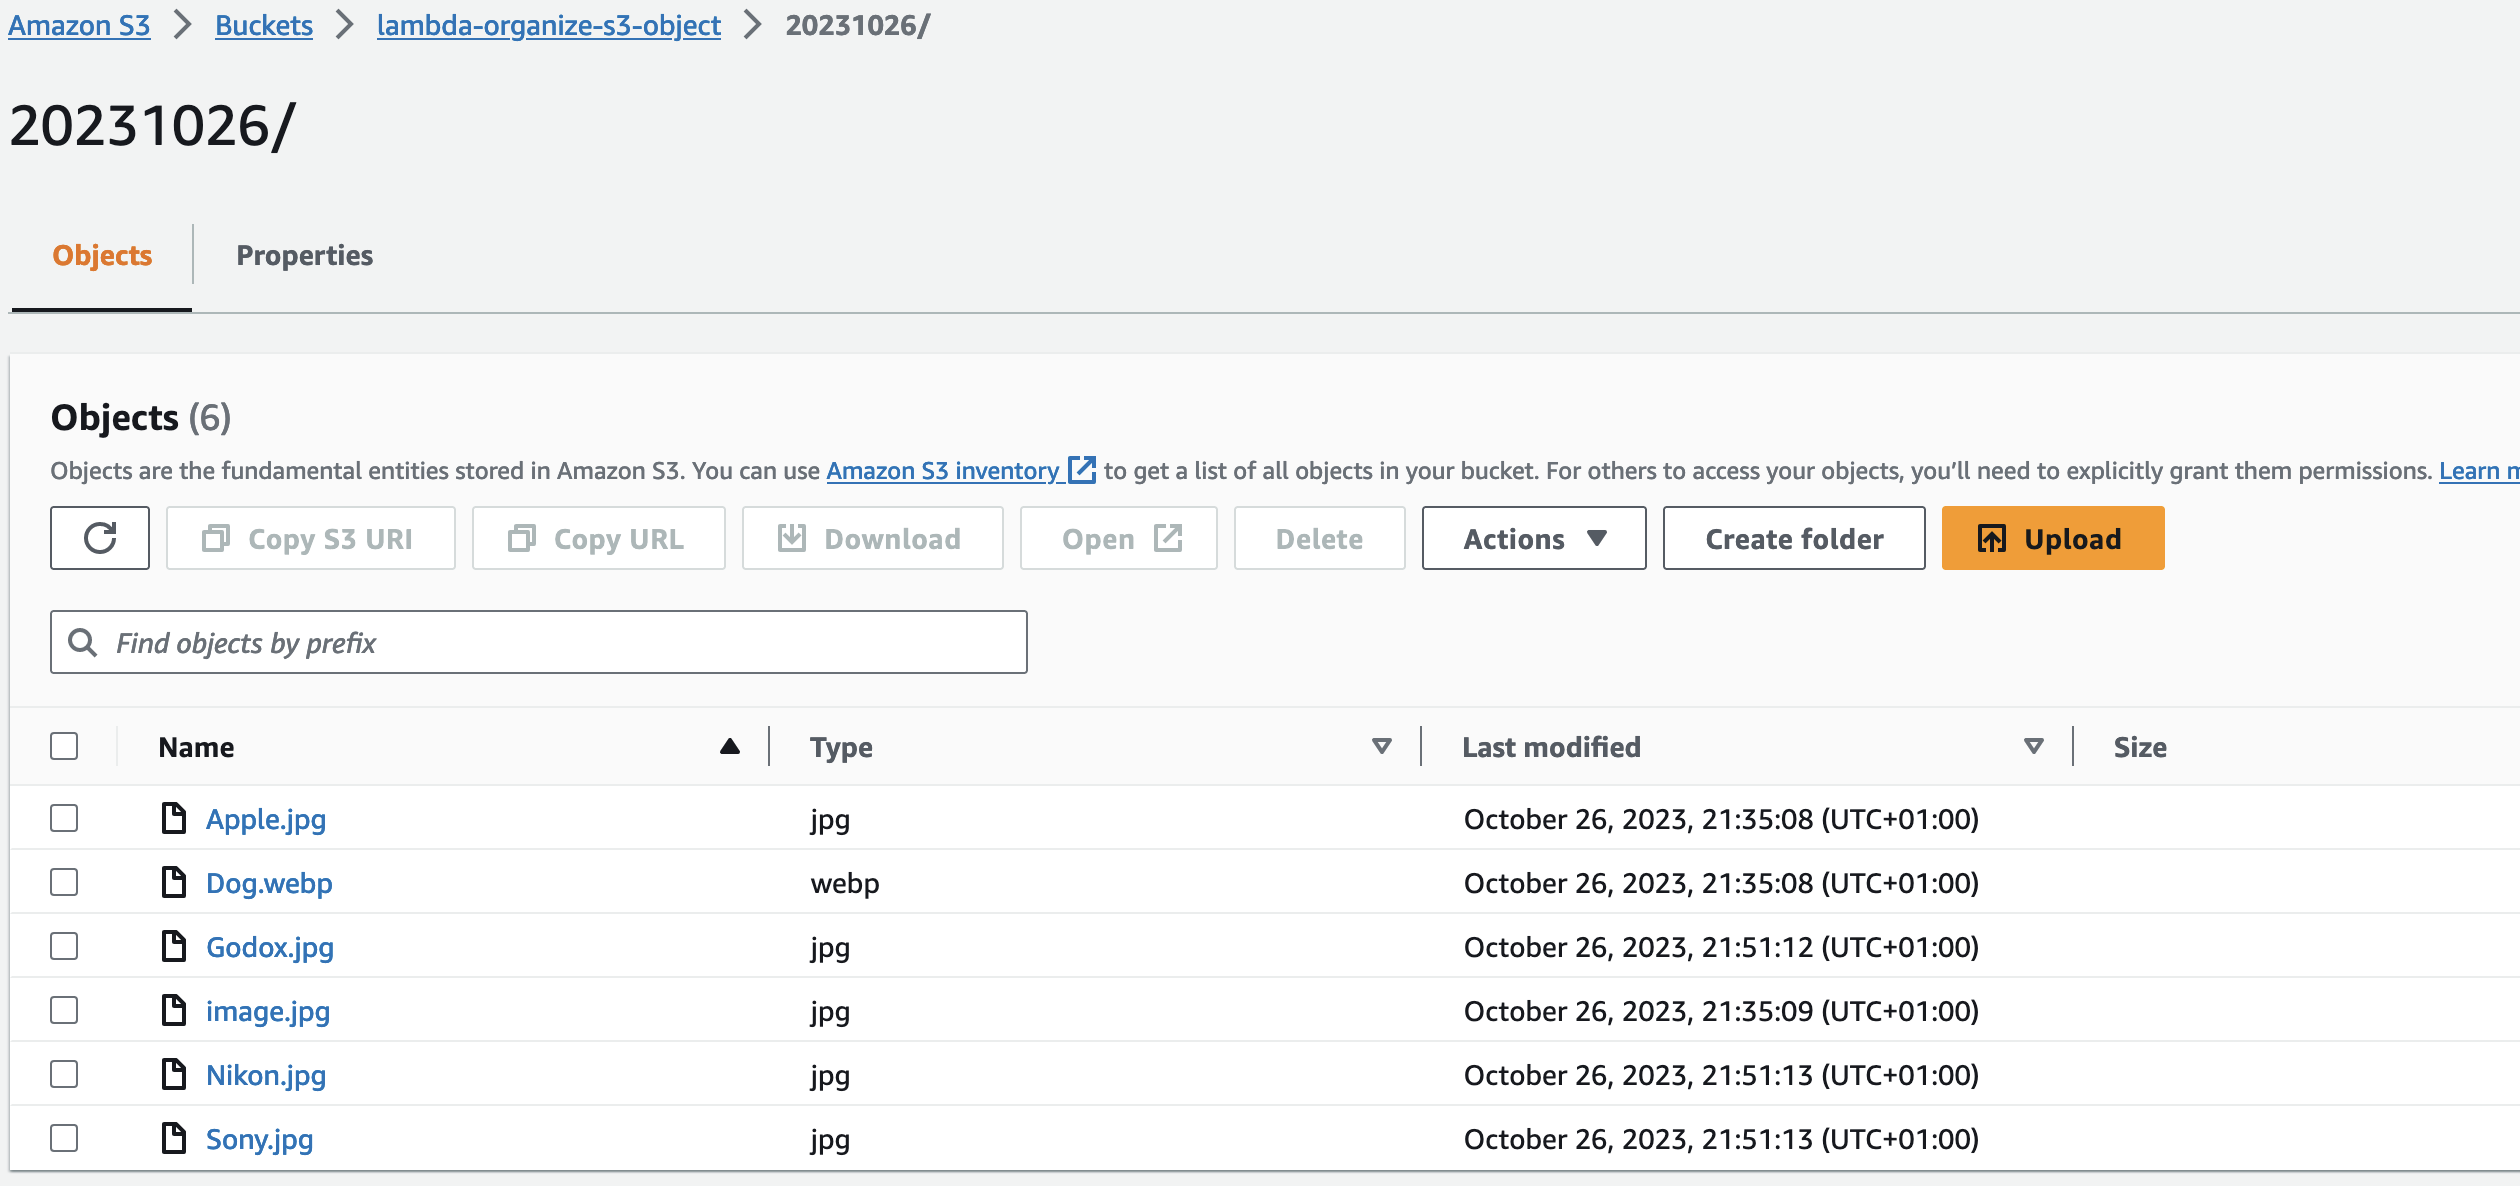
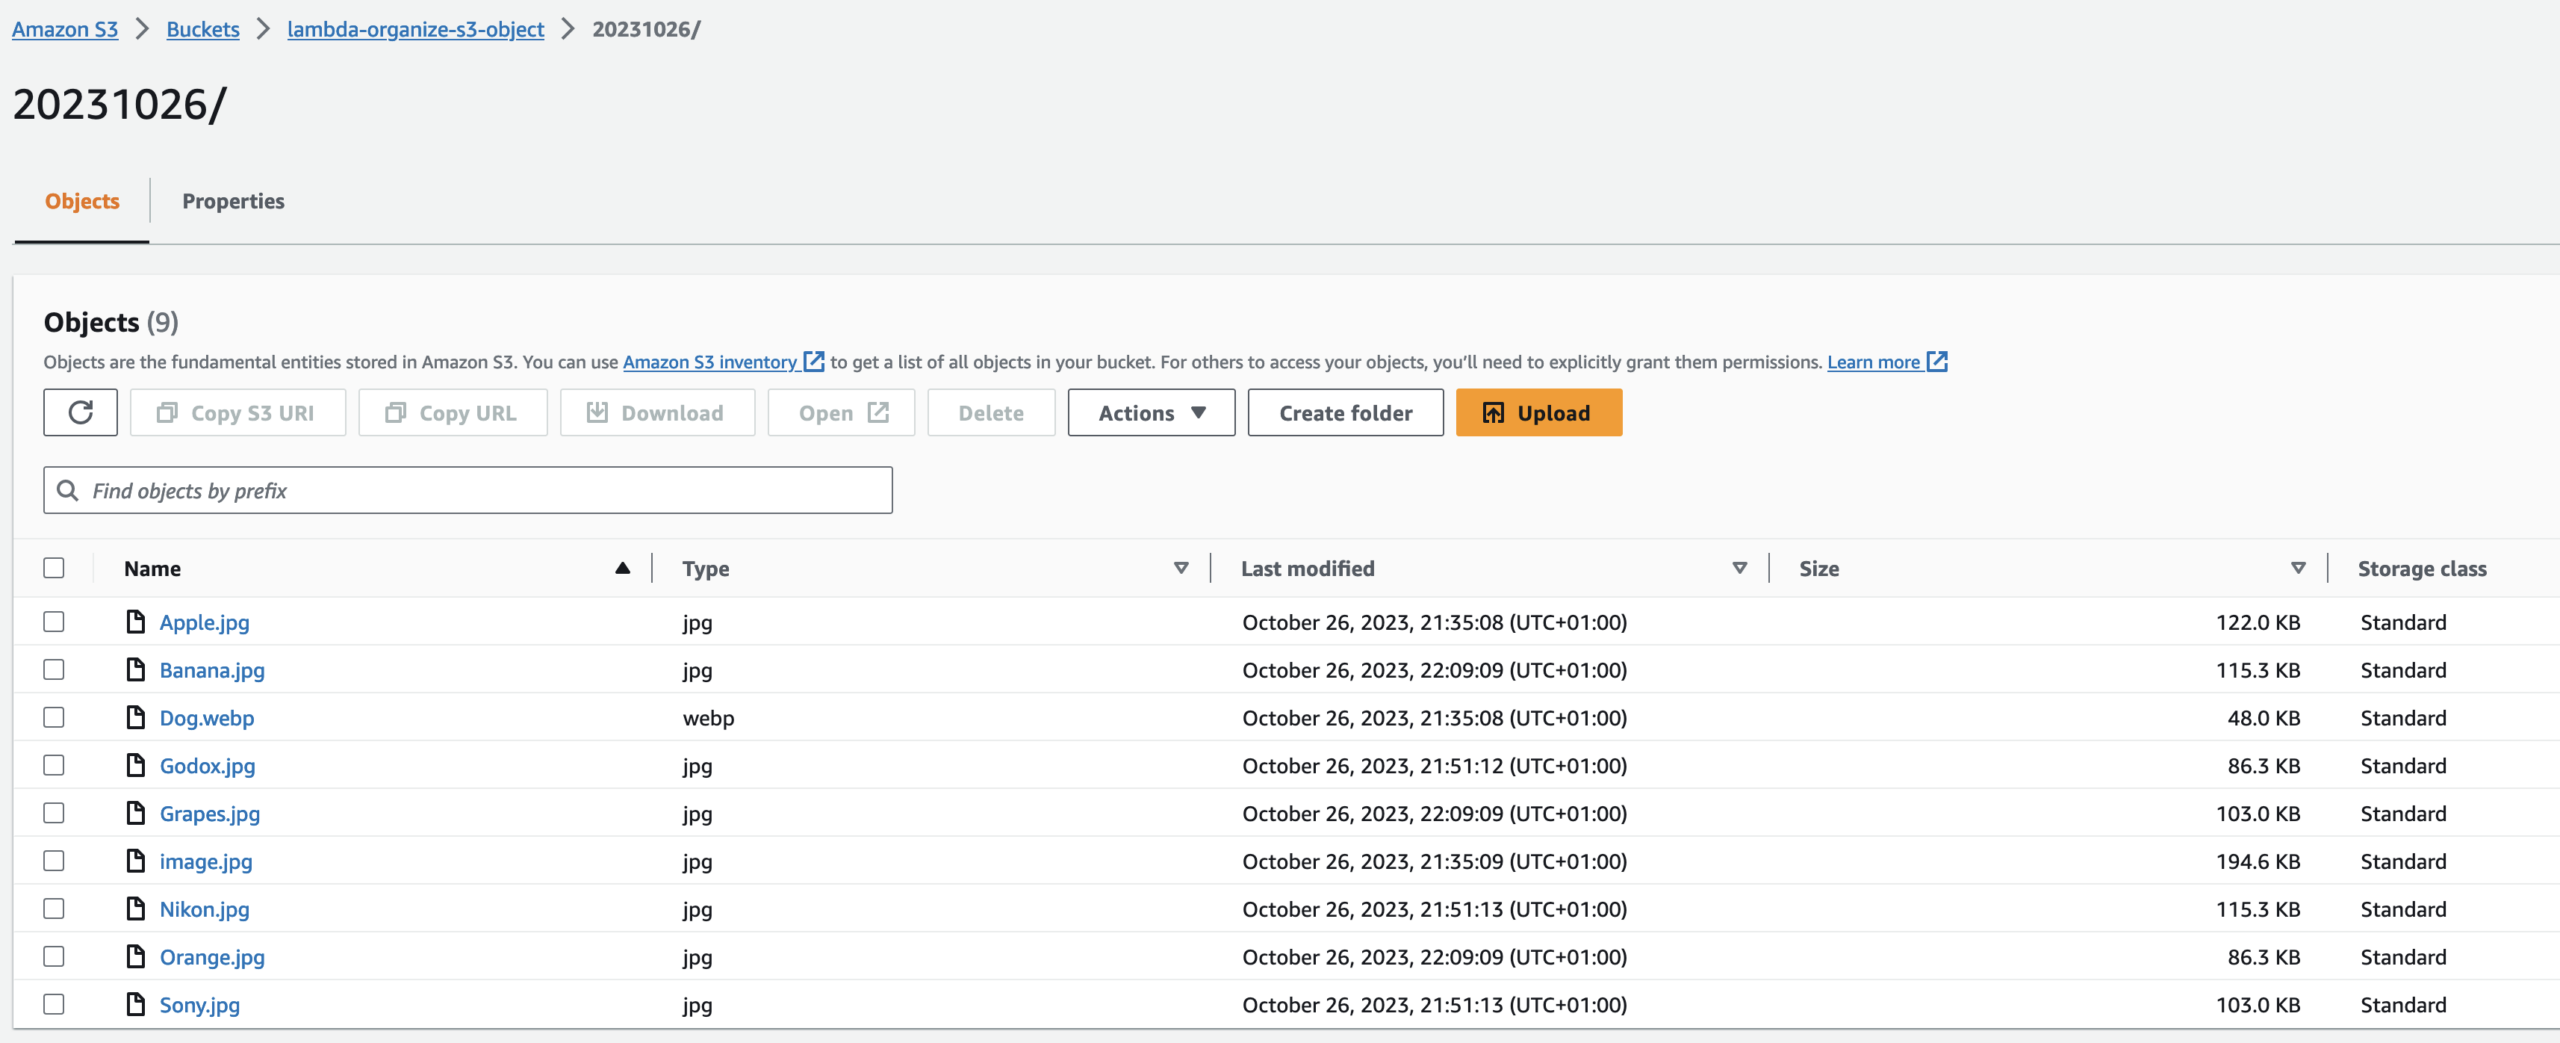
This is after successfully running the code:

Let’s go back to AWS Boto3 Documentation to learn more about the commands that we will use to delete objects.
Request Syntax
response = client.delete_object(
    Bucket='string',
    Key='string',
    MFA='string',
    VersionId='string',
    RequestPayer='requester',
    BypassGovernanceRetention=True|False,
    ExpectedBucketOwner='string'
)This is how our code should look like
    if object_creation_date == directory_name and "/" not in object_name:
        s3_client.copy_object(Bucket=bucket_name, CopySource=bucket_name+"/"+object_name, Key=directory_name+object_name)
        s3_client.delete_object(Bucket=bucket_name, Key=object_name)
This is all we need to do to write the Python script. The last code we just wrote will delete all the objects in our S3 bucket because we already moved those objects into the folder for today’s date.

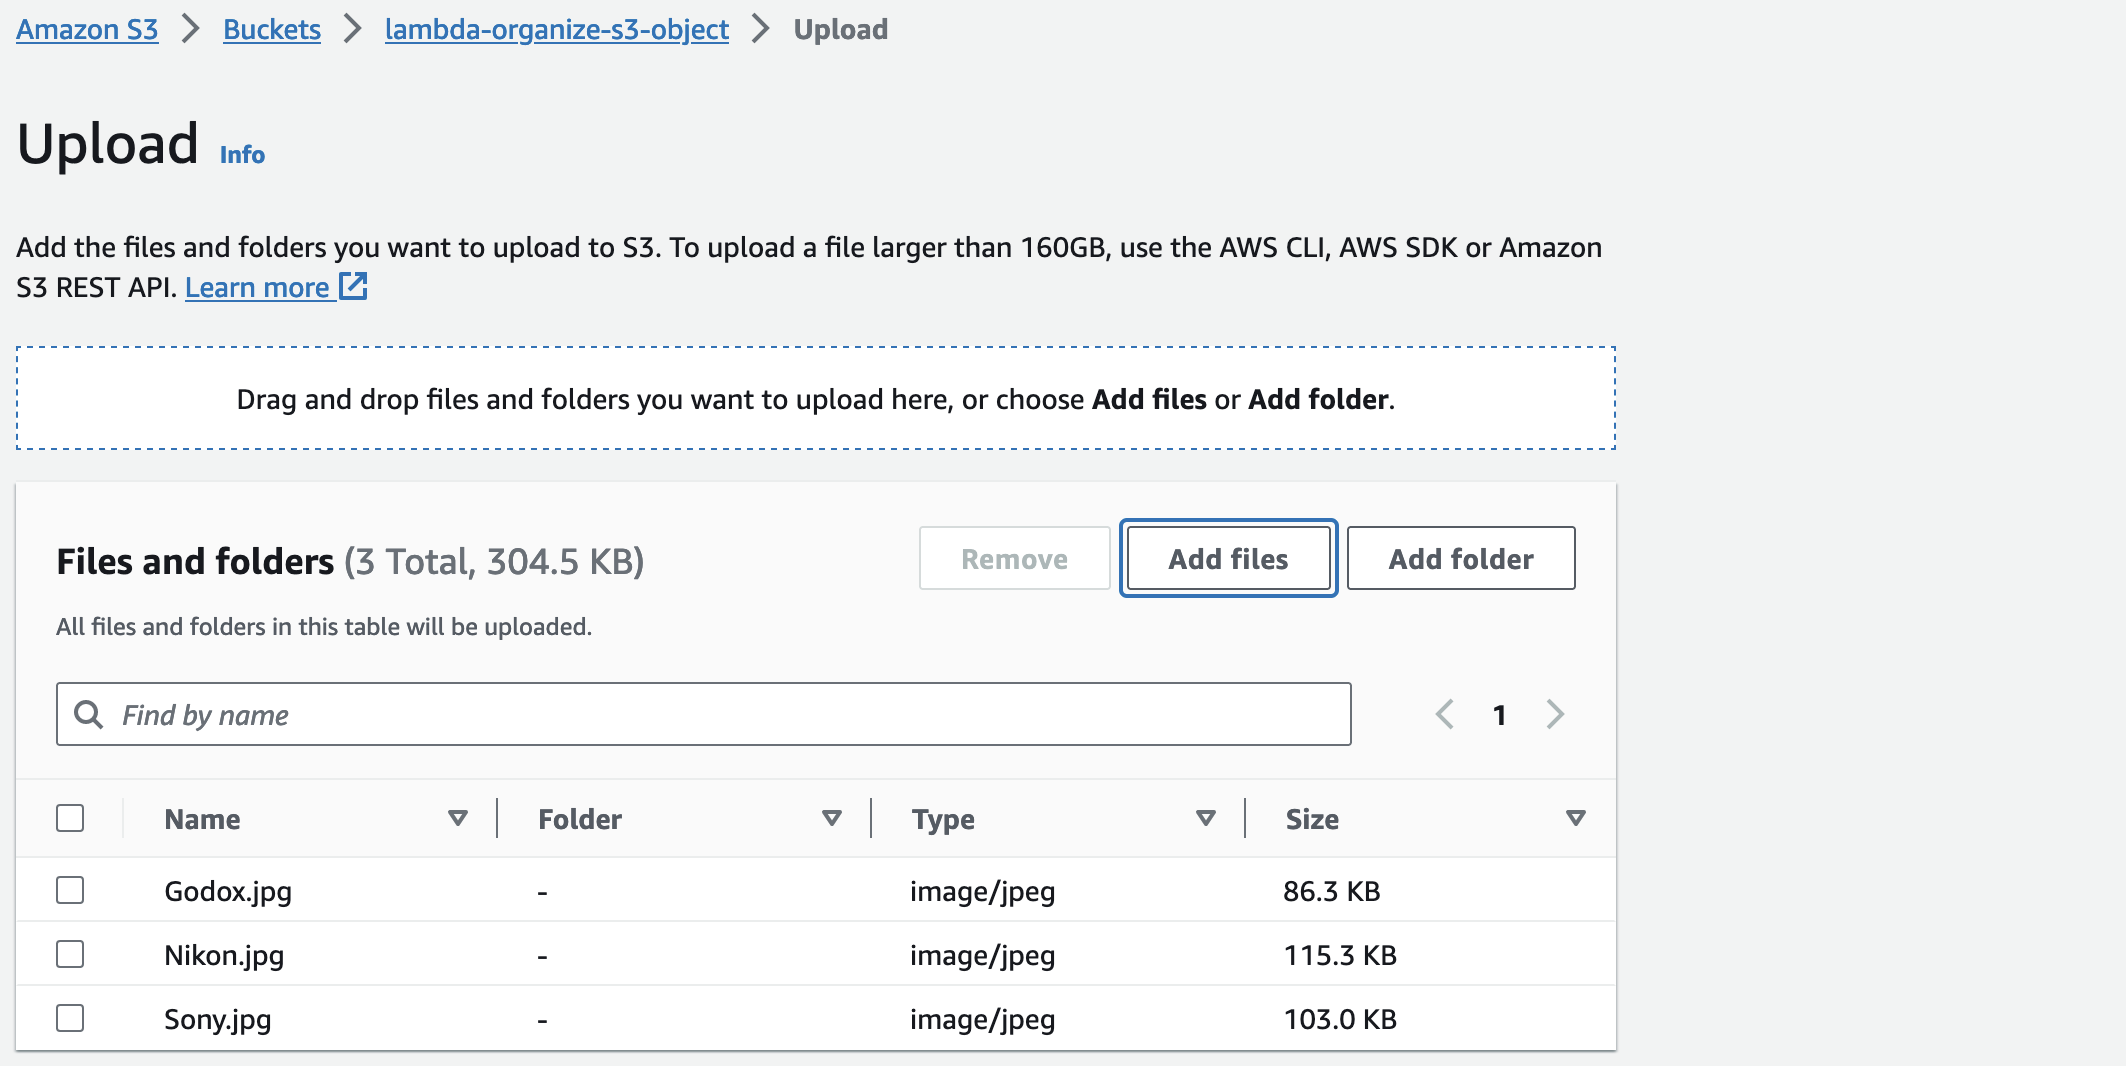
Let’s test whether our code is working properly. Let’s upload new files from our computer to our S3 bucket (not the folder).
Go back to Visual Studio Code and click Run All.

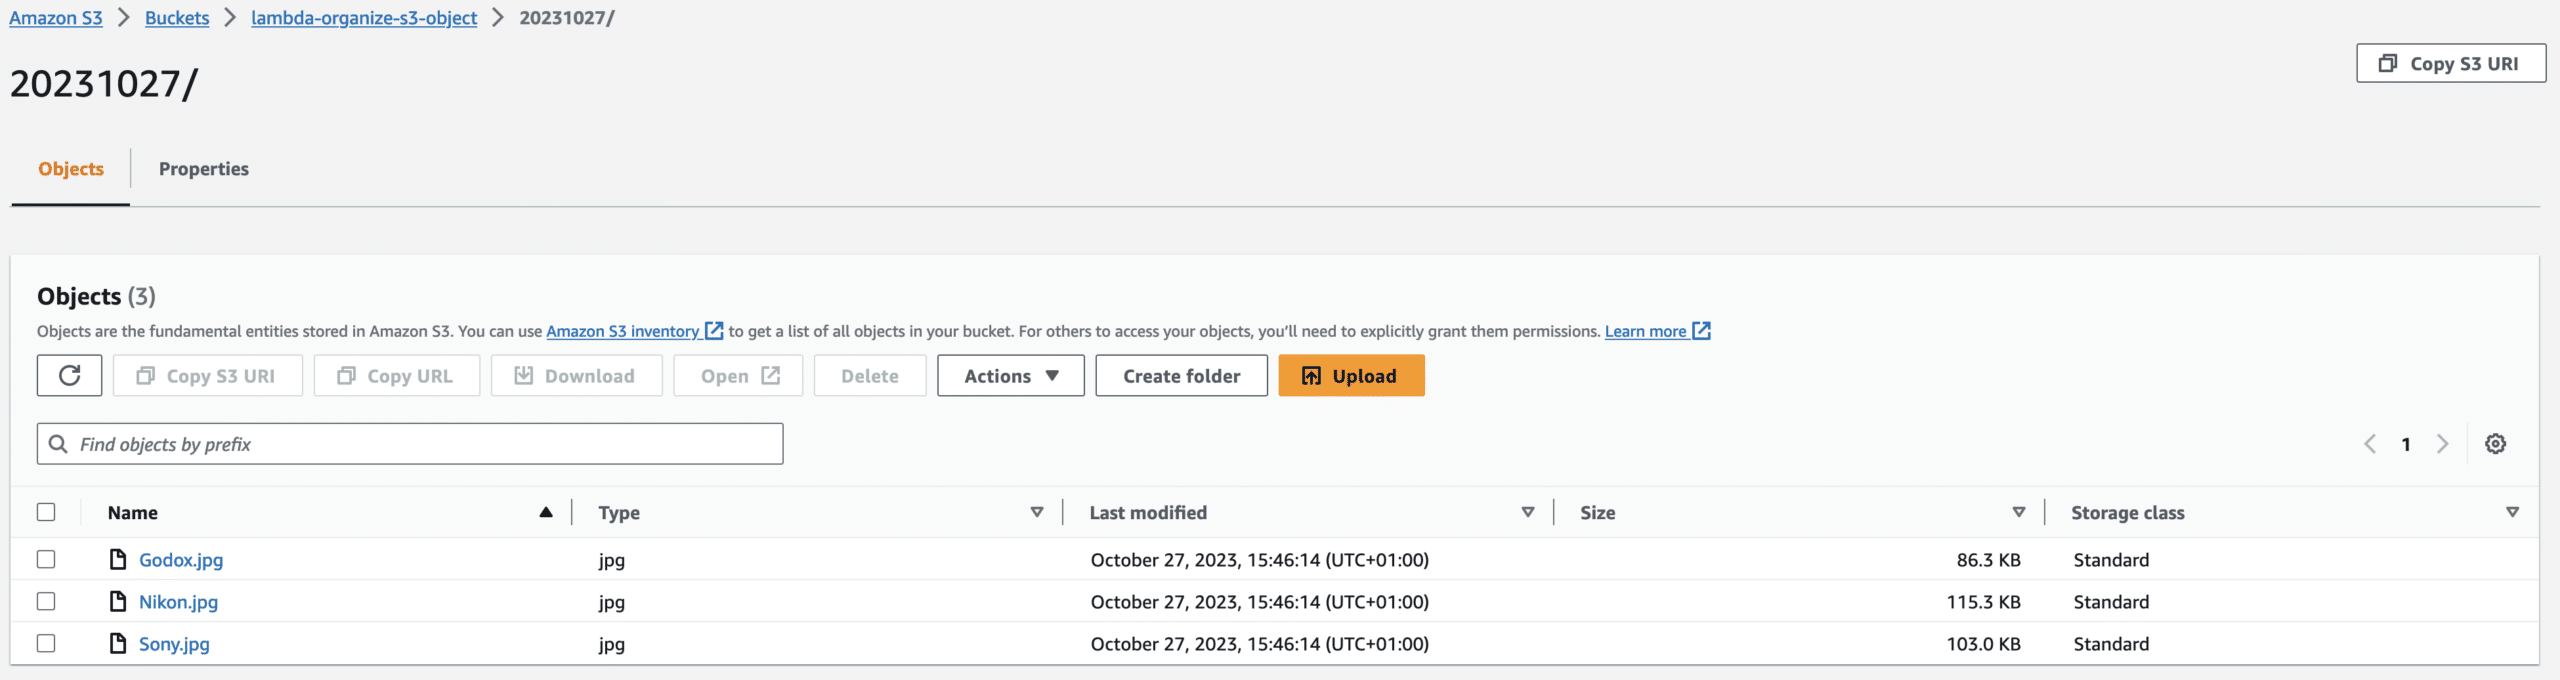
All the files are moved to the folder.
Our code is working as intended. We will upload our code in to an S3 bucket then we will create a Lambda function that automatically triggers to run our code anytime an object is uploaded into our S3 bucket.
We will clean up the code in the Jupyter notebook to export it into a Python format that Lambda understands.
The syntax we want to remove from our code is the syntax we used to print a value to test that our code is working; hence, delete the below by clicking the Bin icon.
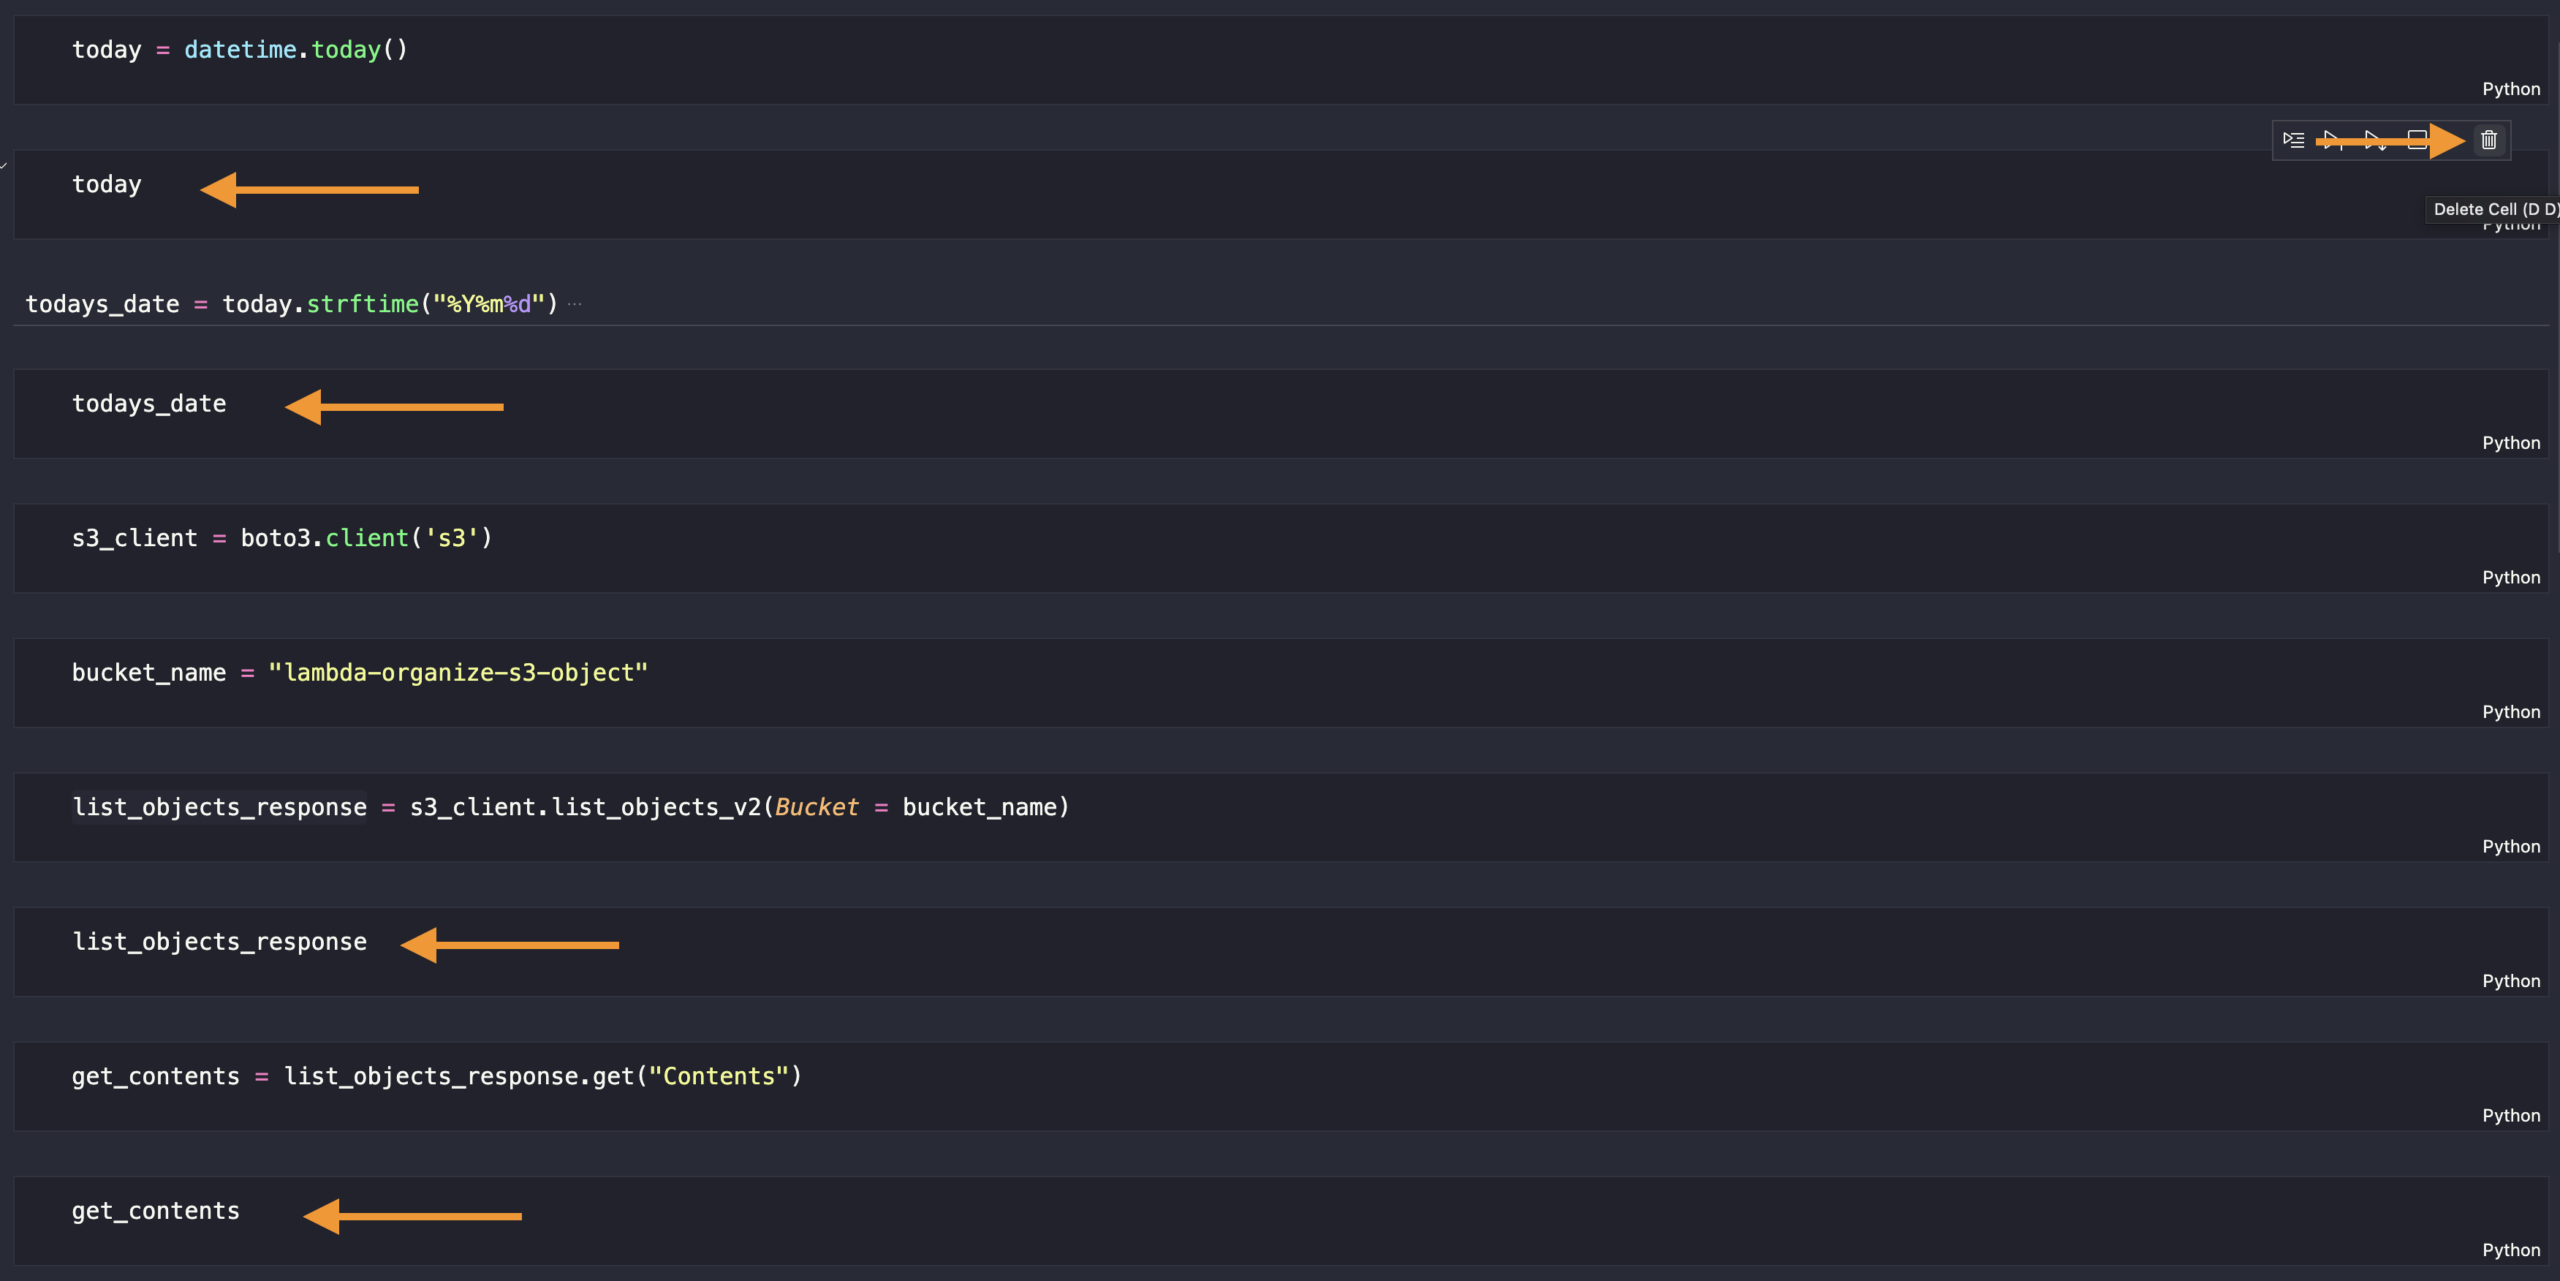

Let’s save our file after deleting them. We are going to upload new objects into our S3 bucket, and then we’ll run our code to make sure it’s working correctly.
Click Run All in your Jupyter notebook code.
This means that our code is working properly.
Convert Jupyter notebook code to Python format
We are going to export our Jupyter notebook code into a Python format.

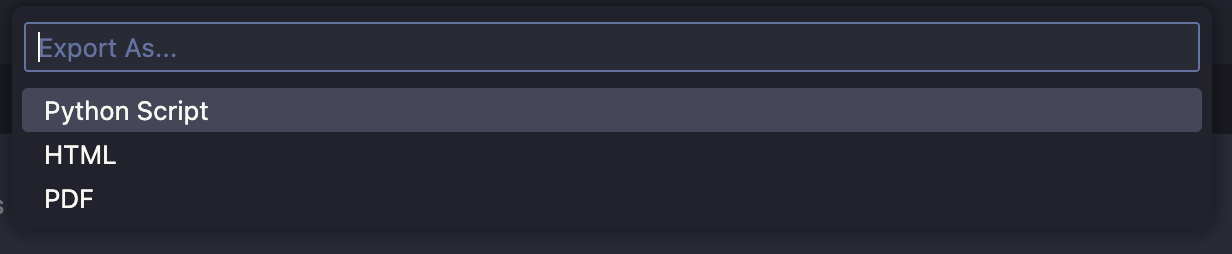
Select Python script:
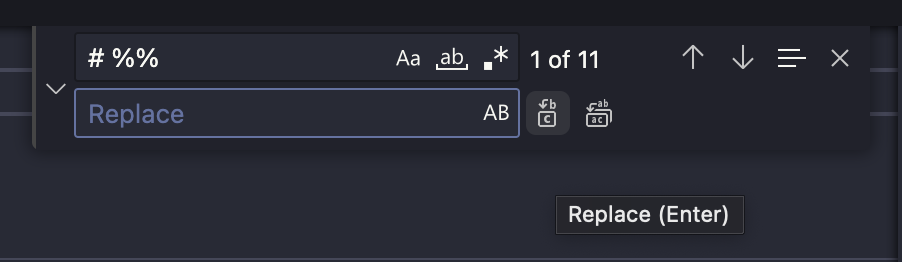
Next, we need to delete all # %% of our code. Search # %% and click either of the Replace icon to delete them.
We’ve removed all the text from our code that has the # %%
We must add a function to our Python code before Lambda can trigger it. We call it lambda_handler. Highlight all the codes under the function, then press the Tab key.
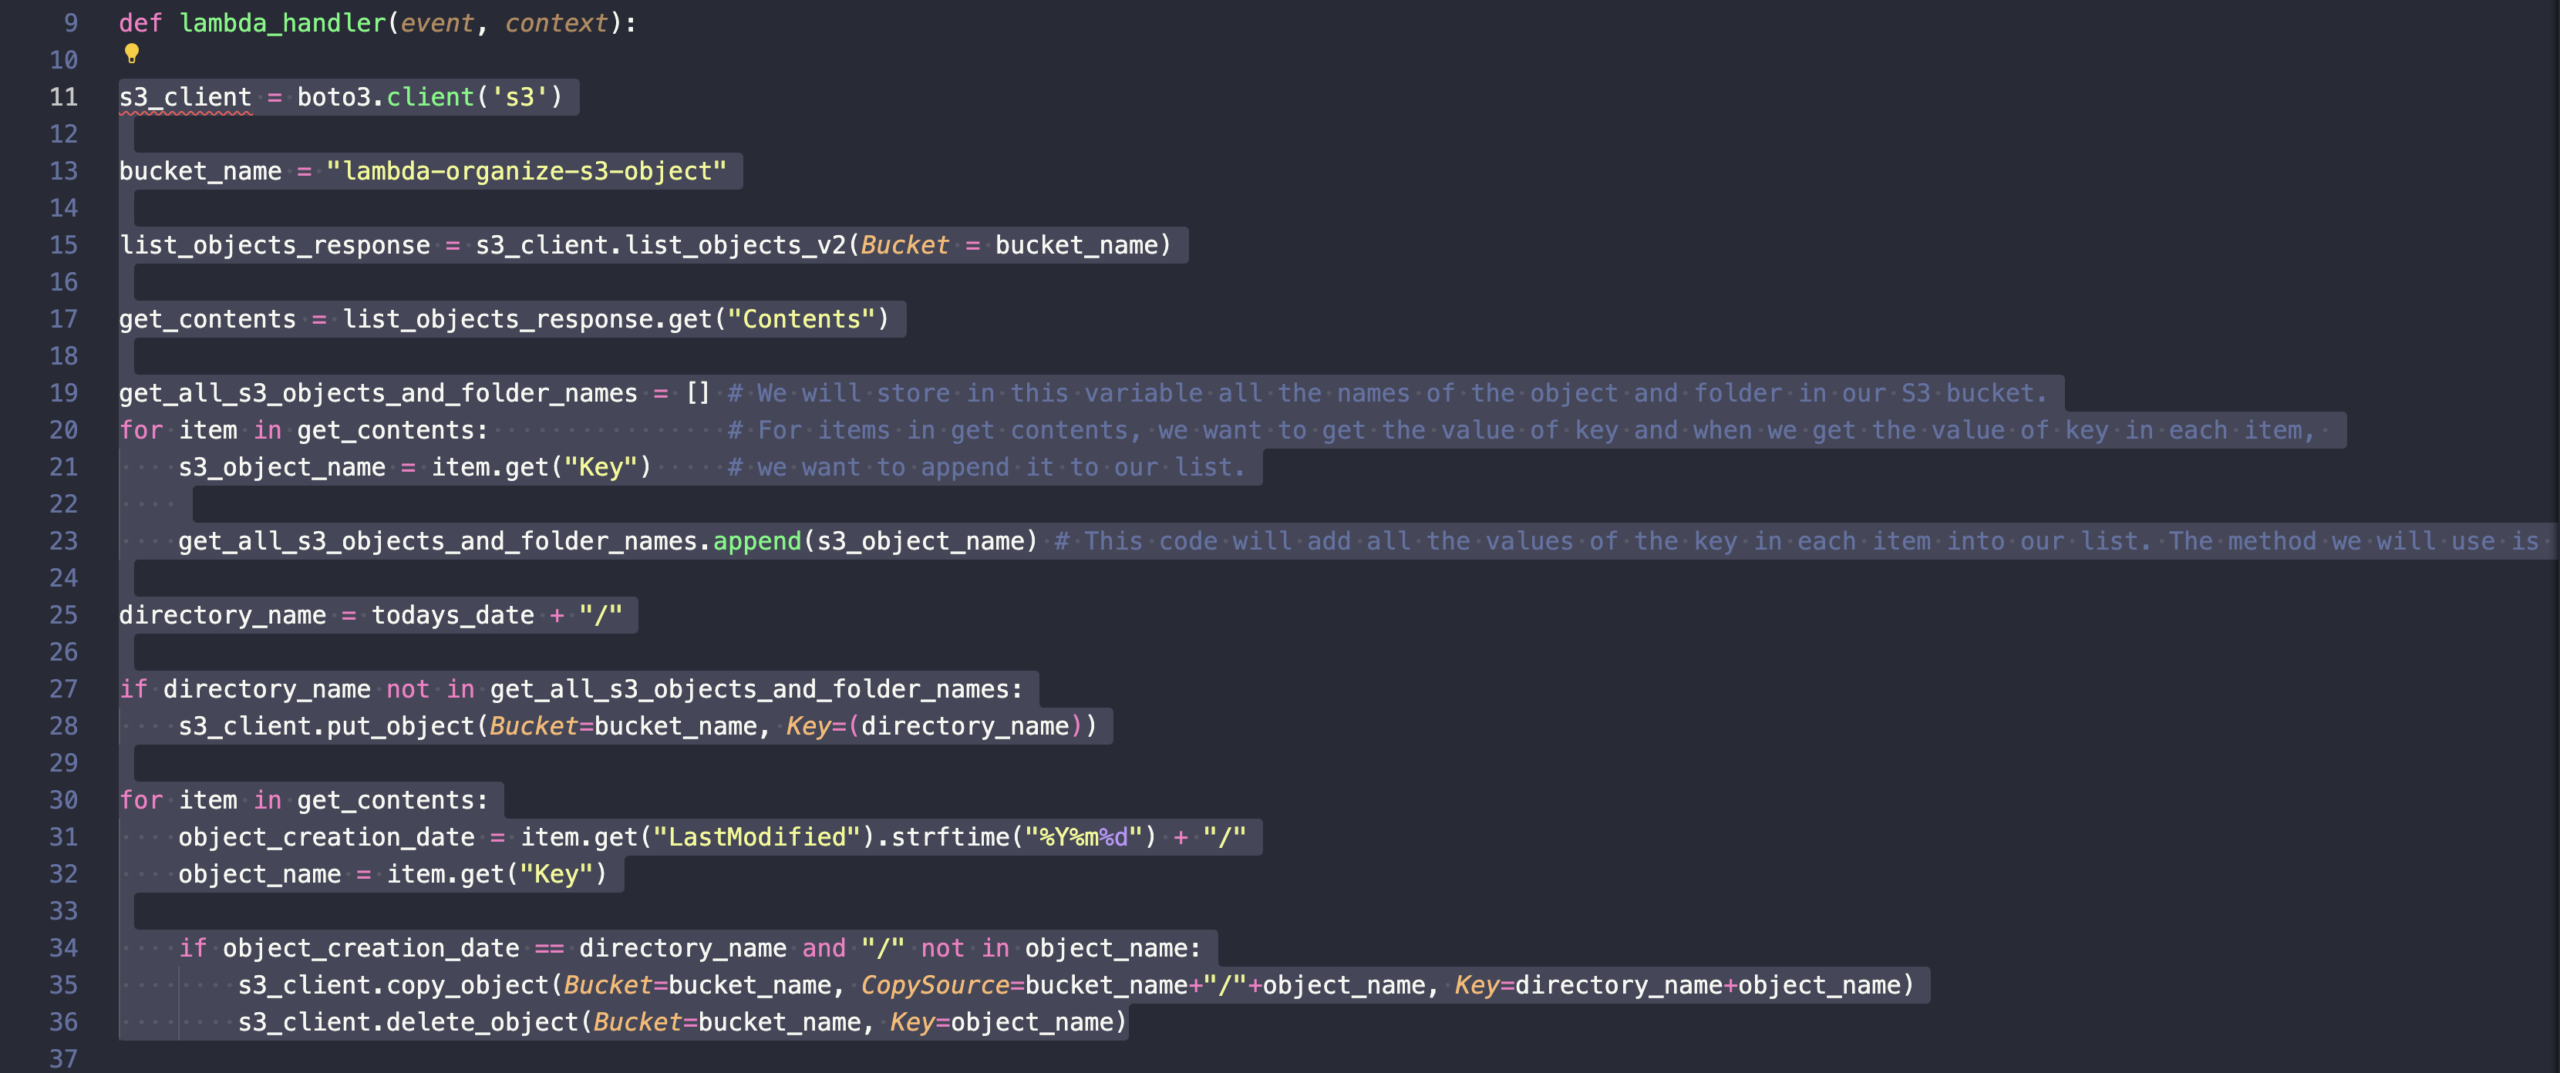
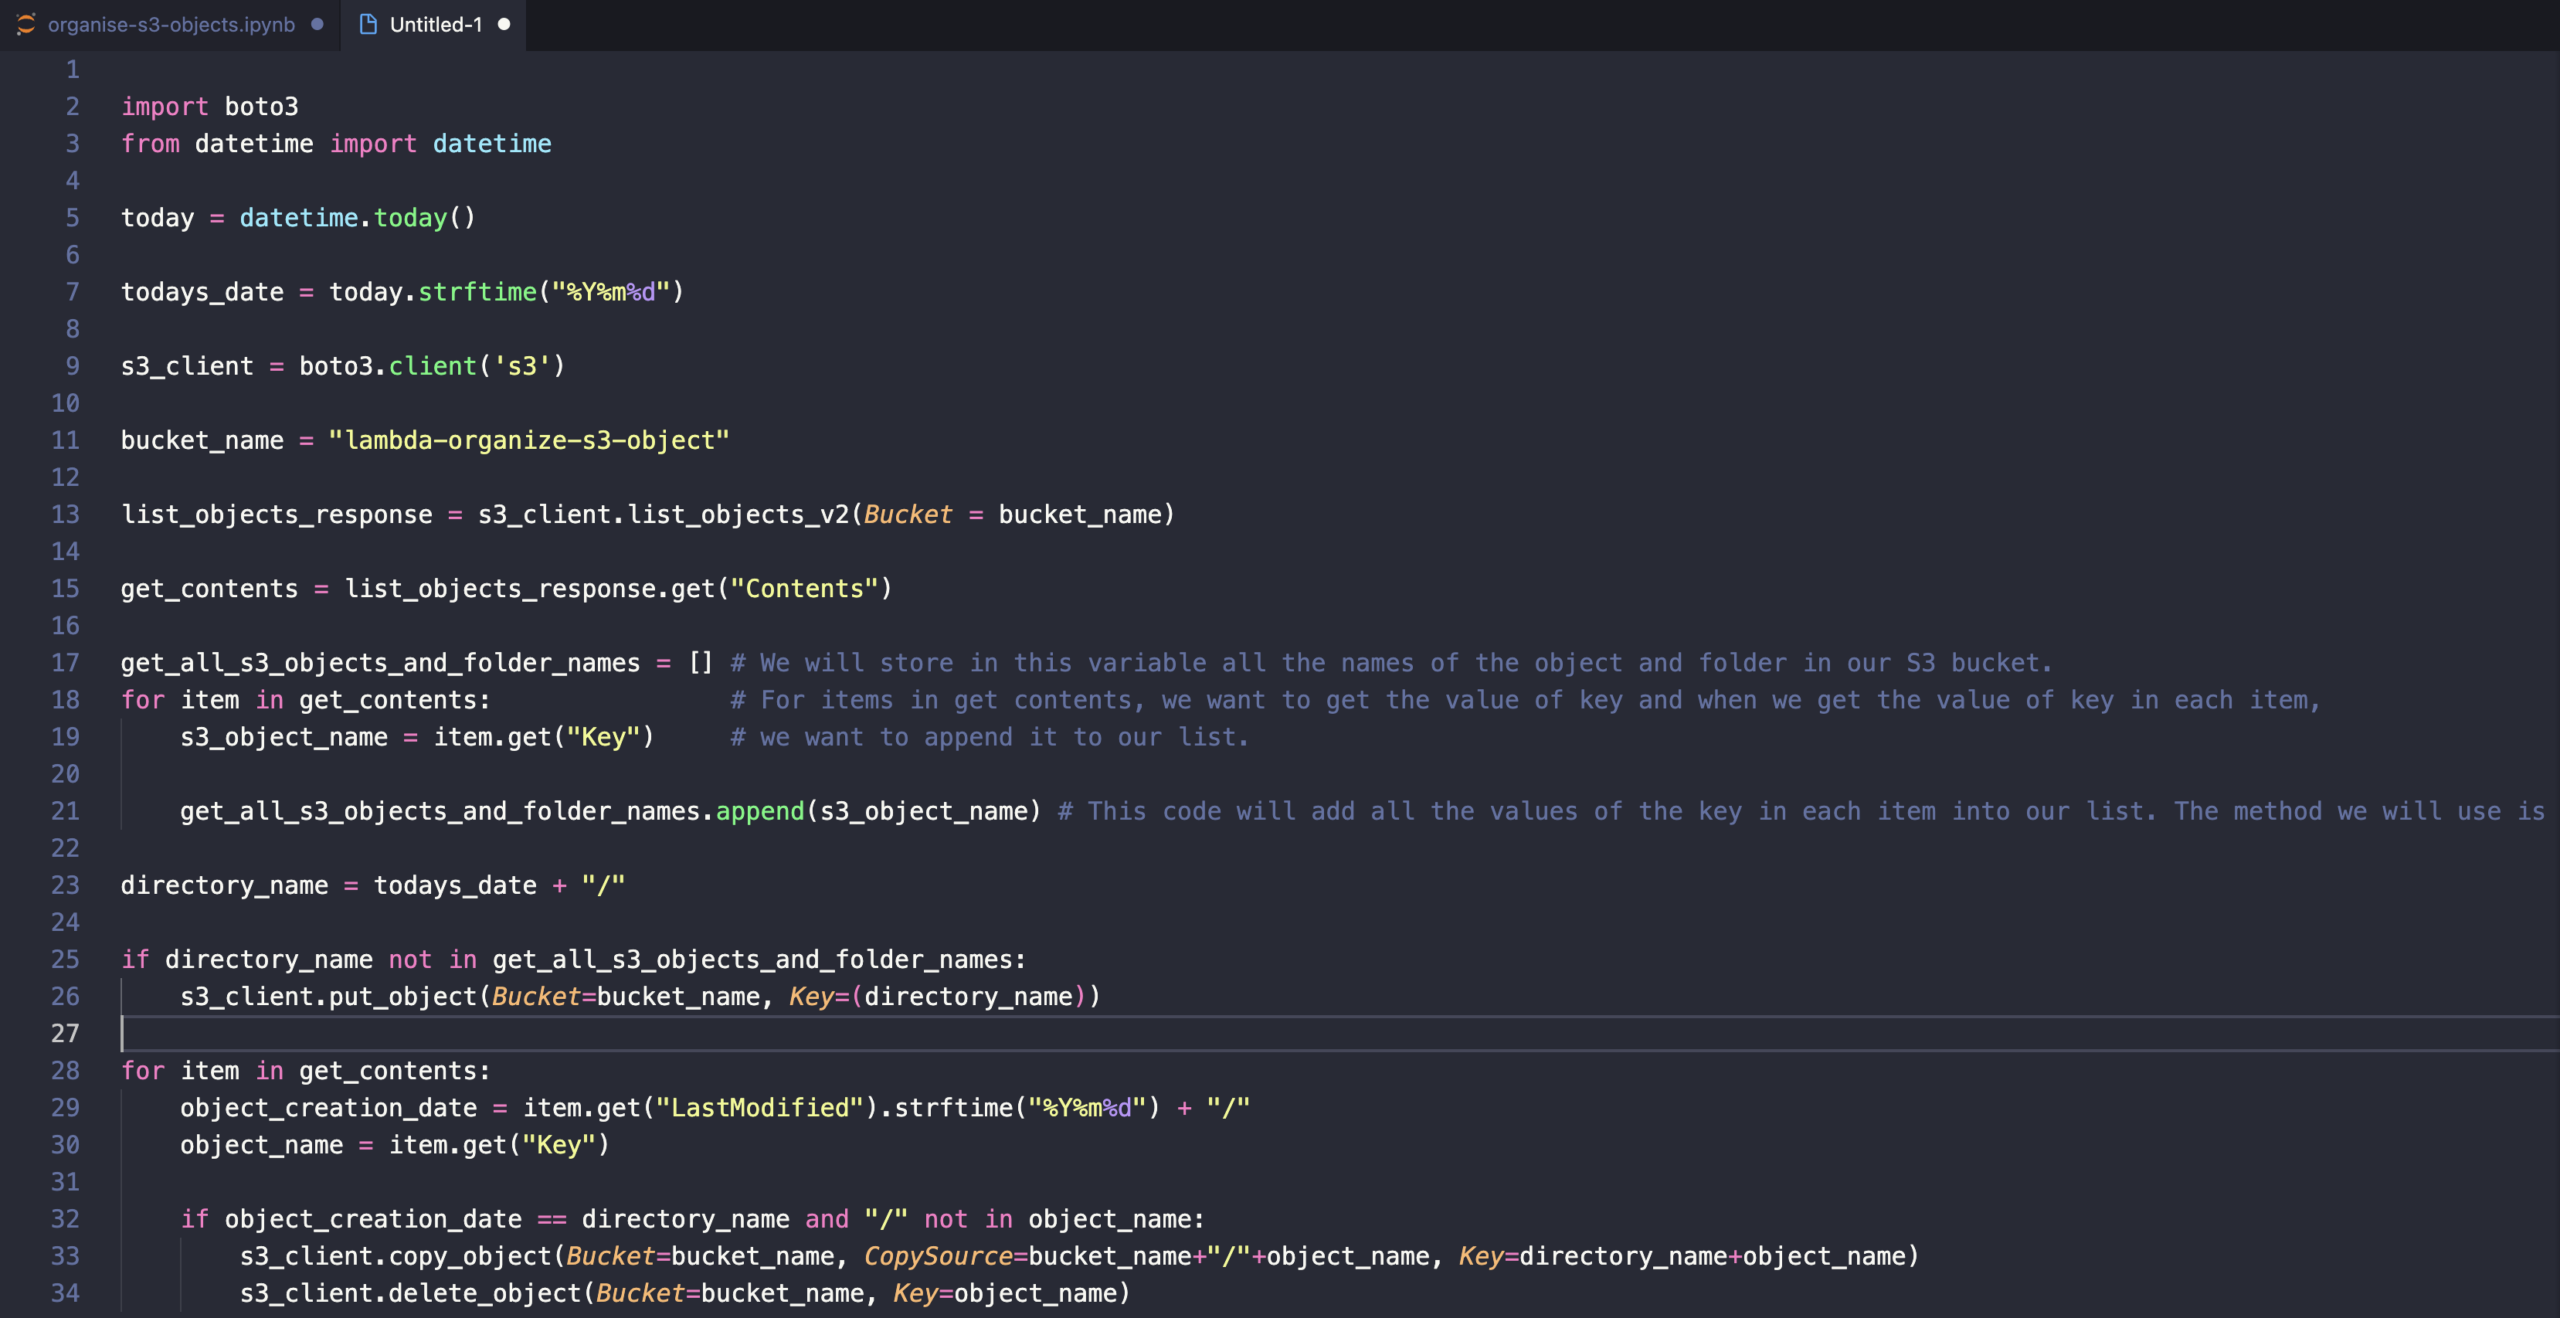
Here is the entire clean code:
import boto3
from datetime import datetime
today = datetime.today()
todays_date = today.strftime("%Y%m%d")
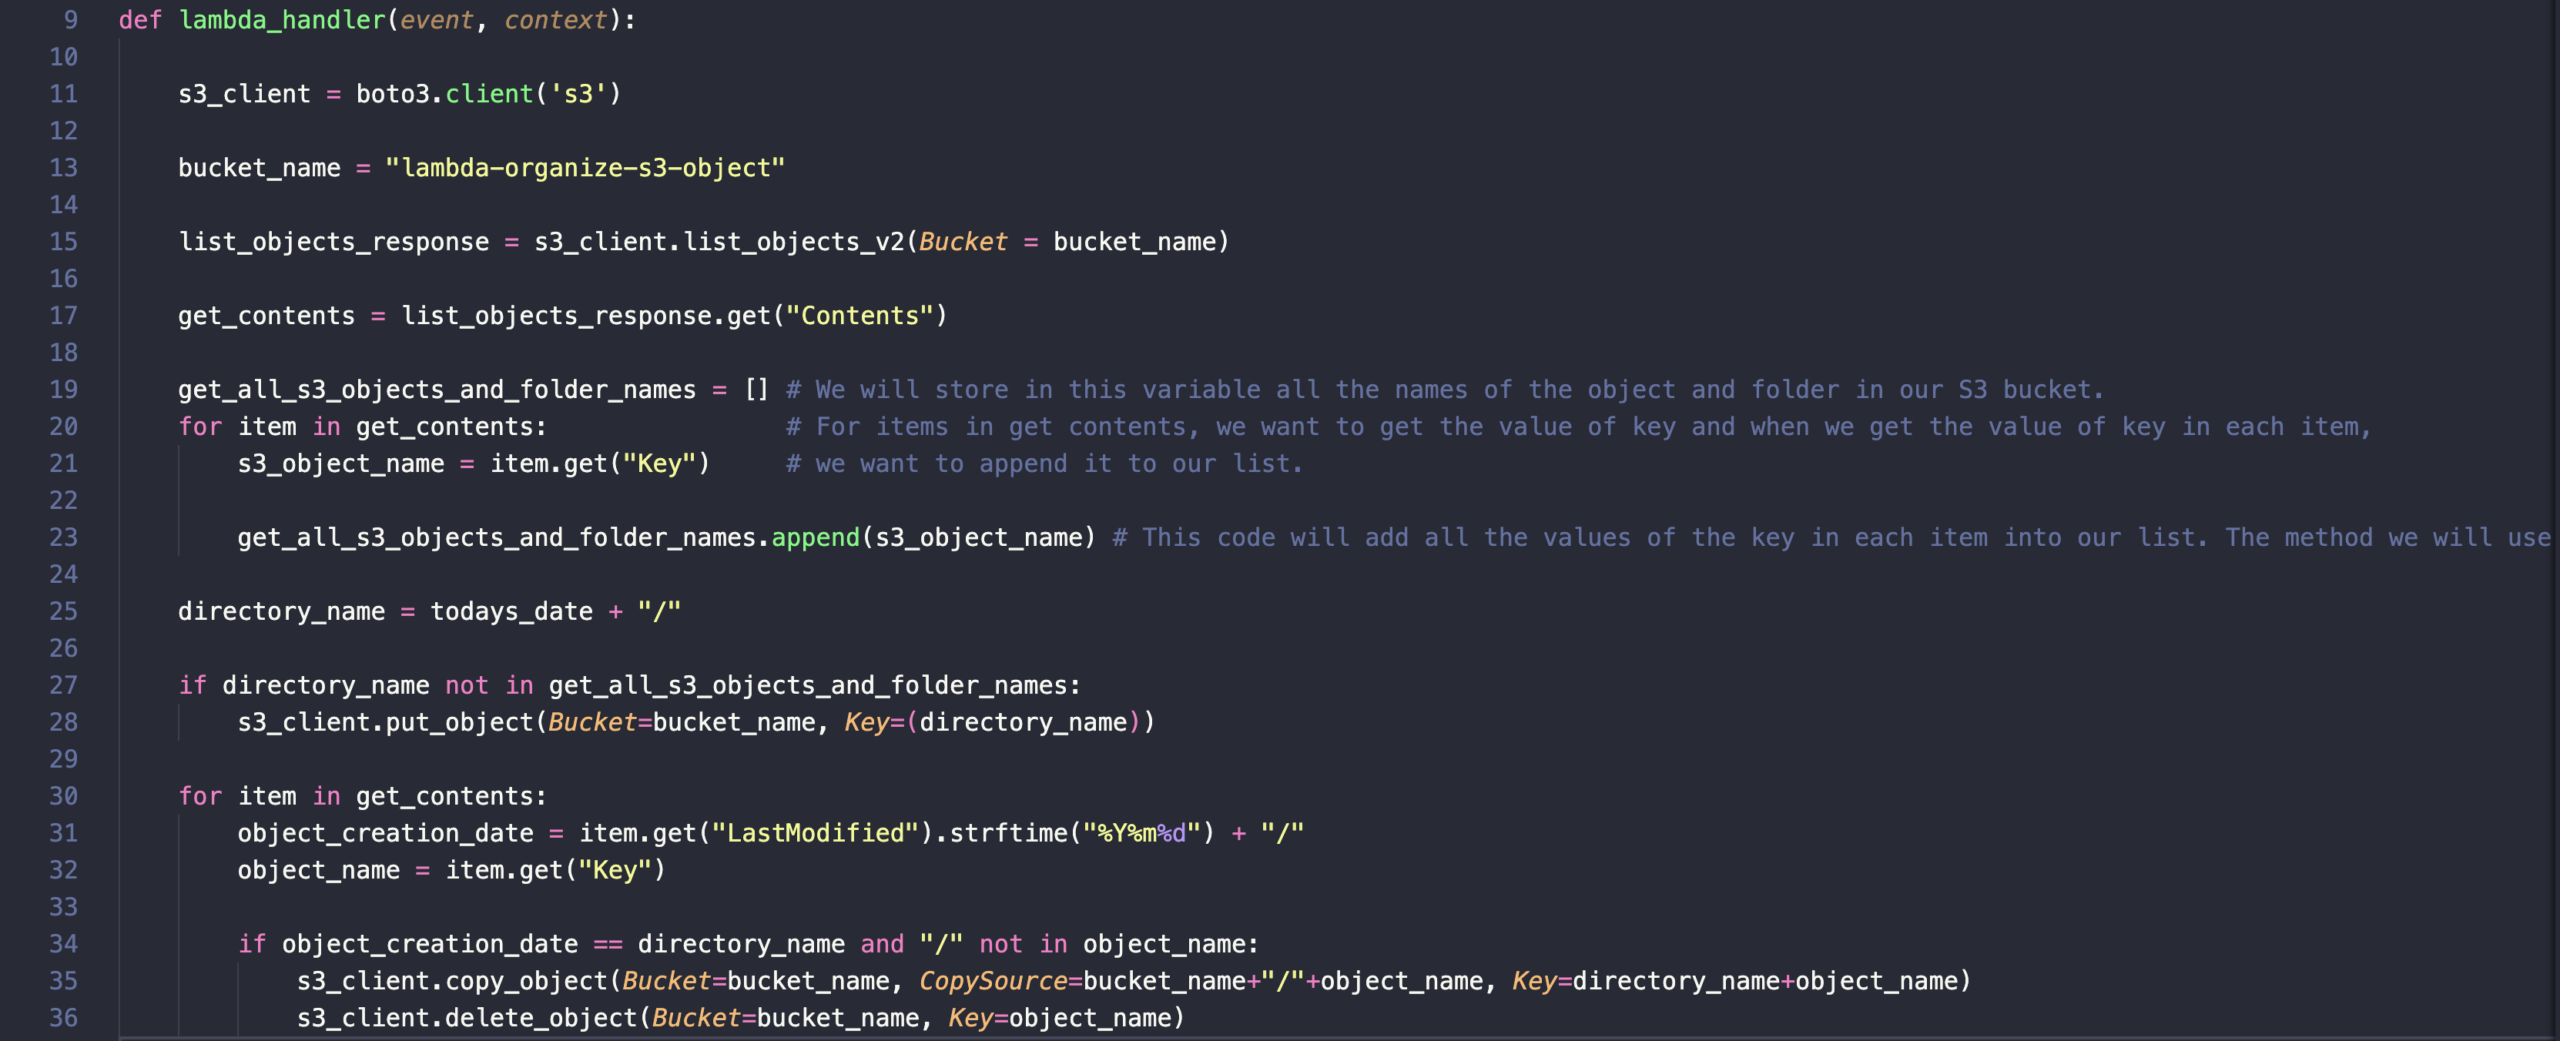
def lambda_handler(event, context):
s3_client = boto3.client('s3')
bucket_name = "pyla01-organize-s3-objects"
list_objects_response = s3_client.list_objects_v2(Bucket=bucket_name)
get_contents = list_objects_response.get("Contents")
get_all_s3_objects_and_folder_names = []
for item in get_contents:
s3_object_name = item.get("Key")
get_all_s3_objects_and_folder_names.append(s3_object_name)
directory_name = todays_date + "/"
if directory_name not in get_all_s3_objects_and_folder_names:
s3_client.put_object(Bucket=bucket_name, Key=(directory_name))
for item in get_contents:
object_creation_date = item.get("LastModified").strftime("%Y%m%d") + "/"
object_name = item.get("Key")
if object_creation_date == directory_name and "/" not in object_name:
s3_client.copy_object(Bucket=bucket_name, CopySource=bucket_name+"/"+object_name, Key=directory_name+object_name)
s3_client.delete_object(Bucket=bucket_name, Key=object_name)Finally, make sure to save the file in Python format.
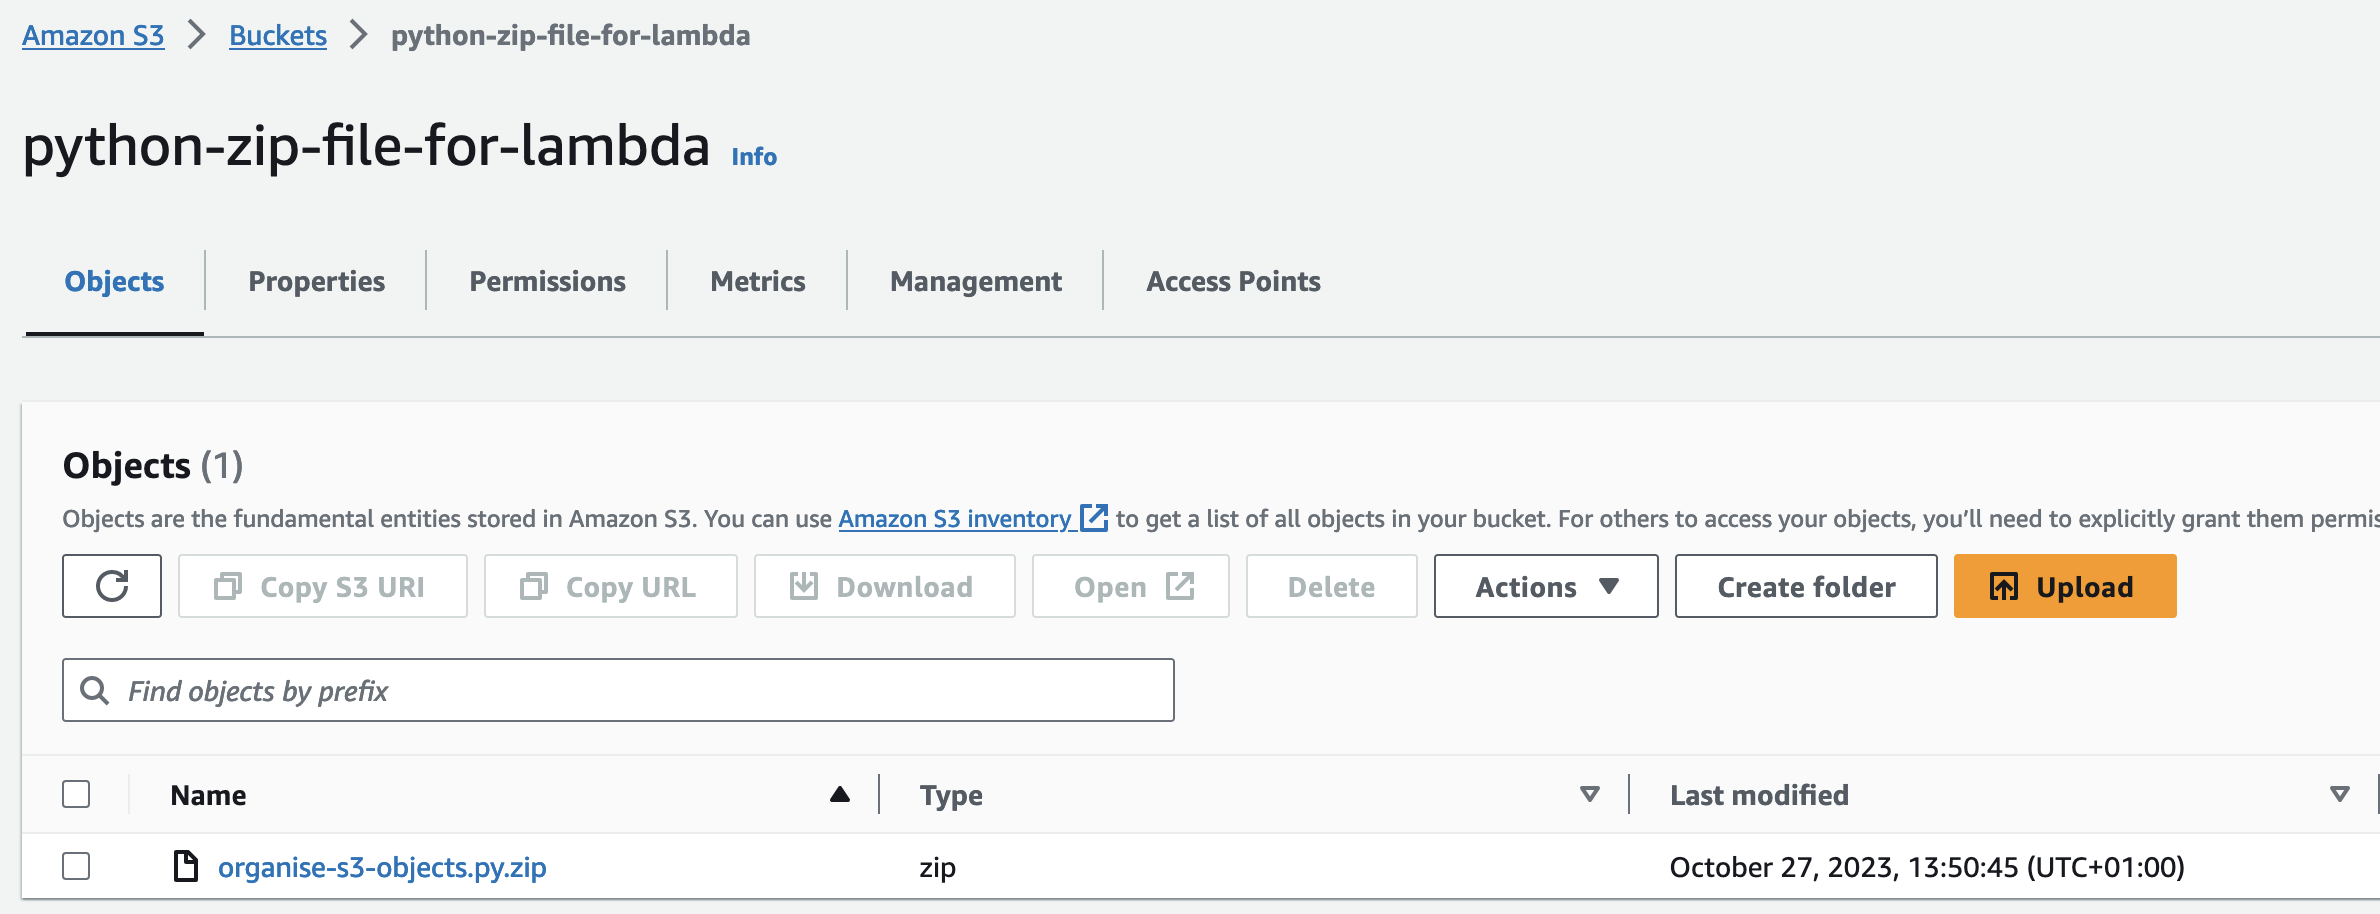
We will add our Python script into a zip file, and afterwards, we will upload it into an S3 bucket so Lambda can pull the code from that S3 bucket.
Go to the directory on your computer where you saved your Python file, and zip it.


Let’s create an S3 bucket and upload the zip file which will store our Python file for Lambda.
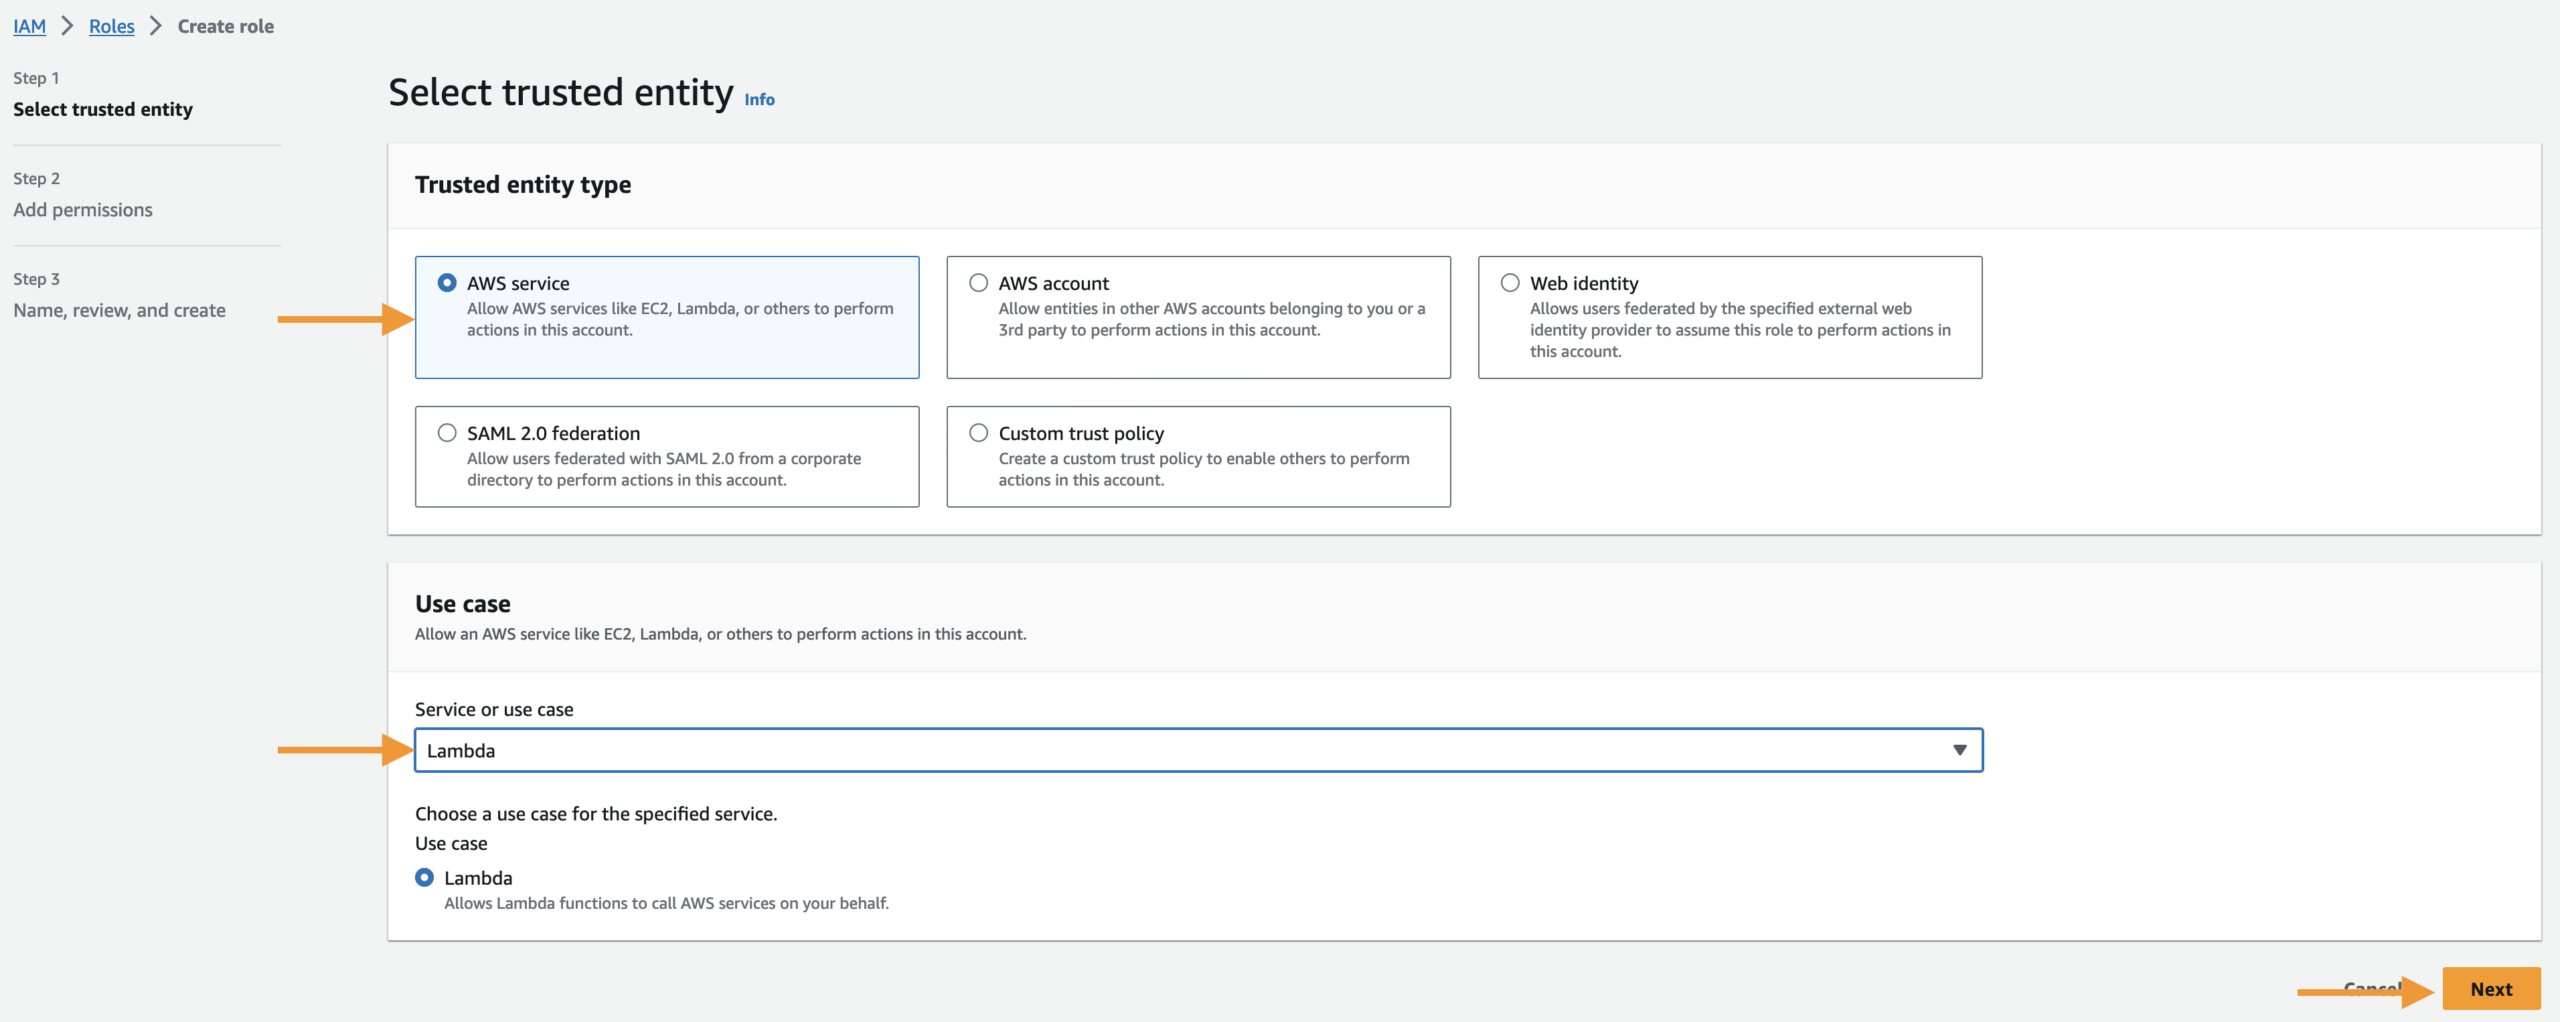
We will set up an IAM role for Lambda to trigger our code.


Let’s create the Lambda function for our project.

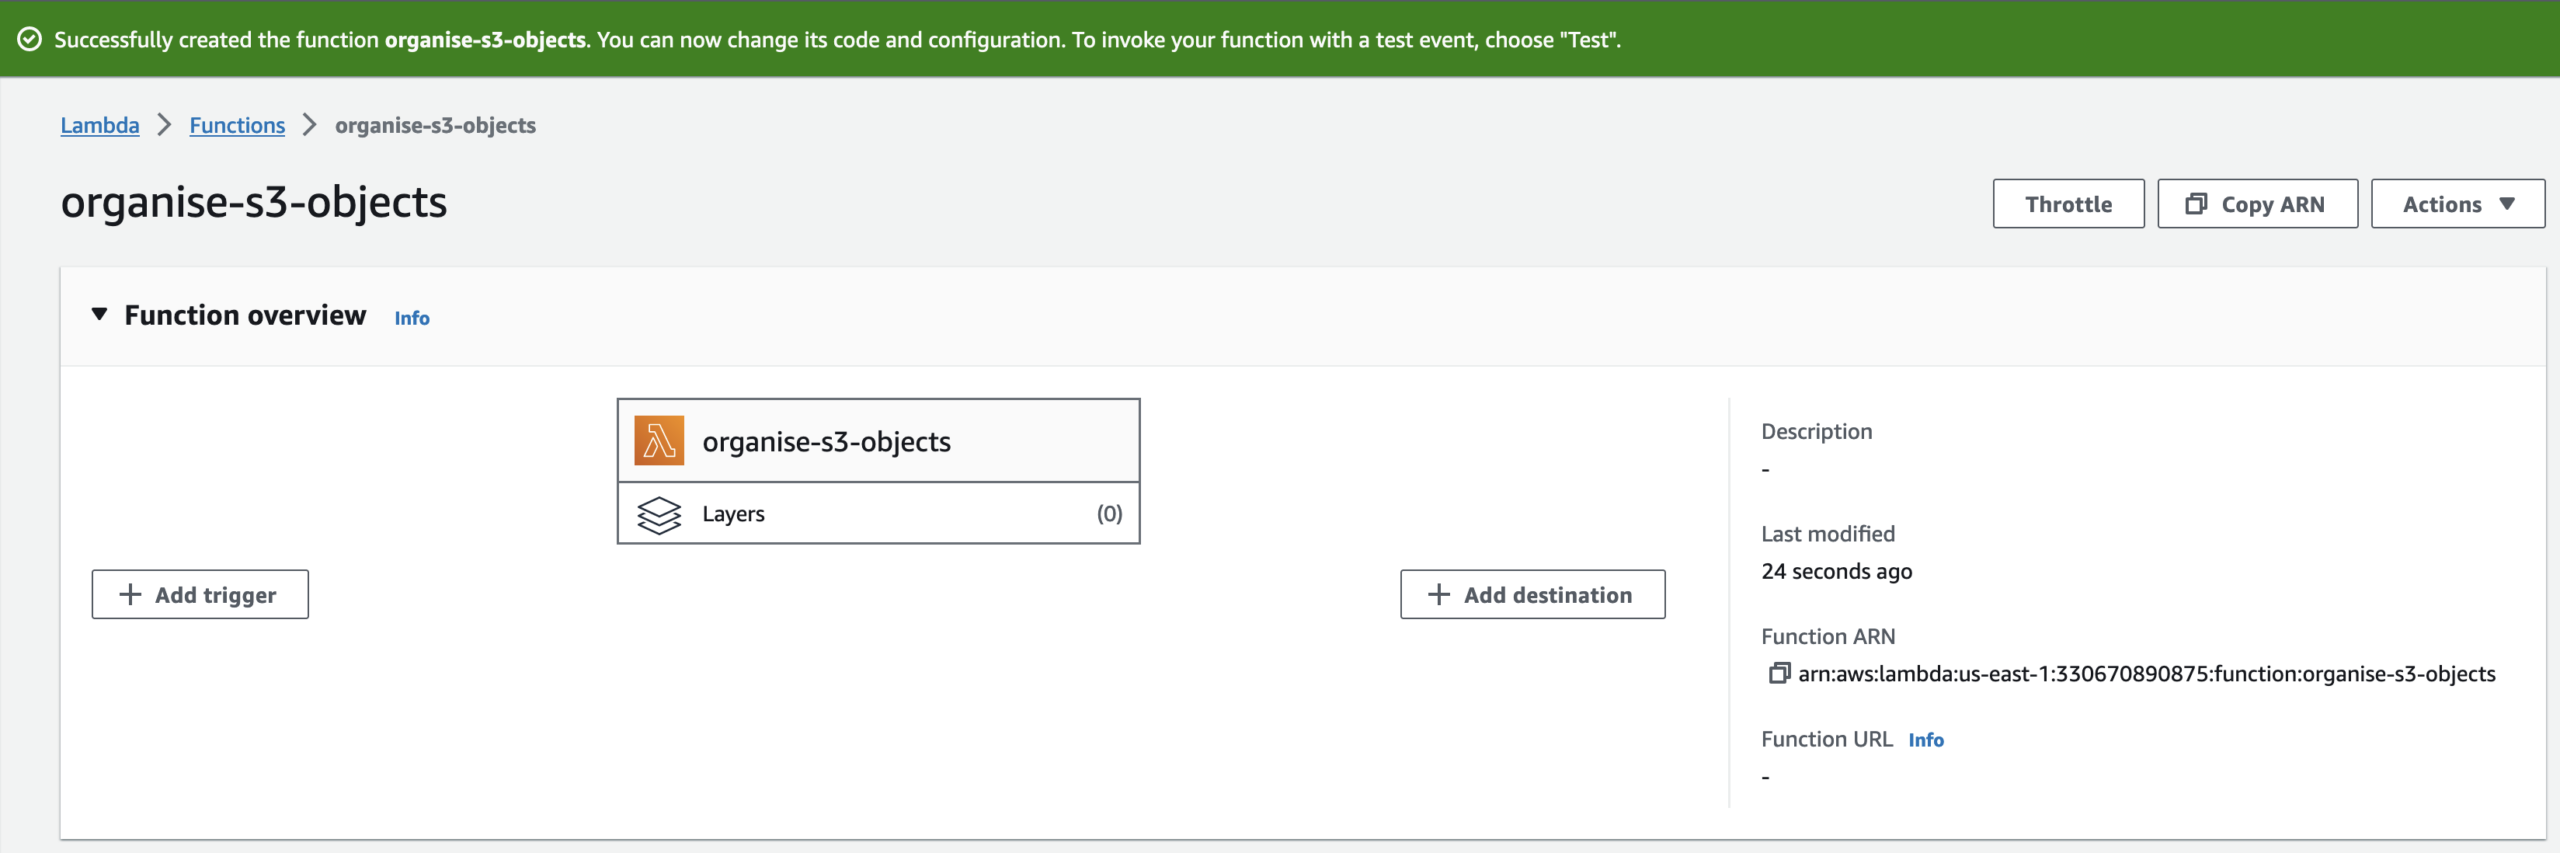
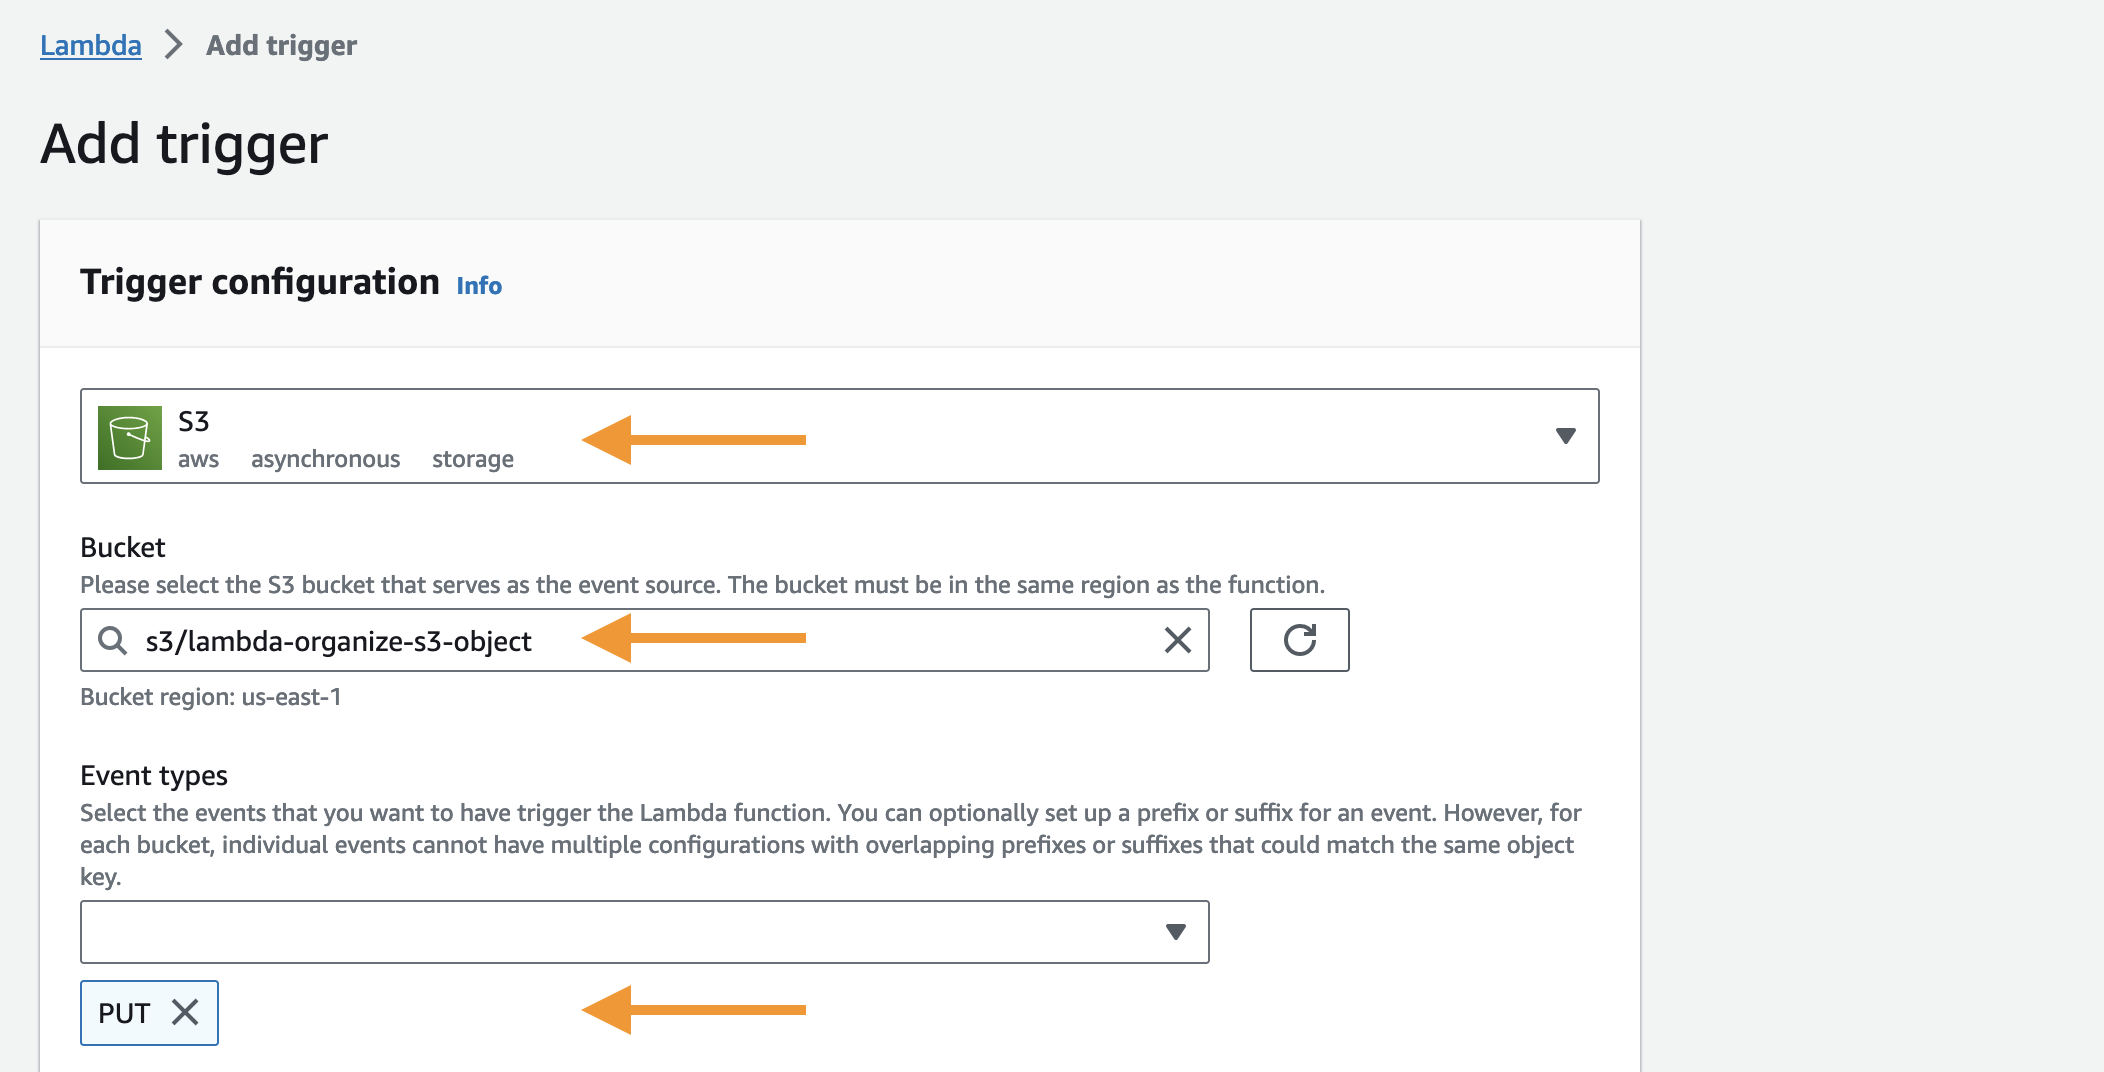
Add an S3 trigger to the Lambda function
Let’s add a trigger to our Lambda function. Specifically, we will add an S3 trigger that will determine the event that will trigger our Lambda function. To begin, let’s navigate to the page of the “organise-s3-objects” Lambda function that we just created.
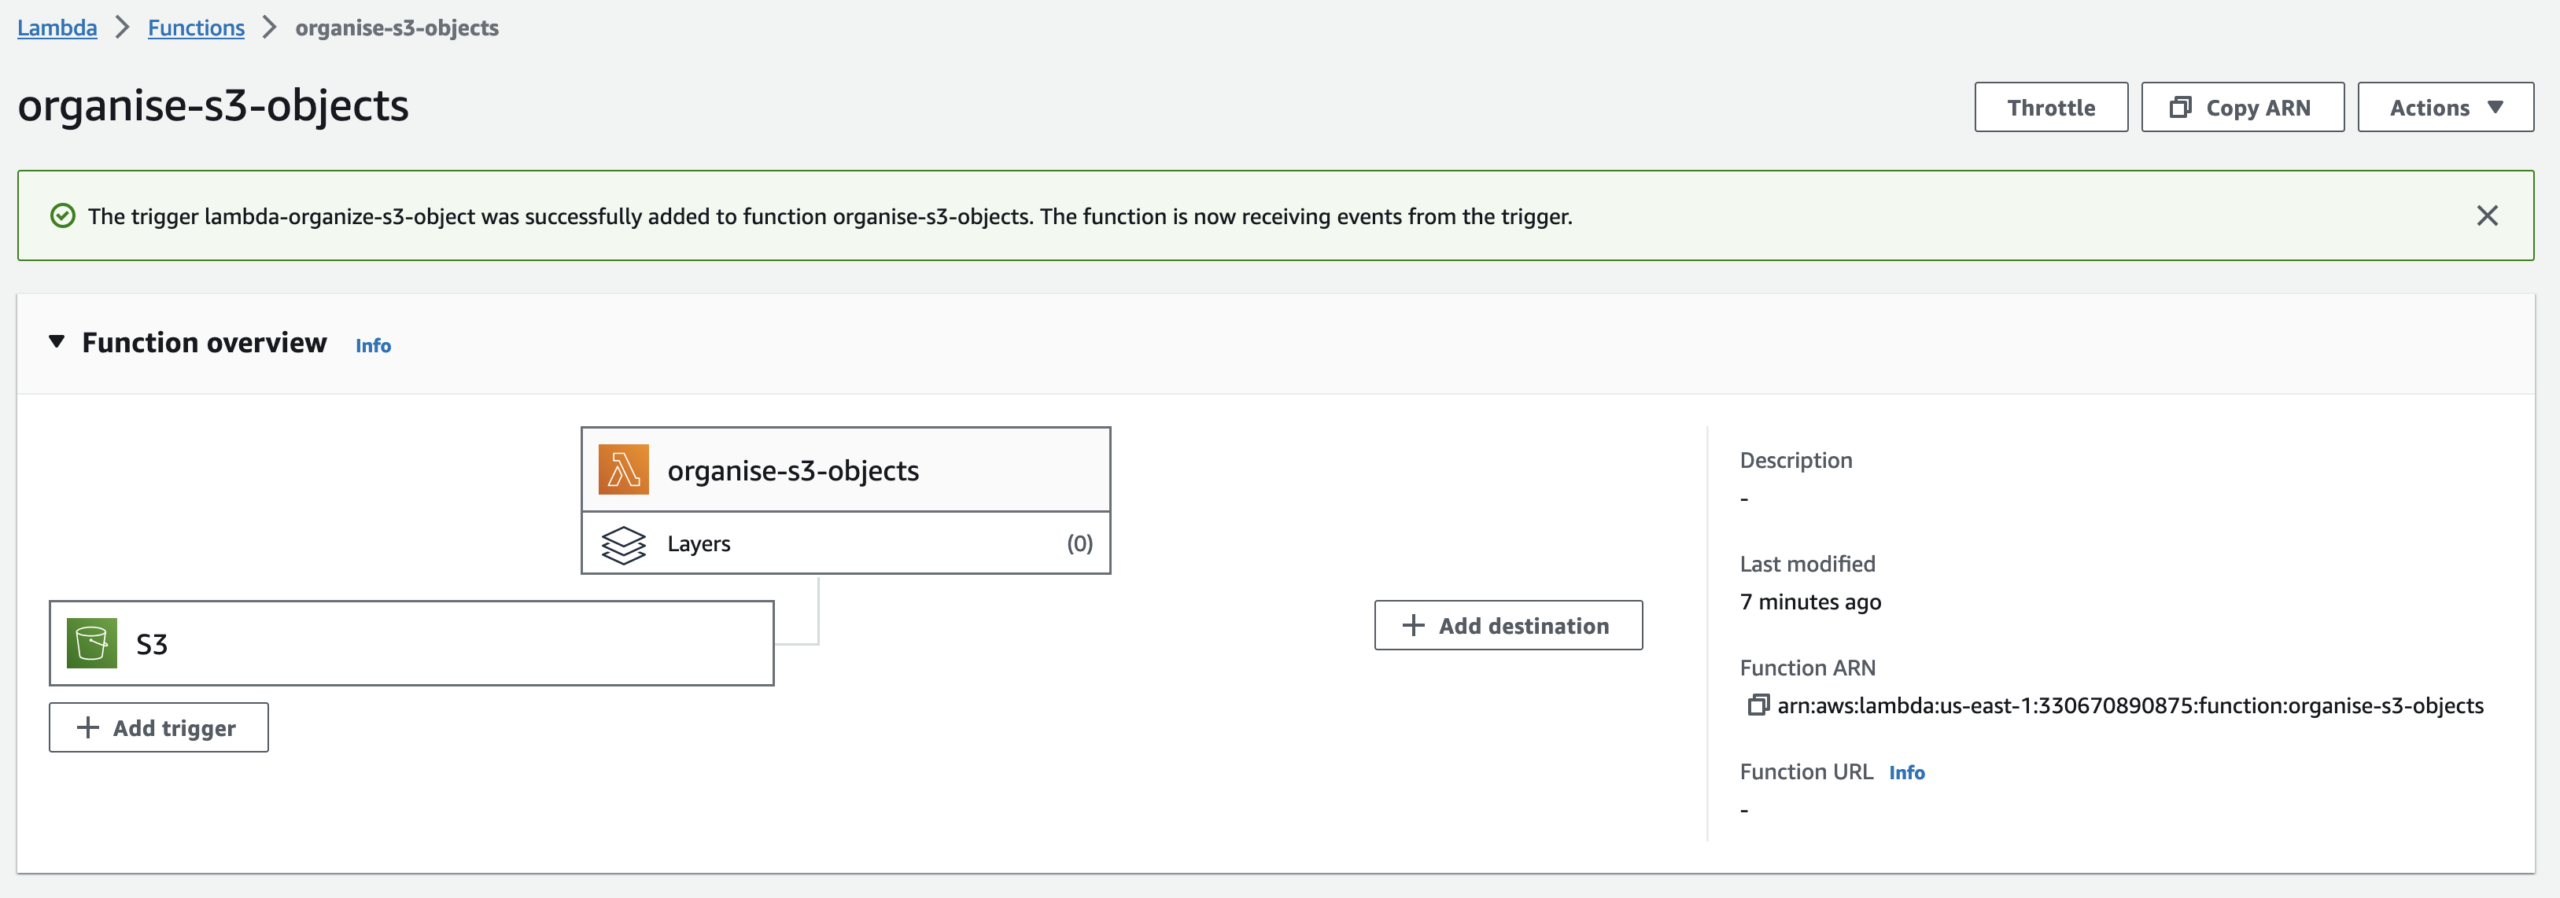
We have successfully added an S3 trigger to our Lambda function.
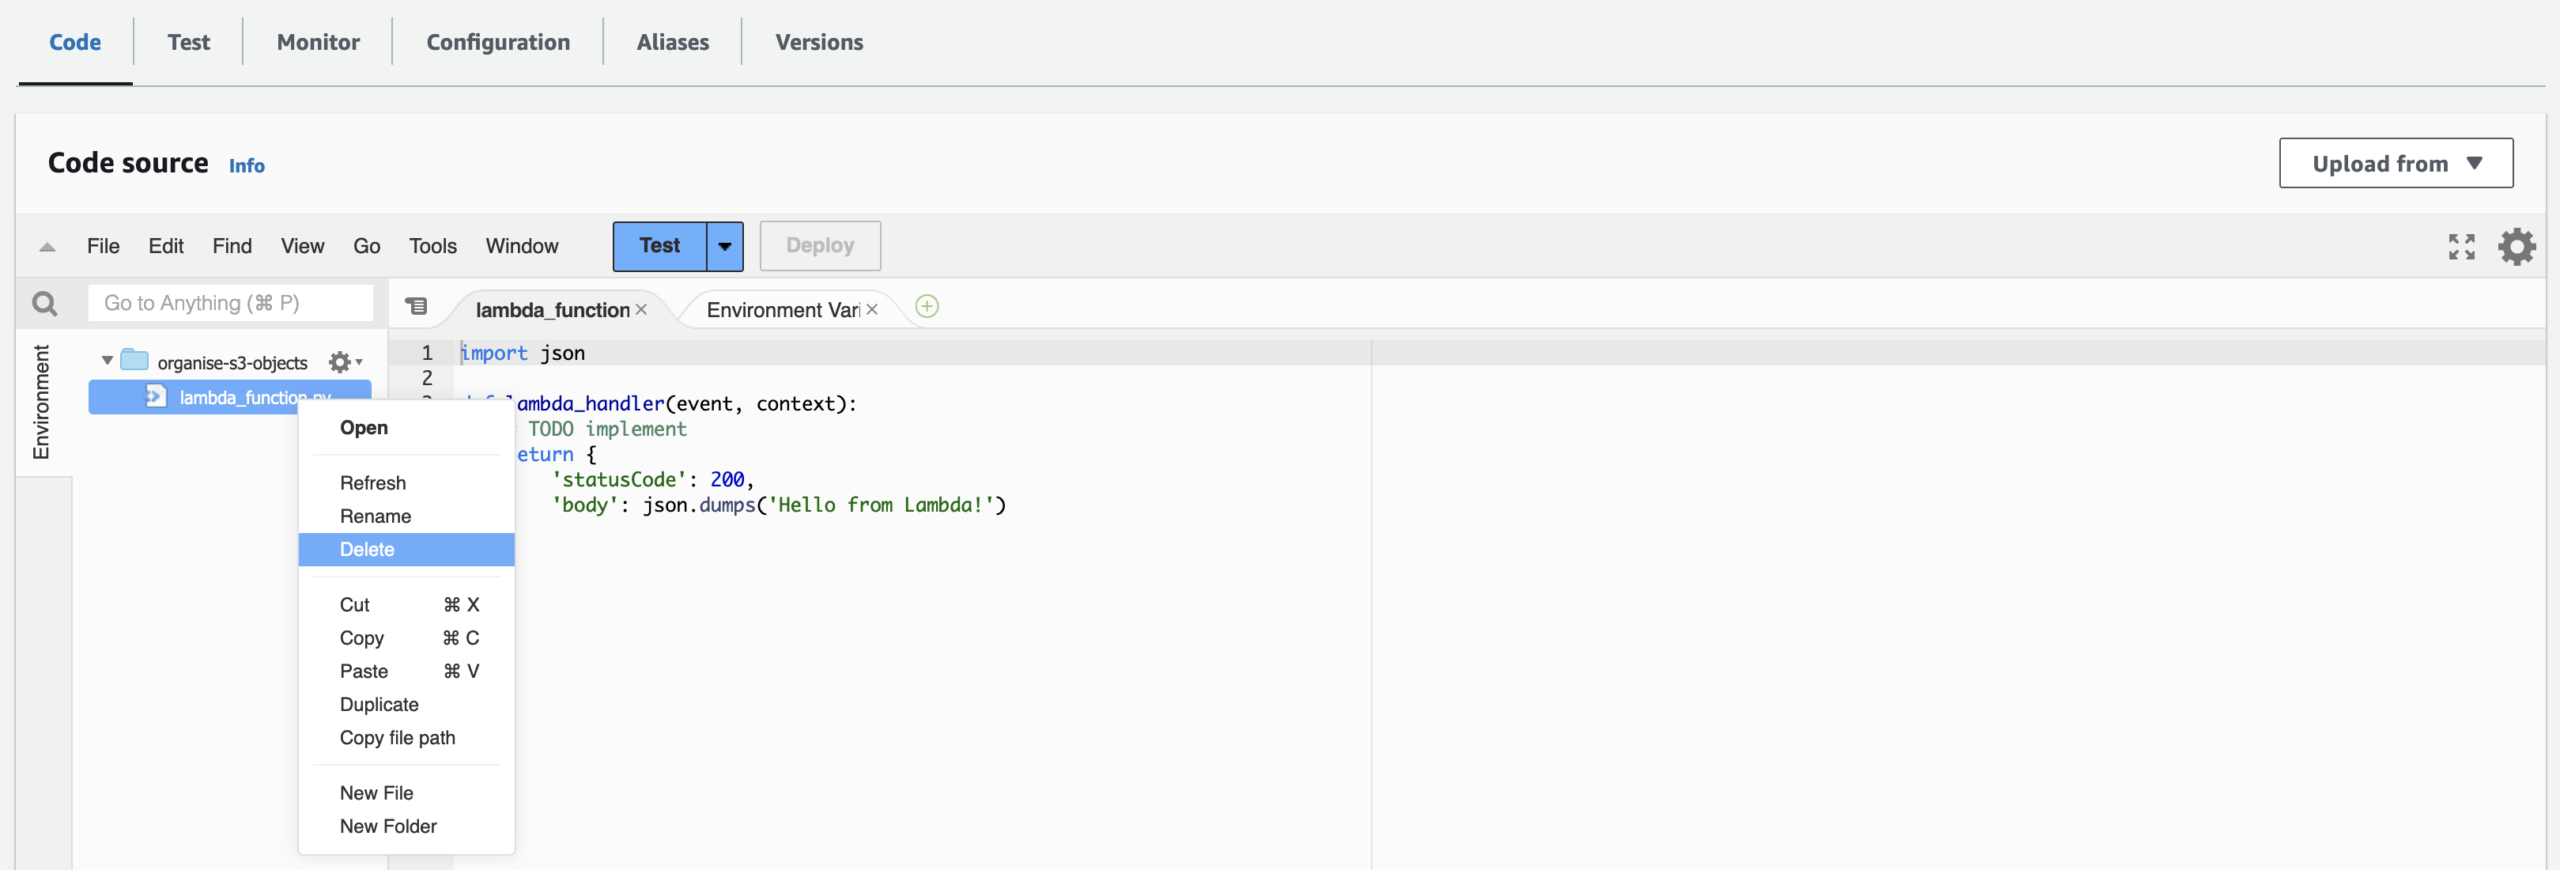
We will upload our Python code in the Lambda function. But before we proceed must delete this code.
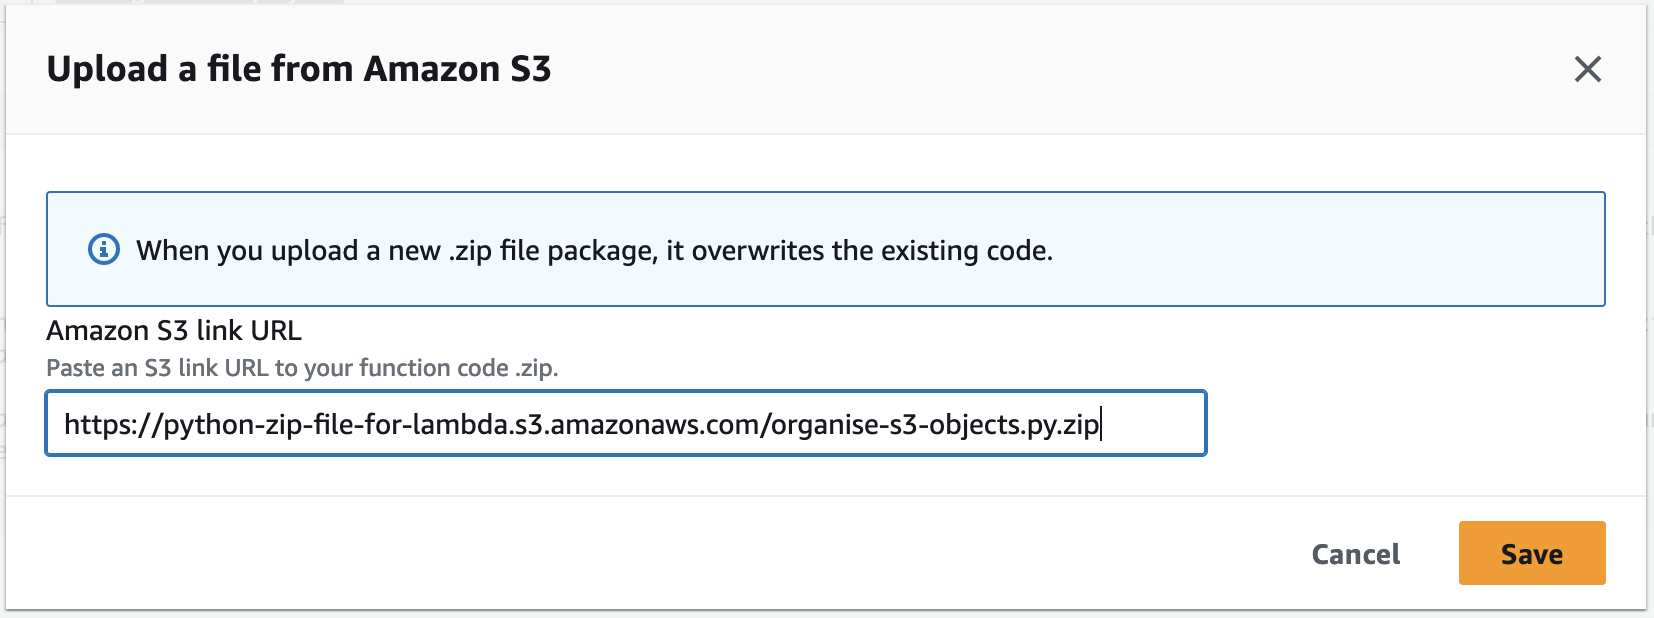
Click Upload from then select Amazon S3 location. Get the Object URL of the organise-s3-objects.zip and paste it here. You can find this in the S3 bucket where we uploaded the zip file to. Click Save.

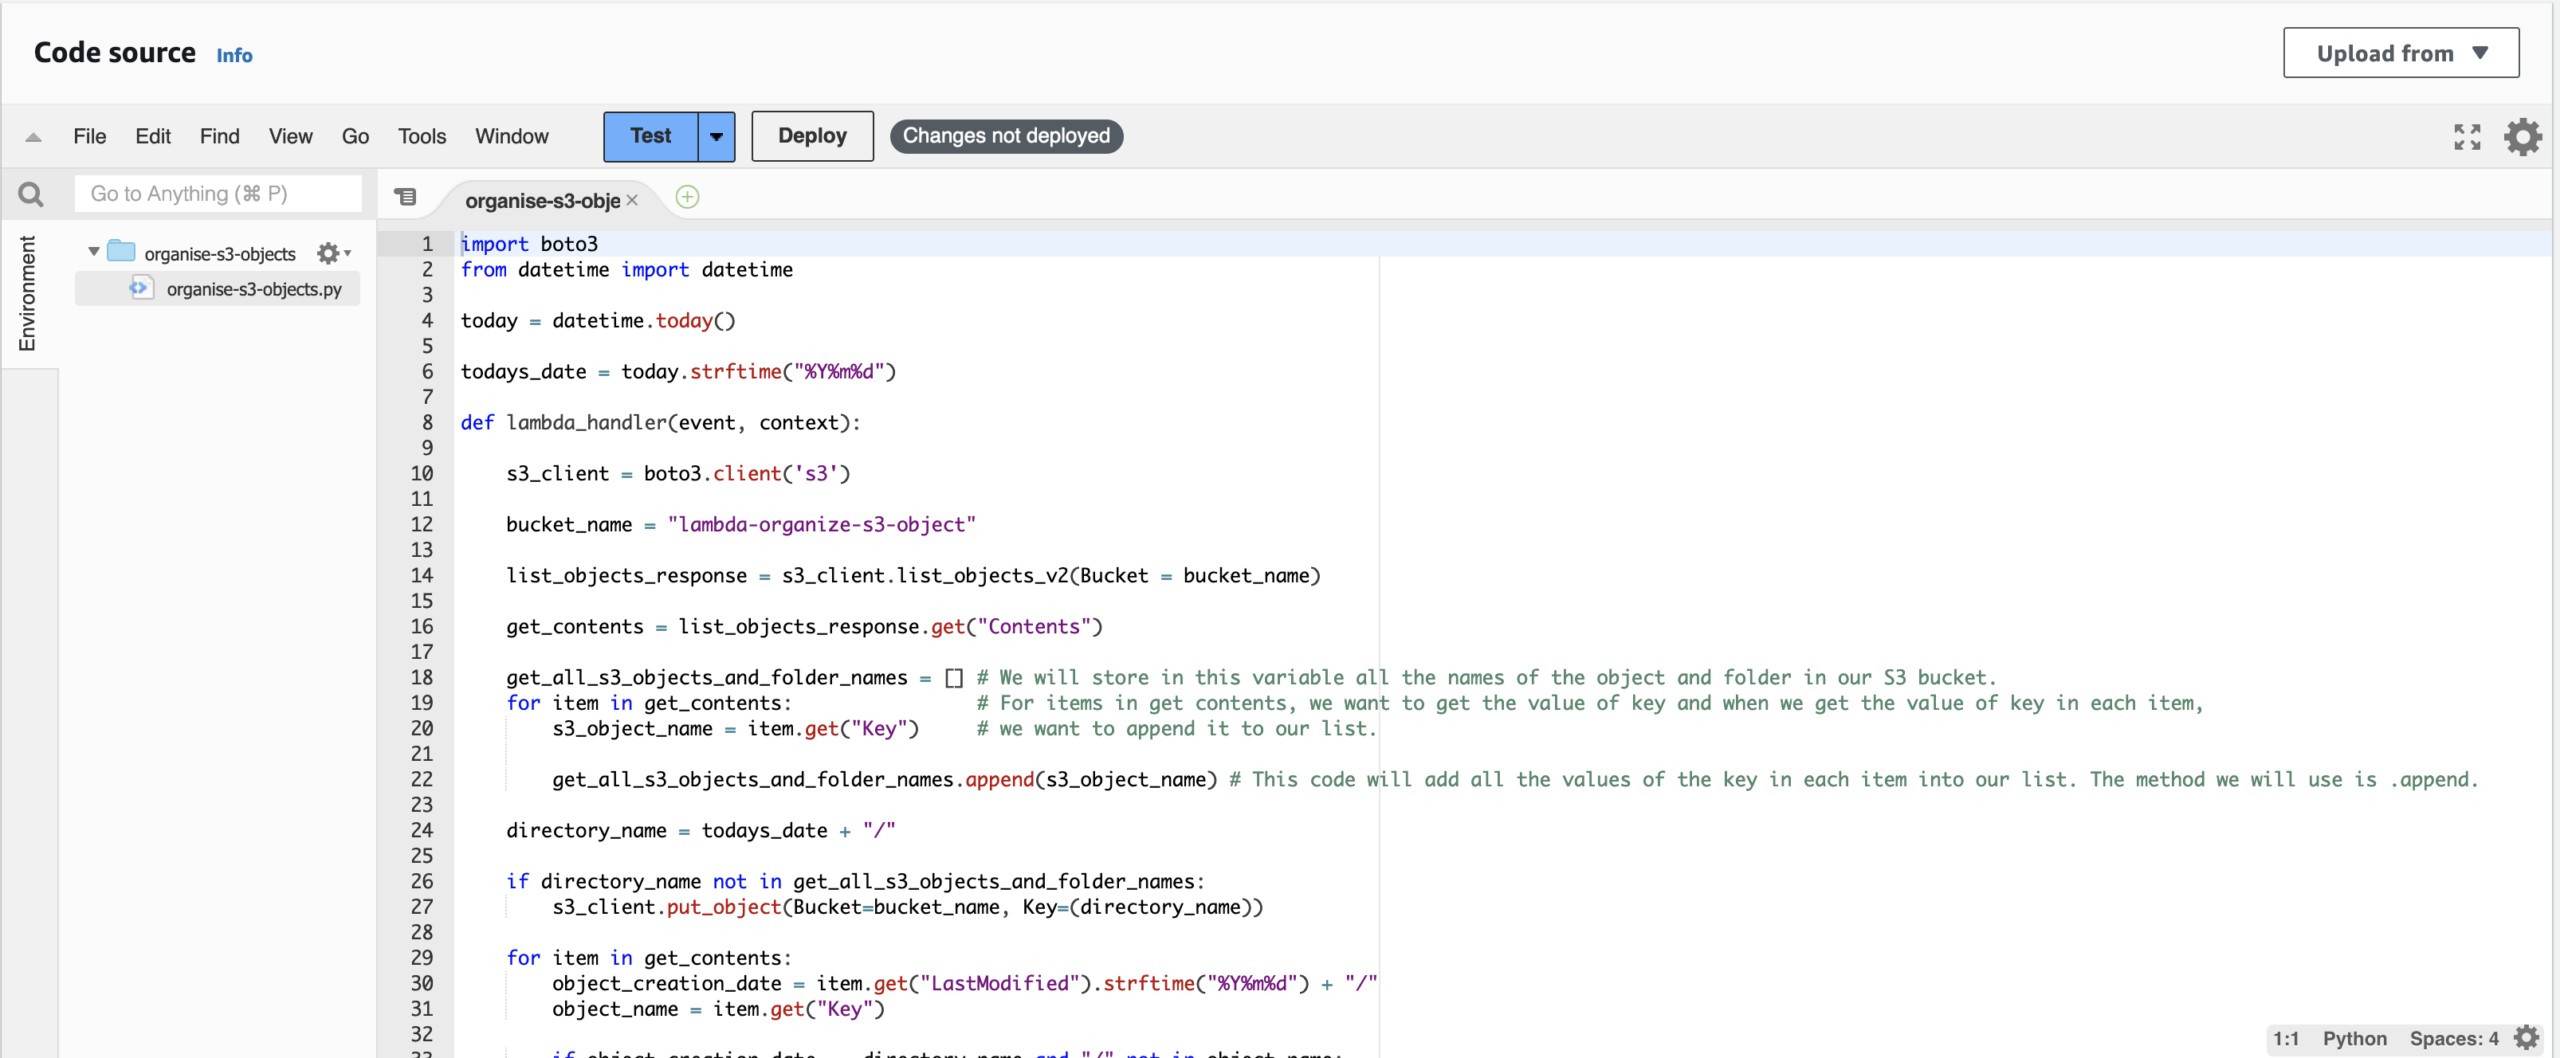
We’ve successfully uploaded the Python code in the Lambda function.
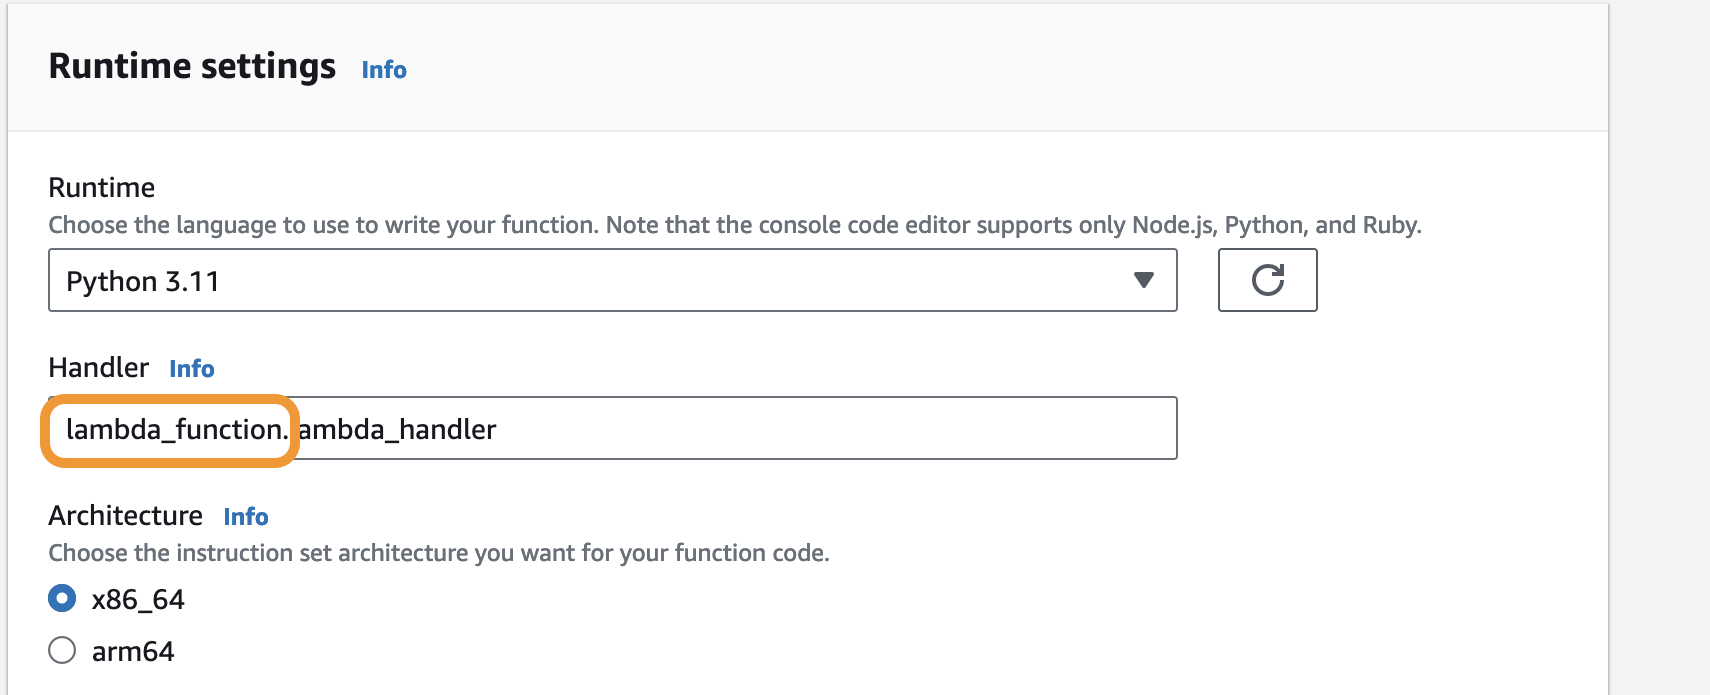
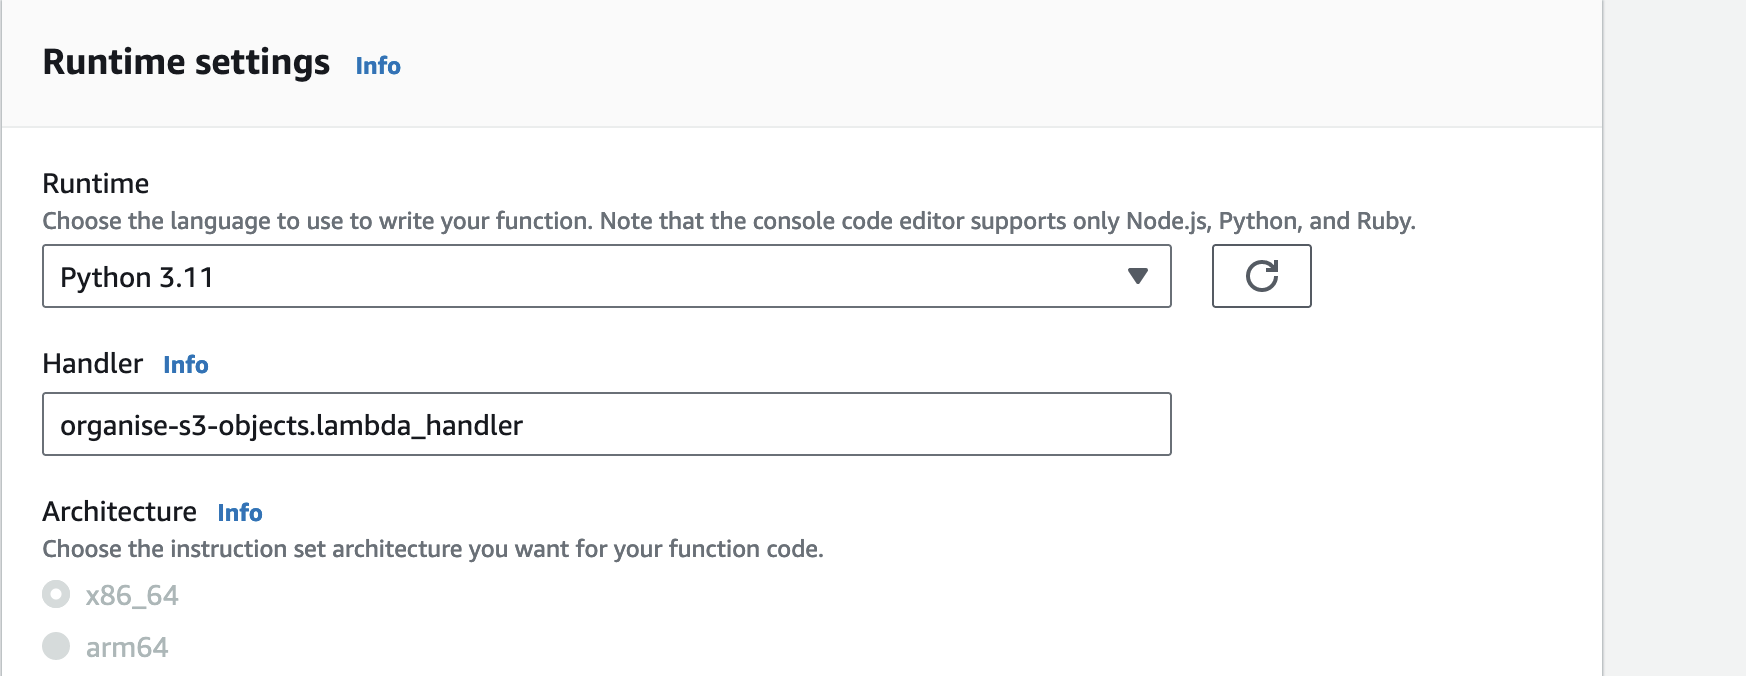
We will update our handler settings and create a test event for our Lambda functions.
First, let’s update our handler settings.


Let’s create a test event. This allows us to test our Python code in the Lambda console.
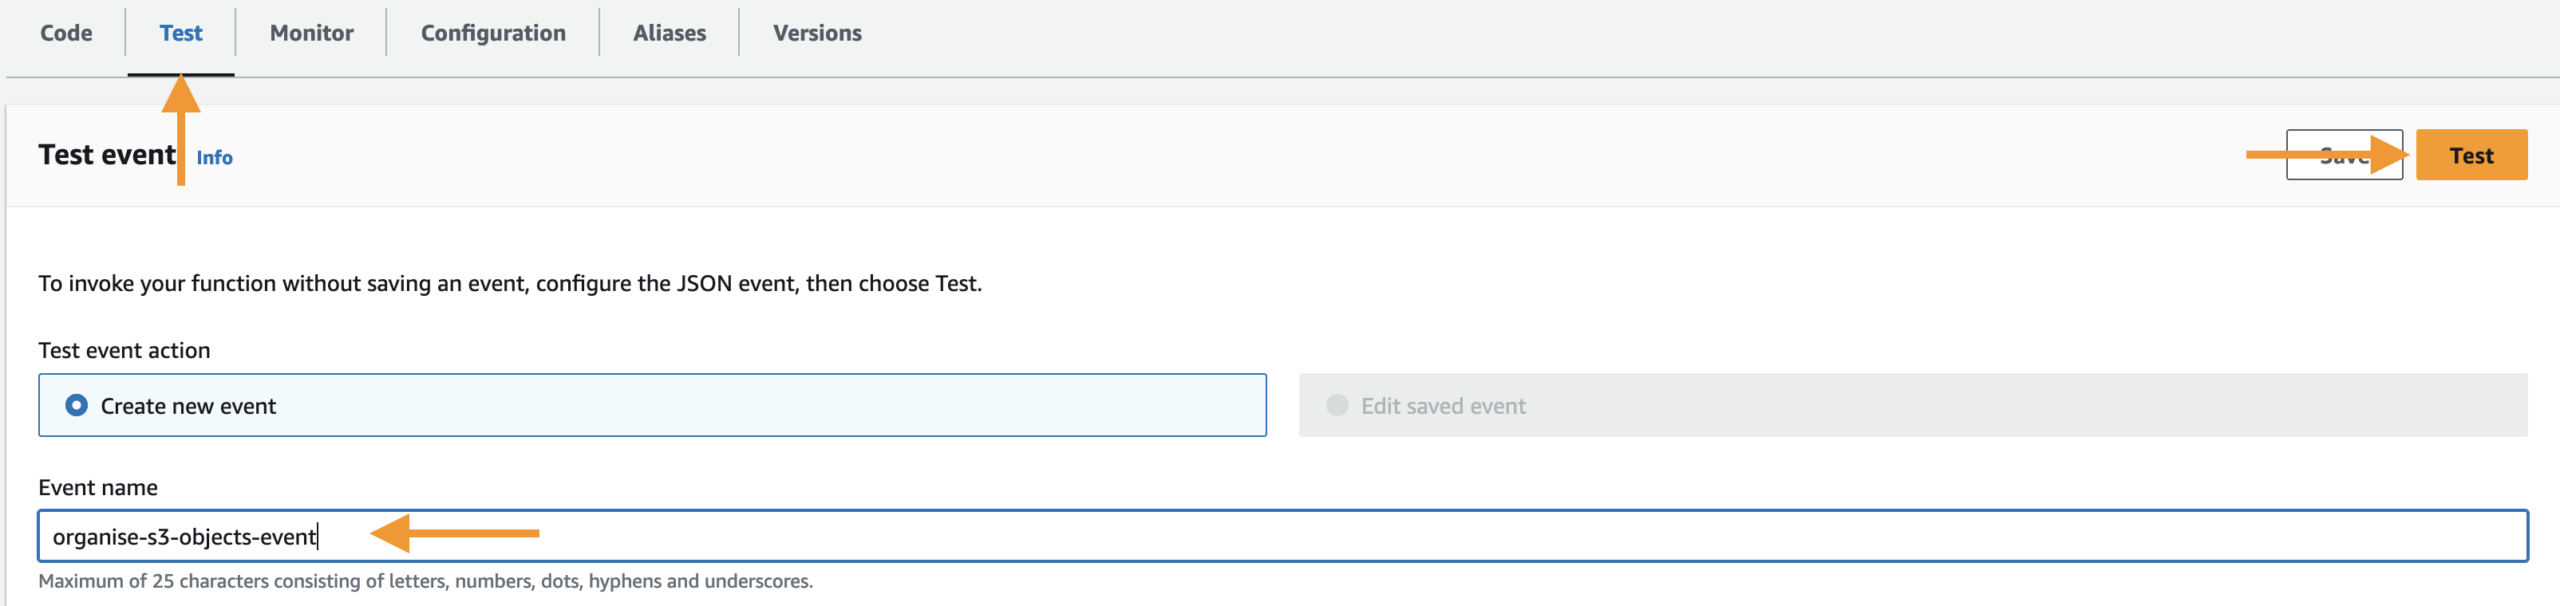
Under the Test tab, provide your Event name, then click Save, then Test.
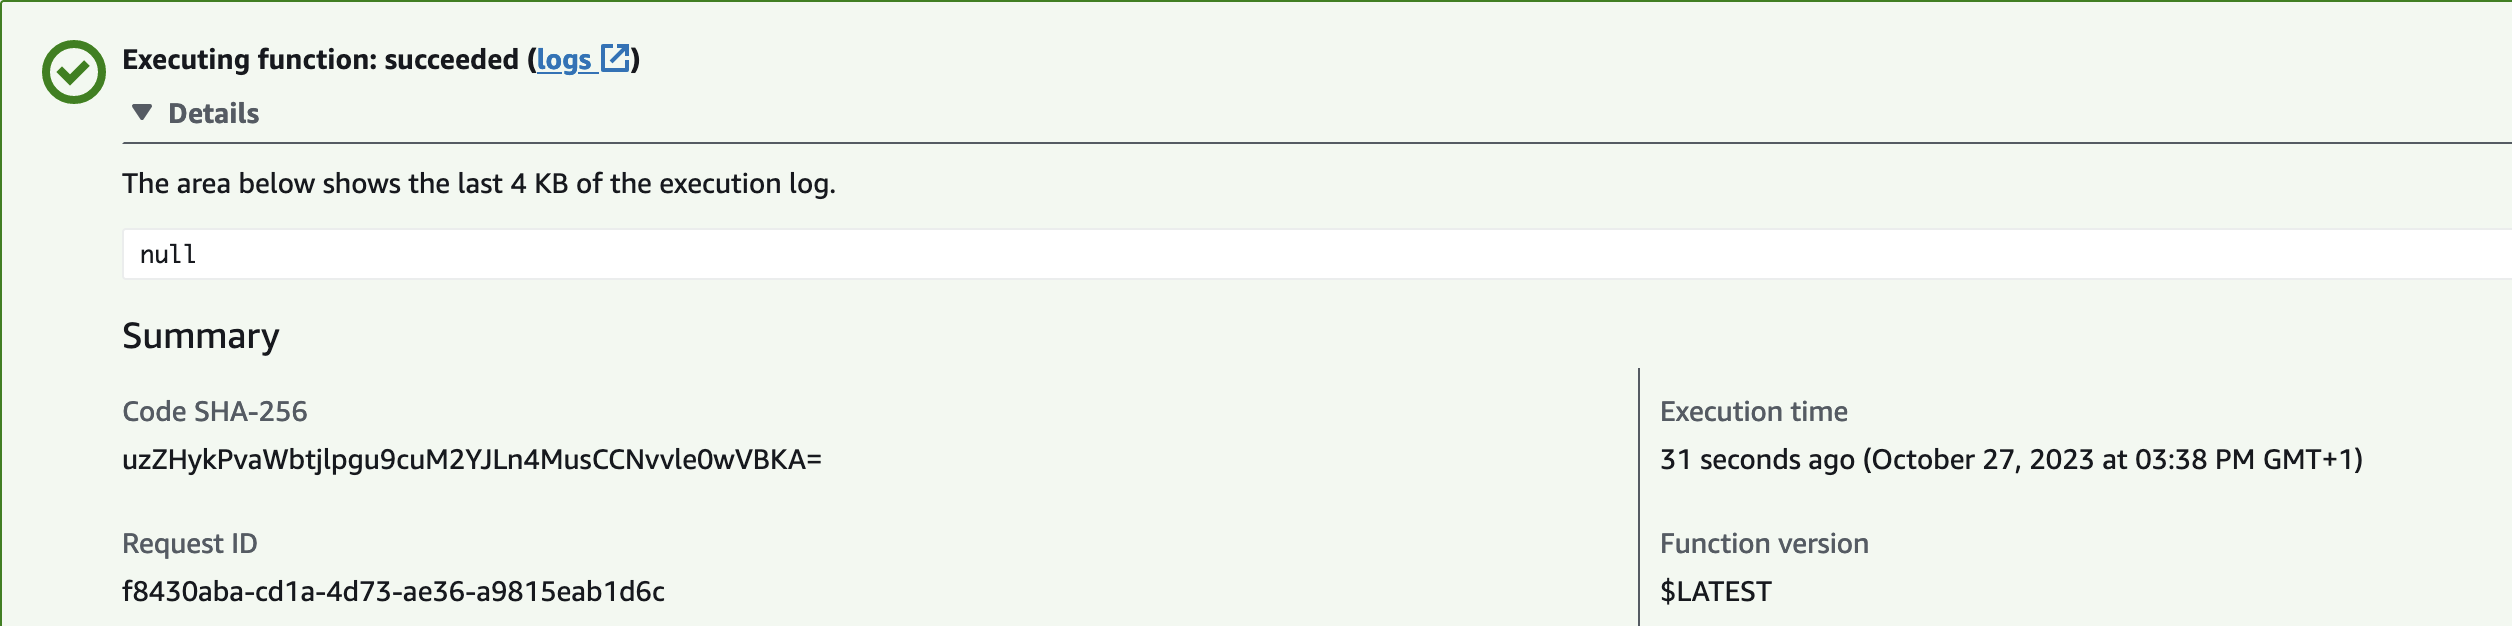
We will test whether our Lambda function is working. We will upload files into our S3 bucket and we will check whether those files are organized into the folder based on the day we upload the files into the S3 bucket.
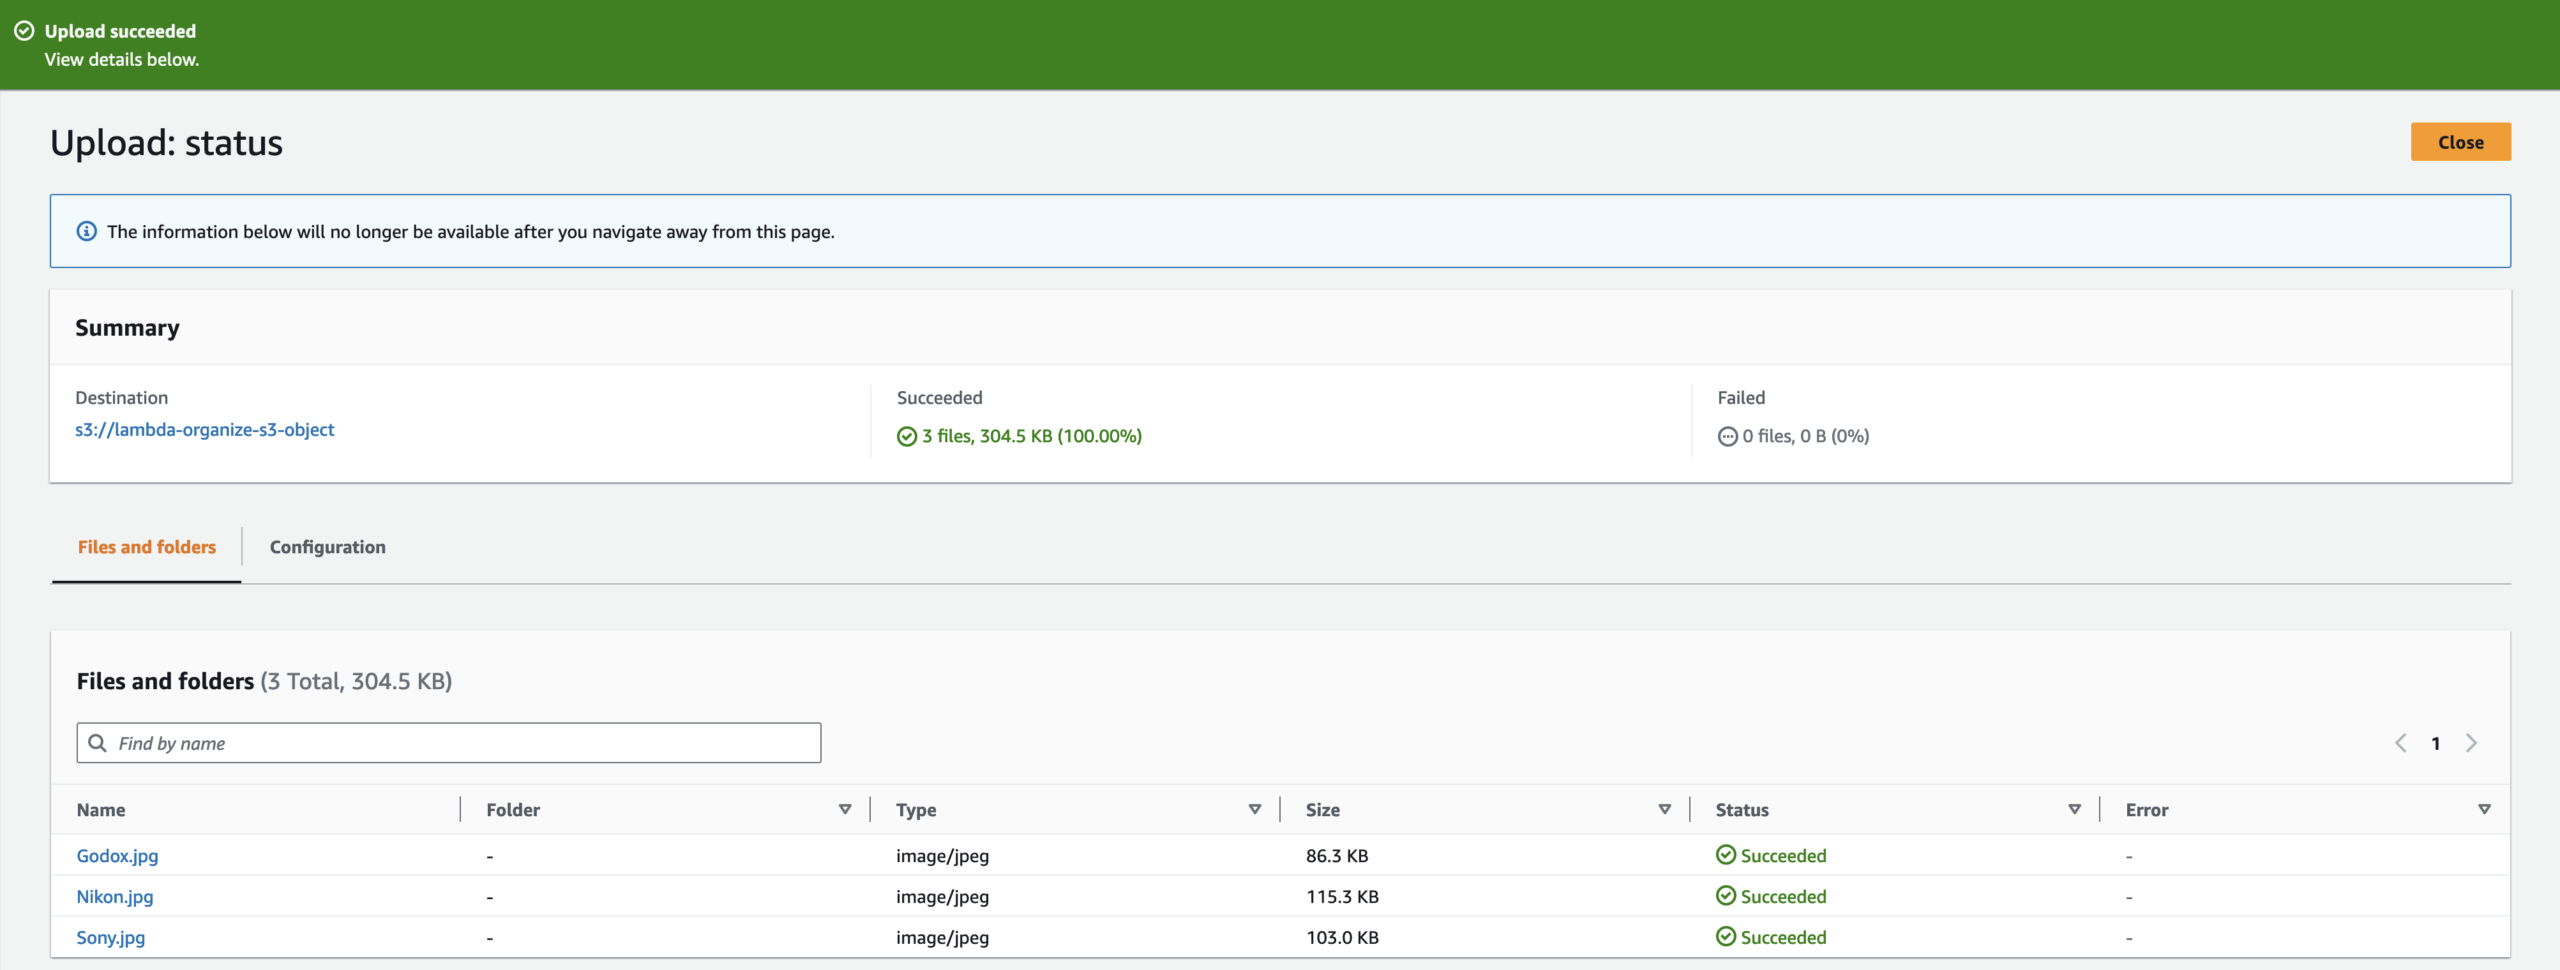
The files are not in the S3 bucket because when we uploaded the files into the S3 bucket, that triggered the Lambda function which ran our code to organize the files into the folder based on the day we put the file in the S3 bucket. (In my project, you will see two folders because I finished it on the second day. However, if you plan to do it in one day, you should only see one folder.)
Clean Up
We’ve just created a solution for this company that will move all the files uploaded into the S3 bucket into a folder based on the day the files were uploaded into the S3 bucket. If you want to clean up the resources we’ve created in this project, you need to delete the following:
Lambda function

S3 buckets
Before deleting an AWS bucket, make sure that all objects inside the bucket have been deleted.
